"This is a journey of my life since I was all of 12 yrs when I started my hand in cooking to now with displays of my learning and creations of recipes from around the world. My inspiration and role model has always been my Mum who has always created dishes from around the world and excellently well. I do not believe I would ever match to her culinary skills. I remember the times she could cook and bake almost 4-5 dishes in one go without ever letting one go under cooked or burnt! I was born and raised in Dubai, UAE and recently moved to India for family reasons. Kitchenette just means that over the decades, my kitchen has changed from that of my mum's to my uncle and aunt's, to my home in UAE and now in India. Pala't'te, describes both global cuisines ('Palatte'-diverse flavours) and pleasing diverse 'Palates'."
Showing posts with label Christmas. Show all posts

Monday, 20 March 2017

Spiced Homemade Wine

Cheeeeeers to a New Year 2017! Ahem, yes I know we are well into the New Year but mine seems to have just begun!


After a cleansing process that the Good Lord has performed in my life recently, I am now in a happy state of mind after the many, many months of downs and outs. On that note, dear readers,

Happy International Happiness Day!


Friday, 25 December 2015

Roast Chicken with Spinach stuffing - A Boxing Day Special

Yes I know the last thing you want to hear right now is Roast or anything remotely close to it. So then why am I posting this recipe now. Well it is because I know many of you either had a festive Christmas meal(s) and may not even know what Boxing Day is all about. However there are many others globally who enjoy a public holiday on December 26th, i.e. the day after Christmas and traditionally celebrate Boxing Day. 


So what is Boxing Day - the simple explanation as per modern day practices is a day when all the leftovers of Christmas Day is shared. It may also be a day when those friends or relatives you haven't celebrated and shared the meals of Christmas Day comes over for a meal or two or more. 


After a festive meal or even a Christmas party, it may be that you do not have any leftovers to share, so hence the Roast recipe I am about to share with you. This roast has a healthy element in terms of its stuffing and is no problem at all to cook up as it has a simple marinade and does not require much of visits to stores (which I am sure your feet probably would not allow you to do). 


No need for any close monitoring either. Just pop it into the oven and it is ready to hold center place on your Boxing Day table along with any leftovers or sides. 


Some interesting learning of the origin of Boxing Day can be learnt here.


The marinade is learnt from my darling Mummy and in fact she was with me in Chennai (visiting us in February 2015) when I cooked this last roast with her.

On with the recipe...

What you need:

  • 1500 gms of chicken (skin-on), cleaned well
  • 2 fairly large bunches of spinach, chopped roughly
  • 1 large onion, finely diced
  • Ginger-Garlic paste - 2 tbsp
  • 1 heaped tbsp of Chili powder
  • 1 heaped tbsp of Garam Masala
  • 1 tbsp salt
  • Water to combine the marinade
  • Olive oil

The Make:

Preparation Time: 10 minutes | Marination time: 30 minutes to 2 hours | 

1. Slit the chicken skin across the breast, legs and wings. Make a marinade of the ginger-garlic paste, Chili powder, Garam masala and salt. Rub generously all over the chicken and within the cavity as well. Set aside for 30 minutes up to 2 hours minimum.
2. Meanwhile in a large wok, drizzle some olive oil, saute some onions until lightly brown and then add the spinach leaves. Cook until the residual water disappears or up to 5 minutes. Set aside.
3. Preheat the oven to 180°C.
4. Next stuff the cavity of the chicken and all around the roast with spinach leaves and place on a roasting tray. Loosely cover the chicken with foil paper. Roast for 45 minutes to an hour.

Serve hot with your Christmas day leftovers and sides.

Sunday, 20 December 2015

Simple Chicken Roast

Yes, yes it just got simpler! I know that many of you hardworking mums and dads would still be fishing around for recipes to prep for Christmas lunch or dinner.


And there are some of you who are spending a quieter Christmas time owing to loss in the family or friends. You got to eat though right?


*This was before I learnt to bake breads ;) *Store bought* And also keeping it simple and just making a roast and a simple green salad. PS I still buy a lot of breads :D


So may be you don't feel in the festive mood this time and do the whole Christmas party /decorations shebang. This may help you make that simple roast for the family to sit down, reminisce over good times of old and remember your loved ones in prayer and good thoughts.


Not much more to say other than, this recipe is simple and straightforward and so I won't go on. Just diving right into this recipe.


What you need:

  • 1200 gms chicken (skin-on) and cleaned
  • Salt and Pepper to taste
  • EVOO (Extra Virgin olive oil)
  • Dried Parsley leaves


The Make:
Prep Time: 10 minutes | Roasting Time: 1 hour | Serves 4-5 adults

1. In a small mixing bowl, mix some EVOO, salt, pepper and parsley.
2. Marinate the chicken all over with the EVOO mix.
3. Place the chicken over a wire rack with a roasting tray below it to hold the juices and pop it into the oven at 180°C.
4. Roast for up to an hour. Occasionally baste the chicken with an oil brush from the juices dripping into the pan. You can baste the chicken at the 20 minute, 40 minute mark and then just before turning off the oven.

Rest the chicken before carving into it.

Bon Appetit!

Friday, 18 December 2015

Mediterranean style Roasted Chicken with Garlic basted Roasted veggies


For a new twist to your traditional Christmas home roast, why not try a Mediterranean one.


Living and working in the Middle East esp. the cosmopolitan Dubai, you get to meet a whole lot of people from all over the world.


I have a fair share of friends from all over the Middle East. Learning their cultural cuisines was one of my favourite learning. So I did get a lot of recipes and tips from them.


This one is for the adventurous YOU who just doesn't want a traditional Christmas roast but exploring each year and wow-ing your guests and loved ones each time.


What you need:

For the Marinade


  • 1 lemon
  • 1 cup of Tomato paste or puree 
  • 1/2 tbsp paprika
  • 1/2 tbsp coriander powder (freshly powdered from coriander seeds)
  • A mix of herbs such as Marjoram,Oregano,Sumac,Thyme and Rosemary
  • 1/2 tsp cumin powder (freshly powdered from cumin seeds)
  • 1 tbsp Salt

Other ingredients:

  • Whole spices such as Bayleaf, Cinnamon, cloves
  • 5-6 Garlic cloves - crushed
  • 4-5 medium sized potatoes (skin-on), cleaned well
  • 1200 gms chicken (skin-on)
  • Extra virgin olive oil (EVOO)
  • 2-3 tomatoes, chopped
  • Shallots/Onions, chopped


The Make:

Preparation time: 10 minutes | Cook Time: 15 minutes | Roasting Time: 1-1 hr and 20 minutes

1.Boil the potatoes with a few stabs in between (no need to cut them now) until half boiled. You can added carrots or other veggies too if you like.

2.Slit the chicken on all sides esp. legs taking care not to cut too much into the meat. On a non-stick roasting pan, add 2 tbsp EVOO, and brown the chicken on all sides, esp the legs as they take longer to cook.

3.Then wait for the chicken to cool down a bit and then add the whole spices in the roasting pan around the chicken. Also place the shallots around in the pan. Rub the marinade well on the chicken and in the cavity and into the slits made earlier.

4. Boil a lemon whole for 5-10 minutes. The larger lemons (not available here) need 10 minutes. Next stab in a couple of times around the lemon and stuff it into the cavity of the chook.

5. Toss in the boiled potatoes cut in quarters.

6. Roast chicken on wire rack (optionally) with the same roasting pan below at 150°C for an hour and then up to 20 minutes on 180°C breast side facing down until the skin is nicely crisp.

7. Meanwhile, to prep the roasted potatoes crush 5-6 cloves of garlic using a mortar and pestle (you can also use an electric grinder) add a little EVOO and further crush to a creamy garlic paste.


8. Add a dash of salt and marinade chopped tomatoes with the creamy paste. When the chook is ready, place the potatoes on a serving dish, pour the garlic paste with tomatoes and some of the juices from the roasting pan.

9. Add some lemon juice from the lemon from the chook's cavity and toss well.

Serve the roasted potatoes on the side of the chicken with some hummus and white rice if you need.


Bon Appetit! Hope you liked our Mediterranean style Christmas Chicken roast!

Try G'Gina's Kitchenette's Hummus recipe here

Thursday, 17 December 2015

Crispy Roast Duck with Sticky, Sweet n Spicy Glaze

As promised, I am back with another Roast for your big Christmas meal. With Christmas around the corner, schools too are gearing up towards their Track Events(Sports Meet), Christmas celebrations, Carolling, etc. And this just means Mama has to be on her toes.


My little girl had a successful track event yesterday where she bagged a prize 'medal' in the school track event. So hence the delay in posting this roast recipe. I am going to try and get you as many roast recipes before Christmas week hopefully if all goes well on the home front.


This recipe was created after reviewing several recipes. It took a while but the resultant Roast Duck was flavoursome and fabulous and was out of some sheer experimentation. Yes this time too I tried for a Jamie Oliver recipe. In fact I saw far too many including Jamie's many duck recipes and then settled to take some tips from Jamie and have a twist of my own based on my Chicken roast success to have a crispy, succulent duck roast. It helps to experiment in the kitchen before hand so you come up with some unexpected savoury/sweet sauces.


It pleasantly surprised me to see such a proud and pretty duck roast coming out of my oven.


Without taking up more time, let me give you the recipe..

You need:

For the duck:


  • 1.7 kgs duck, cleaned well-free of quills and dressed (skin-on)
  • Sea salt
  • Freshly ground black pepper
  • 2 tbsp of five-spice powder (or if you do not have this: mixture of star anise, cloves, cinnamon, pepper and fennel seeds)
  • 1 medium sized orange
  • 2-3 bay leaves
For the glaze:

  • 1 tbsp soya sauce
  • 1/8 cup of honey
  • 1/8 cup molasses or palm jaggery
  • 2 tbsp of orange juice
  • 1 tbsp of your choice of chili sauce (optional)


The Make:
Preparation Time:10 minutes |  Roasting Time: up to 4 hrs, 17 minutes | Serves:5-6 adults

1. Make sure your well-cleaned duck is patted dry. Then with a kitchen blade or the tip of your sharp kitchen knife, make criss-crosses on the skin of the duck (try the diamond pattern), taking care not to delve into the meat of the duck.This will ensure that the fat escapes through the cuts created on the skin and the more the fat escapes, the more crispier the duck skin would turn.
2. Rub the salt, black pepper and five spice on the duck. Cut the orange in quarters and stuff it in the cavity of the duck along with the bay leaves. Truss the legs crossed with a kitchen twine or butcher's twine. Tuck the wings under the duck.
3. Set the oven to 150°C and set the duck on a wire rack with a roasting pan below to hold the glorious duck fat. Roast the duck for an hour. When 1 hour is done, take it out and poke the skin of the duck especially the legs which has more fat content, taking care not to hit the meat.
4. Flip the bird carefully on its breast facing downwards. Cook for another hour at 150°C.
5. Repeat step 3 and 4 once more on 150°C. At the fourth hour, prepare the glaze.
6. After the fourth hour, tip the fat off the roasting tray into a storing jar. You need to do this now to ensure that the glaze does not get into the fat.
7.Next turn breast side up, poke, flip and roast at 200°C for 10 minutes. This is to allow for some extra crisping up.
8. Brush with the glaze and roast at 200°C for another 5-7 minutes. Keep a close eye on it to avoid burning.
9. Rest for about 10 minutes, carve and serve hot.

Sticky, Sweet and Spicy Glaze:
1. In a wok, take all of the ingredients required for the glaze and mix well on simmer.
2. Once the glaze thickens over the flame, turn off and use the glaze to coat the duck with a oil brush.

Bon Appetit! I served the Duck with my Easy make Dinner bread rolls and Crunchy Rosemary and Honey Soda bread.

Note/Tip:
1. Any excess skin can be cut off and trimmed and used to render and reserve the duck fat. Try not to take off too much of the excess skin which can be used to keep the duck moist.
2. Flipping the bird on to the breast will ensure that the breast remains soft as the juices flow to the center.
3. In case the glaze turns cools down and becomes too thick to coat the duck, then slightly heat up on the stove and it will liquify right away.


Tuesday, 8 December 2015

Herbert's Traditional Overnight Bread Loaf #BreadBakers


I am still very much a novice where it comes to baking breads. Mum was always good at baking and she never failed where it came to rising dough of any sort.


This month's theme at our #BreadBakers family is hosted by the lovely Holly Baker of A Baker's House. I love the way you have Baker built into your name Holly! Thank you hosting the 'Overnight  Breakfast Bread' theme. I just loved working with this theme as it gave me some experimentation to work with and I have always mentioned in my blog that I work best with experimentation. My best creations have come from some of the wildest experiments I conducted at various Kitchenettes.


This time I decided to work with an experienced baker's tips. Thomas Herbert baked at a time when yeast used to be pretty expensive (can you believe that?). So during those time of economic necessity, people had to come up with innovative ways to make their bread rise. Herbert used 1/10th of the quantity of yeast that was used in a modern day commercial institution. And hence the concept of overnight bread rose. Overnight breads makes for a mean toast which my little one and I had with melted cheese. The lush flavour comes from the long, slow, overnight fermenting process. The best part of the overnight bread is because only a tiny bit of yeast is used in the process, it actually last a longer time than most bread loaves and it is easy to digest by almost all people owing to the tiny amount of yeast. So yes it should also be called a 'Win-Win Bread Loaf'.


I admit that I had to try this bread a couple of times before it turned out right. I had to borrow a bread loaf pan from my neighbour Joshia for the second try. Yes I have lovely neighbours now and they are very good bakers as well. Ah my luck! :) So now I have the option of having them taste my creations and get candid and clear feedback as to how to improve on my next batch.

During the Christmas and New Year months, you may want to couple your roasts with a loaf of this traditional bread loaf. 


What you need:

  • 560 gms white flour (maida)
  • 10 gms salt
  • 10 gms sugar
  • 2 gms dried yeast
  • 4 gms butter
  • 100 ml full cream/full fat milk
  • 200 ml cold water


The Bake:
Preparation time: 15 minutes | Rising time: 2 hours + 8 hours + 1-3 hours | Bake Time: 55 minutes

1.  In a wide, large bowl, mix all the ingredients together for 15 minutes by hand or until you have a smooth and stiff dough. (Tip#1) Cover and allow to rest in a cool place for 2 hours.
2. Mould to fit in a large tin. Cover and leave it overnight to rise in the fridge.
3. After the 8 hours, in the morning, the loaf would have slightly risen. Remove it from the fridge and leave it to continue rising in a warm, dark place. This could take anywhere between 1-3 hours.
4. Preheat the oven to 240°C or to the highest temperature up to 240°C. Lightly dust the risen dough with flour and given it five slashes (you can add more or less slashes but I thought Herbert's five slashes were in sync with the size of my loaf and also is my fave number :D )  with the tip of a sharp knife or kitchen blade.
5. Steam the oven (Tip#2) and bake the loaf  for up to 10 minutes on the same temperature. Lower the heat to 180°C for about 35 minutes or until baked to a beautiful golden colour and it rings hollow when tapped on the bottom.
6. Remove the bread from the oven and allow to cool on a wire rack.

Your fabulous overnight bread is ready to be toasted and used with your favourite spreads. In my case, my little girl and I had some fine melted cheese sandwiches..ah bliss!

Tip:
1. If the dough comes together in the 15 minutes stop. Please do not over knead as you will come up with a dense bread. However if you do not knead enough (the 15 minutes maximum) to bring the dough to a smooth, stiff texture you could end up with a flat and not so fluffy bread.
2. How to steam your oven: there are several methods to do this but I chose the most natural method of them. Cover the baking bread with a large bowl or pan for the first 10-15 minutes of the bake to trap naturally released steam.


As I mentioned a little earlier, the #BreadBakers theme this month is Overnight Breakfast Breads. This includes yeasted breads that you prepare the night before then bake in the morning as well as quick breads that you prepare ahead of time then mix and bake in the morning. December is a busy time for celebrations and getting together with family and friends. It is always nice to think ahead and to make dishes ahead of time so that you-- the baker-- can enjoy the fruits (or breads!) of your labor with your loved ones. Here is what the group is sharing today, enjoy!


BreadBakers #BreadBakers is a group of bread loving bakers who get together once a month to bake bread with a common ingredient or theme. Follow our Pinterest board right here. Links are also updated each month on this home page. We take turns hosting each month and choosing the theme/ingredient. If you are a food blogger and would like to join us, just send Stacy an email with your blog URL to foodlustpeoplelove@gmail.com.

Thursday, 26 November 2015

Jamie Oliver's Best Eggnog in the World - The Ultimate Eggnog

Aha you must think that I am a die hard fan of Jamie Oliver. Well kinda. I dig his recipes for sure and especially his simple recipes to make awesome, delicious dishes which you can make in a matter of minutes and still look like you have slaved away in the kitchen.


So here goes the eggnog recipe from Jamie's Food team which is claimed and now I confirm to be the best eggnog in the world. I made two versions a virgin one for my little one and the full version. This I did last Christmas 2014. So for those of you who have been following G'Gina's Kitchenette's Facebook page or our Twitter page, the chapter must slowly be unfolding as to what I meant last Christmas by saying this :
"It gets tough to cook Christmas Eve Dinner, Christmas Breakfast and Lunch!! This year got special with Jamie Oliver taking over the kitchen! Thanks Jamie! You Rock! Merry Christmas all from G'Gina's Kitchenette!"

The author from Jamie's Food team who wrote this recipe, Meredith Steele did teach me something new about eggnog. She mentioned how the name 'eggnog' was acquired from a 14th century English drink called posset. Posset was a drink of curdled hot milk with ale and over sometime eggs were added to the concoction.


This preparation of this creamy, sweet drink starts with infusing cream with milk and cinnamon, nutmeg and vanilla beans. It is the warm infused milk which slowly streams into the beaten eggs and sugar. Then your rum or bourbon is what lifts its spirits. It is then refrigerated before the fluffy egg whites join the party of the eggnog for that face uplift. I however separated a portion of the eggnog from the main jug to serve to my princess later. I refrigerated hers separately and then added a portion of the fluffy egg whites to her serving.


Thankfully my parents rear poultry so my chicken eggs were fresh from their home farm.


This was my first try at making eggnog. Mummy used to serve a mean fruit punch/ cocktail punch. Never tasted her eggnog though.


You need:

  • 3 cups or 700 ml of whole milk
  • 1 cup or 240 ml of heavy or double cream (I used refrigerated Amul cream)
  • 3 cinnamon sticks
  • 1 vanilla bean pod, split and seeds removed
  • 1 tsp freshly grated nutmeg (set aside some additional for garnish - about a tsp)
  • 5 eggs, separated (I used our farm eggs)
  • 2/3 cup of granulated sugar
  • 3/4 cup of bourbon or Dark rum


The Make:
 Serves 8 | Preparation time: 10 minutes | Resting Time: overnight-3days

1. In a saucepan, combine milk, cream, cinnamon, vanilla bean, vanilla seeds and nutmeg. Bring it to a boil on medium heat.

2. Once it reaches a boil, remove from the heat and allow it to steep.
3. In a large bowl, whisk the egg yolks and sugar until combined and thick strands are formed when the whisk is lifted.
4. Next whisk in the milk and continue to mix until smooth and well combined.
5. Add the bourbon or rum and mix. Refrigerate overnight or up to 3 days.
6. Before serving, whisk the egg whites in a large bowl until soft peaks are formed. Then gently fold into the eggnog until combined.
7. Garnish with nutmeg and serve cold.

Happy Holidays all! Seasons Greetings from G'Gina's Kitchenette!

Wednesday, 25 November 2015

Crispy Fried Chicken


I know I said that I would be sharing recipes for Roasts and sides in the weeks to come. I did however forget to mention that the sides would not just be dips and salads/breads but also meaty (protein - veg/non-veg) starters/bites. After all you need to prepare a complete meal for the upcoming #Thanksgiving, #Christmas and #New Year celebrations. So the Crispy Fried Chicken did resonate out of Mummy's recipe of KFC (Kentucky Fried Chicken) - the recipe of which I will share another day (will not specify when ;) )


This is an all too easy recipe to create. I did mention in one of my recent posts of my little one's love for Chicken Drumsticks. Well this was to please my princess. I served this Chicken starter with the Coleslaw - the KFC way and some dips as well. Yes and this is one of those long overdue recipes that has been sitting on the back burner as well.


My little one raved about the crispiness of the chicken and to top it was all drumsticks. She loved it to the very last bite.


You need: 


  • 7-8 chicken drumsticks, cleaned
  • 3-4 cups of breadcrumbs
  • 2 large eggs, whisked
  • Salt to taste
  • Ginger and Garlic powder (optional)
  • 1 chicken stock cube (optional)
  • Oil - for frying battered chicken

Ammo required:

  • A large wok
  • A large flat plate with breadcrumbs
  • A perforated ladle
  • A perforated vessel lined with kitchen towel/tissues
  • A large bowl to whisk eggs and dip the chicken drumsticks


The Make
Preparation time: 5-10 minutes | Cook time: 20-30 minutes | Serves 4-6 adults

1.  The first step in the process of making the Crispy Fried Chicken is to lay out all the required vessels and ingredients. If using the ginger and garlic powder and the stock cube, make sure to powder the stock cube and add it along with the ginger and garlic powder to the breadcrumbs. Alternatively you can also add it with the egg but sometimes all of the egg does not get used.
2. In a large wok, heat the oil on medium-low heat. Meanwhile, roll the drumsticks in the whisked eggs draining off the excess back in the bowl and roll it evenly over the flat plate with the breadcrumbs already spread out.
3. Once the oil heats up, gently slide in the prepared drumsticks and line up without any overlapping or interaction between each drumsticks. After 2-3 minutes, using the perforated ladle, turn over the drumsticks and repeat after another 2-3 minutes. Ensure that the batter does not burn and if the oil gets too hot between batches, lower the heat and repeat. Each batch to follow would take lesser time to fry. The first batch may take up to 8-10 minutes depending on the size of your wok and weight of the drumsticks. Transfer the fried chicken to the perforated vessel to drain off the excess oil.
4. Once the batches of the chicken drumsticks are fried and drained off the oil, serve hot with your favourite sides. In my case, it was the coleslaw, hot chili sauce for me and hubby and tomato ketchup for the little princess. The tartar sauce was for the calamari -the recipe of which will follow soon enough.

Hope you and your little one(s) enjoy this make as well.

Jamie's Oozy Beans with Spinach

This recipe is long overdue and as I had mentioned my last blog post on Chicken Masala Roast with Soya Sauce, I will be sharing roasts as we get into the holiday season of Thanksgiving, Christmas and New Year to help you prepare your celebratory meal. This is a perfect side to your Roast. I had served this with Jamie Oliver's Perfect Pork Loin with Crackling. Of course Jamie's Oozy Beans were Borlotti Beans (aka Cranberry beans) served with Agretti. Since Agretti was unavailable, I substituted with Spinach and Parsley. Also since I had no idea of where to get Borlotti Beans from or if they were even available in the local market, I substituted it with black-eyed beans or black-eyed peas which in some cultures are served within a New Year meal as it is supposed to ward of evil eyes. As noticed above, I have also substituted a couple of ingredients owing to the fact that it was no available in the local market.


This has to be the most simple side dish you can prepare to go with your elaborate main course and it is incredibly healthy. 


You need:
  • 1 small potato, cut in half
  • 1 large tomato
  • Water as required
  • 3 cups of black-eyed peas/ black-eyed beans
  • Bouquet of garni (as Jamie calls it - thyme, bay and sage leaves tied together. I used dried sage instead)
  • Pinch of Soda Bicarbonate
  • 6 tbsp + 1 drizzle of EVOO (Extra Virgin Olive Oil)
  • Pinch of salt
  • 1 tsp white vinegar
  • 1 bunch of parsley, few basil leaves, chives, thyme leaves (as available), finely chopped
  • 1 bunch of spinach, cleaned and chopped


The Make
Preparation time: 10 minutes | Soaking Time: 4 hours min | Cooking Time: up to 1 hour | Serves 4-5 adults

1. If you were using dry Borlotti Beans then you could soak it overnight in  a large pot with the beans covering only 1/4 of the pot and the rest covered with water and a pinch of soda bicarb. Then discard the water. In my case, since I was using the smaller black eyed peas, I soaked mine for 4-5 hours only.
2. In a large pot add the beans, herb bouquet, potato and tomato in full. Fill the pot up with water (twice as much as the beans).
3. Bring the beans to a gentle simmer for 50-60 minutes. When it is about to boil, turn down the flame. Resist the urge to cook these beans in a pressure cooker as the turn out would be different and so would the taste.
4. Next take out the potatoes, the herb bouquet, squish some of the tomato pulp with the back of a ladle into the pot and take the tomato out.
5. Next pour out 80% of the residual liquid from the pot into a bowl. Mash up the cooked potato halves and put some of it back to the pot to add a creamy texture.
6. Add the olive oil in the pot with the salt and vinegar and toss it over in the pot taking care not to mash the beans. Add one more drizzle of EVOO on top.
7. Add the chopped herbs and toss once more.
8. Cook the chopped spinach in salted, boiling water in another pot for 2 minutes and then drain it out and toss it in the roasting pan of your cooked choice of roast as if cleaning the roasting pan with it.
9. Add a bit of the reserved residual liquid from the pot which was set aside earlier to the beans pot and toss. Taste and add more EVOO and vinegar if required.
10. Serve the beans on a flat serving tray and top with the spinach tossed in the roasting juices. Then pour any residual juice from the roasting pan on top. Top with a slice of the pork loin or your roast and pour some of the roast's prepared gravy on top.

Jamie added a very important tip for those who hate beans for the obvious breaking wind ;) add Summer Savoury herbs. I checked it is available as an online buy on Ebay here. You can also add a few cloves of chopped garlic when cooking the beans.

Serve these Oozy beans with your favourite roast or Jamie's Perfect Pork Loin with Crackling.


Monday, 23 November 2015

Chicken Masala Roast with Soya sauce #Thanksgiving #Christmas #New Year

These days I have to admit are particularly hard for me to blog. Not because I am extremely busy but instead not too fine and dandy. I miss my Mum a lot and Christmas is a time to spend with family. These last 3 years Mum did not have Christmas celebrated at our ancestral home as 2012 we had lost my dad's youngest bro and 2013 Mum's youngest bro passed away. 2014 we lost our grandma (Dad's mom) and this year Mum was taken by Our Lord. So it is particularly hard this year as not only did I lose Mum but we didn't spend Christmas together for 4 years now.


Growing up Mum always designed our Christmas celebrations perfectly. I remember our childhood Christmases and there is not one thing I would change about it. Mum's roasts were raved about all year through be it her Turkey roasts over Christmas or all year through with our healthy Chicken roasts. Bliss! I am sure all our relatives who have attended our Christmas parties or any party thrown by Mum would vouch for her roasts and celebratory meals.


I have played a lot with the different roasts made over the years. So since we are not celebrating Christmas or the New Year, I decided that I would help you my dear readers with some of my best roasts made over the last year(s) (the recipes of which I have not posted yet) to help you with the upcoming Thanksgiving meal preparation (November 26, 2015), Christmas 2015 and New Year 2016. So my not celebrating does have it advantages, I am available at your disposal for any and all queries regarding your celebratory meal. And when you do try these out, do say a little prayer for my dear Mum and our family or send a positive thought in our direction. We really need it.


I need to specially thank three people in life, my dear friend Shireen (Shirs) who helped me get back on track with writing on my blog (Thanks Shirs my motivator) , my buddy Suzanne (Sue) who needed some help with her upcoming Thanksgiving meal prep (Thanks Sue I got a wake up call through your request) and my darling hubby (always thankful to you for your motivation and pep talks) who gave me a jolted shake this morning to get out of the gloomy valleys and move up hill. I also thank my many readers who were/are looking out for simple roast recipes. I hope the upcoming recipes along with the previous ones on Turkey Roast Delight (which can be adopted with the humble chook as well minus the cook time) ,  Lemon and Herb Roast Chicken , Jamie Oliver's Perfect Pork Loin with crackling , etc. helps you prepare your perfect albeit simple Thanksgiving or Christmas or New Year meal. I am available on gginazkitchenette@gmail.com for any of your queries regarding these meal preparations or any others. Also my dear vegetarian and vegan friends/family/readers, I am  available here to tell you how to cook your perfect vegetarian celebratory meal.

Now on with the recipe:

What you need:

  • 1200 gms of  perfectly cleaned chook or chicken with skin on
  • Salt to taste
  • 2 tbsp heaps of Garam Masala
  • 2 tbsp heaps Chili Powder
  • 1 tbsp pepper powder
  • 1/2 tsp of turmeric powder
  • 2-3 tbsp of ginger-garlic paste
  • 3-4 cloves of garlic
  • 1" pc of ginger
  • 1 tbsp soya sauce
  • A drizzle of oil
  • Water as required


The Make:
Preparation Time: 10 minutes | Roast Time: 1 hour | Serves 6-8 adults | Marinade and resting time: min 1 hour 

1. In a large wok, heat some oil and toss in the ginger and saute for half a minute, then add the garlic for about 20 seconds and saute on low heat.
2. Then add all of the ingredients except the chook and saute well for about a minute.
3. Add a drizzle of water as required to form a thick marinade paste. Keep adding water as required taking care to retain the thick paste texture and not be to watery.
4. Saute for another minute until the masala leaves the sides of the pan or is cooked.
5. Set aside to cool for a few minutes and grind the paste to a fine consistency.
6. Next marinate your chook well all over and in the cavity as well. Let it stand for about half hour at least and up to 4 hours (in the refrigerator if required).
7. Preheat the oven to 200°C.  Next prepare the roasting pan either well oiled or with foil paper and grease lightly. Place the chook carefully on the roasting pan. I always advise my readers to add their favourite veggies either inside the cavity of the chicken (depending on their stuffing type it would take more than an hour to cook the chook) or at the sides of the chook (in which case it would take up to the hour).
8. Slide the roasting pan into the oven on 180°C. Lightly cover (do not tuck the foil at the sides) the chook's breast with a foil paper to keep the breast tender and moist.
9. Roast for about an hour checking at the 30 minutes and 45 minute time to see if tenderised and cooked. Uncover the foil at the 45 minute mark and allow the chook to roast for the remaining 15 minutes without the foil. If required continue for another 10-15 minutes until the breast in nice and springy and the limbs seems soft enough to pull off with your fingers (do not actually pull the limbs off at this stage :) )

If using an oven without a top flame oven, please turn the chook over at the 30 minute mark. This requires some amount of skill to avoid burning your hands/fingers. However a good pair of tongs and a large ladle always helps. It would also help to slide out the roasting tray at the 30 minute mark in this case before turning over the chook.

Serve hot with with your favourite sides, salads, choice of breads. Flat breads would go well with this make of roast.


Wednesday, 7 October 2015

Jamie Oliver's Perfect Pork Loin with Crackling #FoodieExtravaganza

Ah this was a long wait. I made this for Christmas 2014 and its taken 10 months to write this post. I remembered the cook took a fairly long time too as I started late in the morning after church and a hearty breakfast after our fully vegetarian pre-Christmas lent of 24 days. Also I had a couple of eggnog breaks as well in between ;). Still remember how mum was kinda' scolding me over the phone for having started the cook late. Izzy and Anup were happy campers though as they had a ball of a time and over this meal as well. Well it sure was worth the wait! Thanks Jamie for making our Christmas 2014 a special one. He was practically there for the cook as I had to follow his online video to make this one. So yes this recipe is all him!


Mum has a large part to play in my courage to make dishes so hearty and large as these. Don't get me wrong it is not a difficult dish at all to plate up. Just that I wouldn't have the nerve had I not seen her make such large and wonderful festive meals. Love you Mum! You will always be at my side while I cook/bake.


I decided to post this recipe to honour Foodie Extravaganza{Party}'s October event 'Pork'. This is the first event I have joined of Foodie Extravaganza. The first 'Wednesday' of every month, Foodie Extravaganza {Party} hosts a theme based cook-off where food bloggers come together to celebrate the food event of the month from the American National Food Holidays. October's Foodie Extravaganza Pork Party was hosted by the lovely Lauren Mitchell of the blog 'From Gate to Plate'. 


Jamie is right, this is the most perfect pork recipe and is full of flavour as he promised! I did do a twist on his recipe of 'Oozy Beans and Agretti' side that accompanied this pork. That recipe I will share soon enough (hopefully not 10 months from now ;) )!


I have altered the recipe quantities based on the weight of the pork loin that I got from my butcher. Yes and I did get the fat separated from the meat of the loin at the butcher's place. If you do not have that luxury, then do follow Jamie's video here where he displays quite simply how to do the slice off.


You need:
  • 2 kgs pork loin, fat separated
  • 2-3 sprigs each of rosemary and thyme, chopped
  • Salt and Pepper to taste
  • Drizzle of EVOO (Extra virgin olive oil)
  • Half a bottle of balsamic vinegar (about 250 ml)
  • 10-12 cloves of garlic with skin on, smashed


The Make
Serves 12-15 people | Roasting Time: 60-70 minutes | Preparation and Resting Time: 15-20 minutes

Source: Jamie Oliver

1. First score the white side of the fat strip of the loin meat. I did a criss-cross scoring.
2. Rub the skin and meat with the chopped rosemary and thyme leaves along with salt and pepper all around.
3. Use a little EVOO to ensure that the leaves stick to the meat and fat all around.
4. Score the crackling skin with a sharp cooking blade or if you have a sharp pointy kitchen knife you could use the same. Use the tip to form the scores.
5. Put the skin fat side down first on a medium heated non-stick pan and hold for a minute until lightly browned.
6. Using tongs, take out the skin out carefully, and next place the skin side down of the pork meat and lightly brown for a minute . Then turn it over and caramelise the other side as well for about 2 minutes on medium-low heat.
7. Drizzle half a bottle of balsamic vinegar over the caramelising pork meat. Turn it over to coat the meat and then transfer it to a oven-friendly tray and pour all the balsamic vinegar over the top of the pork.
8. Place the garlic cloves into the tray all around.
9. Move the tray to an oven of 180°C . If you have a dual heating oven (top and bottom), you can place the skin on a grill sliding tray on top of the pork tray so all the juices would drip on top of the pork meat keeping it moist all through the cook. If not, you can do what I did and grill the skin separately in another compartment with a spill tray to hold the juices and intermittently using a ladle pour over the cooking pork in the pork tray. This would help create an amazing, simple gravy.
10. Roast over 60-70 minutes, intermittently turning the meat and the skin.
11. Take off the heat Rest the pork in the pork tray with all the juices for 10 minutes. Then take out the pork with a tong or a large fork and place on your serving tray.
12. Pour out the juices from the tray into a jug. You can then see the fat separated atop the jug. You can then take a ladle and scoop up the fat (even if a little gravy comes with it, that's ok) into a storing jar and refrigerate which can be used as a flavoursome stock later on.
13. Sieve out the juices from the jug, making sure to squeeze the garlic cloves to ensure its flavour comes through. This forms your gravy.
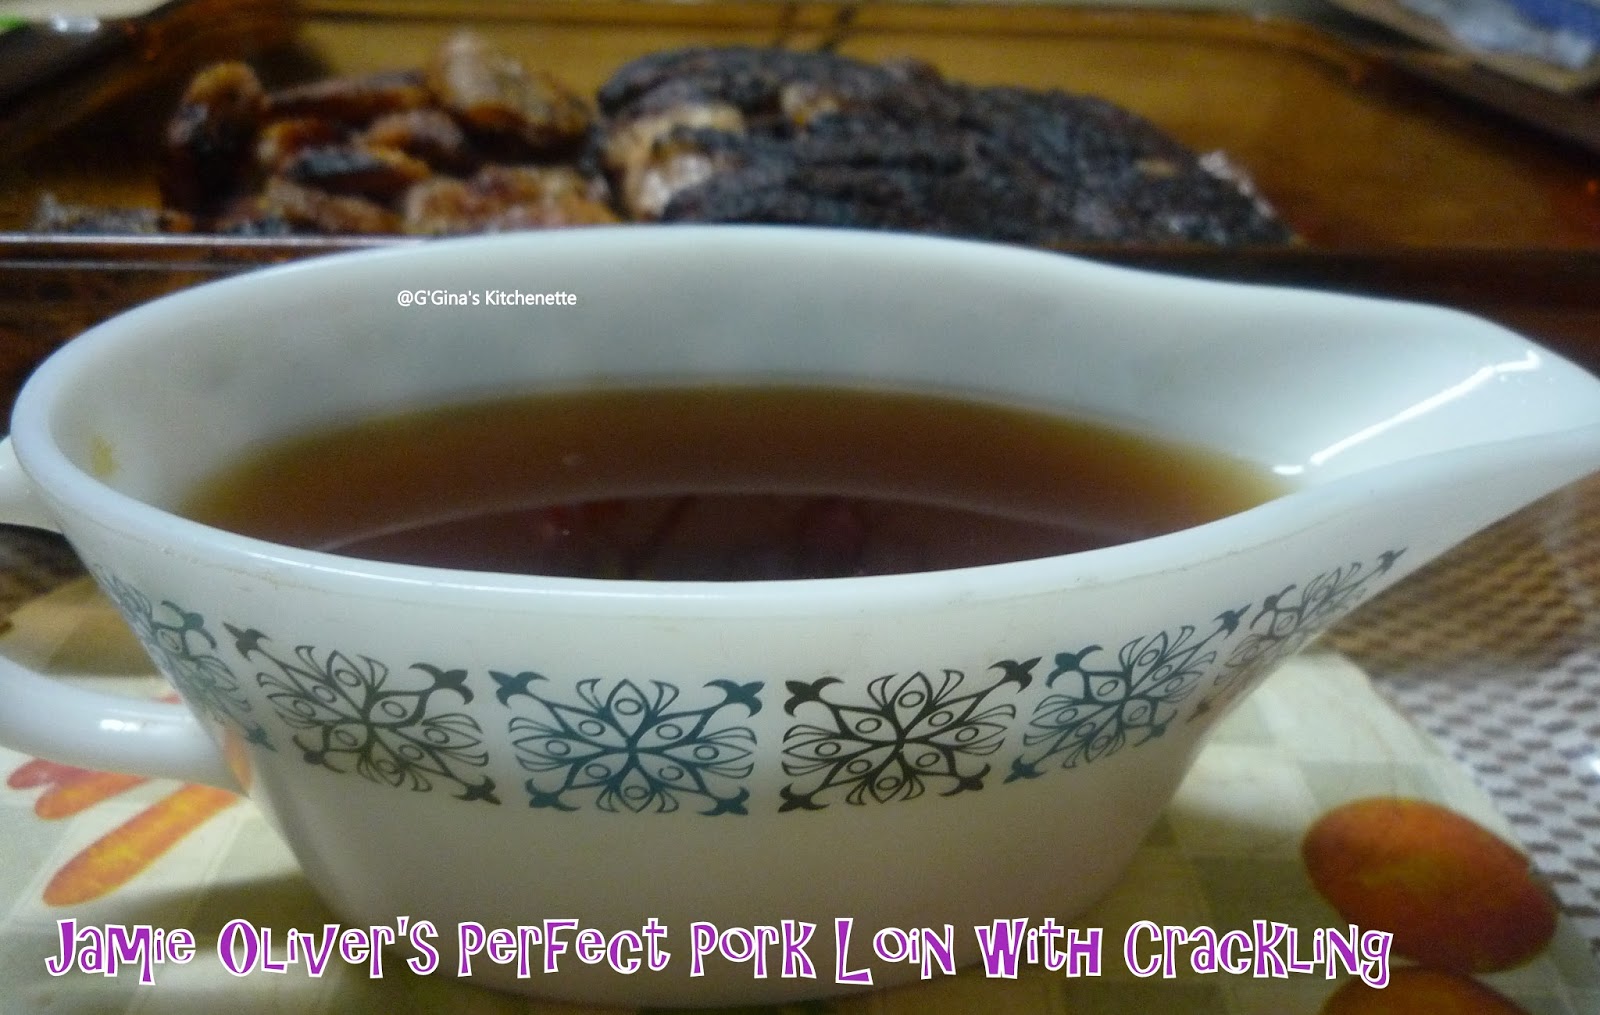
14. Serve your pork meat as a whole  or sliced with cracking strips at the side (the earlier scores will help you cut it through) and with some of Jamie's Oozy beans with Agretti  or my take of Jamie's recipe of beans (recipe to follow later). Pour over some of that amazing gravy.

And as Jamie said you are sure to hear of this make for years to come!

Bon Appetit!

Some delicious recipes from our fabulous Foodie Extravaganza members: