"This is a journey of my life since I was all of 12 yrs when I started my hand in cooking to now with displays of my learning and creations of recipes from around the world. My inspiration and role model has always been my Mum who has always created dishes from around the world and excellently well. I do not believe I would ever match to her culinary skills. I remember the times she could cook and bake almost 4-5 dishes in one go without ever letting one go under cooked or burnt! I was born and raised in Dubai, UAE and recently moved to India for family reasons. Kitchenette just means that over the decades, my kitchen has changed from that of my mum's to my uncle and aunt's, to my home in UAE and now in India. Pala't'te, describes both global cuisines ('Palatte'-diverse flavours) and pleasing diverse 'Palates'."
Showing posts with label Garlic. Show all posts

Wednesday, 23 August 2017

Celebrating Life.... Creamy Vegetable Soup

No excuses this time for being late on my recipe posts. I am thankful that I have a full life, filled with multitude of things to do. One such wonderful opportunity that came my way again was to cook at my little girl's school. They have started a new cooking lab and I had the opportunity to impart some cooking learning to a bunch of wonderful second graders.


The thing I love about my girl's school is how they inspire the kids to inquire and learn. Kids are curious by nature and to mould them into thinking out of the box is something I simply love. I love that I have a creative, excited little girl who is always willing to explore, learn and better herself.

The Lead Ma'am and I chose a soup to make this time owing to the end of monsoons. Also since there have been a couple of rains off and on causing the temperature to lower. A lot of kids had been falling ill too with cold, cough or flu. So a soup seemed apt.

This soup is a Thai inspired one. But since kids come from different households where either they are vegetarians or cannot eat onions, eggs, etc. or where the kid has peanut allergies or generally don't like things  like ginger, I avoided using them. Kids are also picky on things like bell peppers, etc. So although it is Thai inspired requiring the use of galangal, bell pepper, peanuts, etc I avoided using any of it.


Carrots are liked by most kids and I know many kids who prefer broccoli these days to cauliflower. So a small portion of brocolli, chopped finely was used. Each kid was asked to bring 1-2 ingredients. I loved the excitement of the kids as each ingredient went into the wok. In fact because of all the beta carotene (through carrots), the soup got a nice orangish colour and coupled with the coriander leaves, the kids who had just celebrated their Indian Independence day celebrations were inspired to tell me what the colour of the soup reminded them of, which was the Indian Flag.


Apart from maybe one or two kids who wanted chicken in their soup, the rest even though non-vegetarians liked the soup for its creaminess. I chose to use two homemade coconut milks, the 2nd milk to cook the vegetables in and the 1st milk to add at the end just warmed up and not boiled which added to its creaminess. How to freshly extract the coconut milk is explained here.

That's me by the way. Extra happy with the kids :)


If you want to make the full version, you can used crushed ginger or galangal, lemongrass, either sriracha chili or green chili, bell peppers finely diced and yellow onion. You can also take a non vegetarian option by adding boneless chicken diced small or boneless fish diced small.


You need:

  • 2 cups of grated carrots (about 4-6 carrots depending on size)
  • 1 cup of broccoli, florets separated into tiny florets
  • 4-6 cloves of garlic, grated using a hand grater
  • White pepper preferred (if not available you can use regular black pepper) powder - 1-2 tsp
  • Salt to taste
  • 1 medium coconut gratings (extract two milks)
  • 1 bunch of cilantro or coriander leaves, diced well
  • 1 cup of sweet corn
  • 2 tbsp coconut oil
  • 1 cup of drinking water (set aside some more if required)


The Make:
Preparation time: 10-15 minutes | Cook time: approx. 20 minutes | Makes about 4-6 medium sized bowls 

1. In a large wok, heat about 2 tbsp of coconut oil and add the carrot gratings. Saute for about 2-3 minutes on medium-low heat.
2. Next add the broccoli  and sweet corn. Saute for another 2-3 minutes. Add a sprinkle of salt and the pepper. Mix well. Add 1 cup of drinking water.
3. Add the second (thin) milk and half cover the wok. If you have a wok with a glass lid containing a steam hole, then cover fully and keep the heat at medium-low heat. Allow the vegetables to cook for 10 minutes. Add the water and if required add more than 1 cup. Do not overdo it else it will not turn out as creamy.
4. Grate the garlic over the uncovered wok and stir well. Add half of the chopped cilantro and simmer for 5 minutes.
5.  Lower the heat and then add the first coconut milk. Add the remaining coriander leaves and watch over the pot to allow to heat up. Do not boil. Do a salt check and add more if required.

It is better to add just a sprinkle of salt at first as adding to taste levels at first may not balance the dish as the coconut milk tends to sweeten the soup. So you may end up adding much more salt than is required for the soup. You could also cook the vegetables with just the water at first, blend it with a hand held or regular blender and then return it to the wok to cook in the coconut milk and finish off with the first thick coconut milk. Since there was no blender available, I had opted for the non-blending option.

Hope your kids and you enjoy this soup. Do let me know how it turns out. You can also mail me on gginazkitchenette@gmail or visit my Facebook page or Twitter page. We are also on Pinterest and Instagram now.

Friday, 15 April 2016

Mediterranean Roasted Red Snapper with Sauteed Veggies #FishFridayFoodies

I often go back to the land where I was born at, in my thoughts. It is hard to be away from Dubai, UAE as there are so many fond memories of the place. Growing up, we lived in a place very close to the first fish market. Seafood has always been at home as long as I can remember at least for lunch.


Mummy made the best roast /grilled fish too. Since Dad has not had spicy food in decades now owing to his health, Arabic/Mediterranean food seems to be the best choice! And nothing like having Fish grilled or roasted which brings out its natural flavours and does not need much oil owing to its natural oils. I miss Mum's cooking a lot these days. The image below is of a post card I had since college days. Well I used to miss her cooking back then too when we stayed away from home.


This fish was grilled when my Papa (Hubby's Dad) came to stay. He has been unwell since last year and has a lot of diet restrictions, so I thought it best to make this fish roasted. He thoroughly enjoyed this fish and make. What's best is it was devoid of any oil and used a lot of good, healthy ingredients. The Red Snapper in itself is quite a flavoursome fish. You can add other vegetables too but like I said he has many restrictions on the type of vegetables too. Suggest adding some whole shallots and tomatoes with slits on either side. Ironically though my recipe is titled as with Sauteed Veggies, it really does only give the look of being sauteed as that is how it cooked when roasted with the fish.


Red Snapper can be cooked in many ways. Rich in Selenium, Vitamin A, Omega-3, it can be baked, broiled, poached, grilled, sauteed or steamed.

I am a fan of one pot or pan cooking. So it was neat to have the veggies cooked atop the fish. Although I had to do a bit of flash cooking prior to placing the beans on the baking pan.

April's Fish Friday Foodies is hosted by the lovely Camilla M. Mann of Culinary Adventures with Camilla. Thank you Camilla for this awesome theme.

You need:

  • 1.5 kgs Red Snapper
  • 4-5 cloves of Garlic
  • 2 tbsp of crushed black pepper
  • 250 gms of French beans
  • Sprinkle of Salt
  • 1/2 medium sized lemon (Preferable, but I had to leave it out owing to Papa's diet restrictions) or 1 tbsp of vinegar
  • 1 large shallot, diced or cut finely


The Make:
Preparation time: 10 minutes | Marination time: 20 minutes to an hour | Cooking Time: 30 minutes | Serves 4 adults


1. Slit the sides of the Red Snapper and sprinkle some salt and rub down on both sides with the black pepper and vinegar (or lemon juice).
2. Crush the garlic using the back of a knife and press down. Place it in the cavity of the fish and around it as well. Allow it to stand for 20 minutes to an hour.
3. Line a baking pan with butter paper/foil or lightly grease the pan. Heat water and add a sprinkle of salt and bring to a boil. Add the cleaned French beans and shallots to the boiling water and  cook for 10 minutes. Turn off the flame and place the beans in an ice bath or chilled water.
4. Place the fish over the pan and add the beans and shallots on top. Loosely cover the fish with the edges of the butter paper or foil or you can even leave it open.
5. Heat the oven to 180°C and place the fish in the oven. Roast for at least 20 minutes to an hour.

Serve hot with kuboos / pita bread or any of your favourite flat bread and garlic paste or sauce.


Would you like to join Fish Friday Foodies?  We post and share new seafood/fish recipes on the third Friday of the month.  To join our group please email Wendy at wendyklik1517@gmail.com.


And now for some of the lovely, healthy Whole Fish Recipes by our awesome #FishFridayFoodies from around the world:


SELF-HOSTED WORDPRESS

Tuesday, 12 April 2016

Easy-Peasy Garlic-ky Mini Rolls #BreadBakers #NoBake

I am thankful to our Good Lord for showing His Mercy on us. My dearest Daddy had a mild chest pain last Thursday and my little girl and I rushed over to Dad and Mum's home which is a little away from the city where we stay.


I did not remember about this BreadBakers' event as a result as I was too stressed having just lost Mummy 11 months ago. My sisters who are abroad were petrified and asked me to leave at the soonest. Luckily Dad's initial cardiac results were normal. He has to go through a TMT on Tuesday and so I am scheduling this post ahead of time. We also have to drive back to our apartment with Daddy as he plans on staying with us for a bit so I may be settled only by evening hours to complete the updated post links which is ok owing to the time difference which will still  meet the event challenge time. Since it is my first time at scheduling a post, I am a tad nervous it may not happen on time. Nevertheless, family is the most important, Food always takes second place to Family, so Karen please excuse me in case this does not happen on time.


I would like to thank my good friends (you know who you are) for checking in on Daddy's health and my well-being during this trying time even if for a day or two. Also thank you for cheering me up with shared laughter and moments via calls, visits and messages. You are amazing! Just goes to show who true friends are and the love that you bestow on me is irreplaceable. God bless your families and you abundantly.


Since I did not bake ahead of time and if you have been following my posts since last May, you would know that Mum's oven is at our other home which does not make it easy for me to go over just to bake these rolls. As although we have a full fledged kitchen there all the ingredients and tools are at this home . So what started as my experiment to make Garlic Dough Balls turned out to be Garlic Mini Rolls. We had a rough Sunday night with my little girl feeling ill and so when I made this on Monday afternoon, I was pretty groggy. Sorry about the last day name change of my recipe title Karen.


My husband and I consume raw garlic as a part of our morning routine. This was started a few years ago, when a nutritionist asked my husband to have it as he seemed to have a borderline high cholesterol value back then. Then it became a habit and when we learnt of the many benefits of garlic, then it just became a part of our daily routine.


So the last time I tried this technique of baking is when I was at home after Mummy's passing away and had committed to making Whole Wheat Pita Bread. Trust me when I say that this is not only an easy technique of baking but gives almost the same results as the oven if done right. For those of you who have an oven, I will provide instructions as to how to bake it normally in the oven as well.

Garlic happens to be my favourite condiment so I could not resist participating in this event. I would like to thank the lovely Karen H Kerr of Karen's Kitchen Stories for choosing this theme.

You can serve these mini rolls with your favourite soup or simple as an appetizer as well. 

The Verdict: My 6 year old gobbled up most of these rolls as a snack! :D


You need:
  • 1 pod of a medium sized garlic, peeled and cleaned; half the pod sliced finely, other half minced or microplaned
  • 2 tbsp of butter / ghee (Clarified Buter) / Olive oil
  • Salt - 1 tsp + a sprinkle
  • 1 cup of whole wheat flour 
  • A pinch of sugar
  • Luke warm water  -  to knead
  • 1 tsp Yeast


The Make:
Makes 8 mini rolls | Preparation time: 10 minutes | Rising Time: 30 minutes | Cook Time: 10 minutes

1. Proof the yeast by taking the yeast with a pinch of sugar and mixing it with some lukewarm water in a small bowl. Let it stand for 5-10 minutes till it froths.
2. Next in a large vessel, add the yeast, flour and salt and knead well with the lukewarm water added in bit by bit to form a smooth dough ball. Allow to rest in a warm, dark place for at least 30 minutes. The dough would have doubled.
3. Using a mortar and pestle, crush the finely sliced garlic pieces with the butter, ghee or oil. If you do not have a mortar and pestle you can do this with your grinder/blender and if using the oil, slowly trickle the olive oil in during the grinding process. The resultant will be a creamy garlic butter. Add a sprinkle of the salt and mix well. Set aside half of the garlic butter. If you are using a blender, do not exceed a minute.
4. Next knead in half of the garlic butter in the dough and roll the dough within your palms to a longish log, as evenly as possible. Cut out pillows of dough as even as possible and roll the dough into balls or in my case pillow-shaped. Repeat till the entire dough is used and placed on the vessel with some distance between the dough pillows to allow it to expand.
5. The dough bits will expand further. Next brush the top of the dough rolls with the remaining half of the garlic butter and place the minced garlic on top and lightly press down.
6. After brushing, heat the remaining garlic butter in a pan and place the dough rolls on the pan. Cover with a lid with a steam outlet or slightly left open to allow steam to pass. Heat each side for 2 minutes.
7. For those using an oven, butter the baking pan with the remaining garlic butter after brushing the dough bits and line the dough rolls at a distance from each other. Bake for 10 minutes until lightly browned. Flip over in case you do not have top heat in your oven.

Serve hot aside your favourite soup or as it is with some butterspread/cheese spread.

April 2016's #BreadBakers' event : Our ingredient of the month is GARLIC, in celebration of National Garlic Day in the United States - 19 April - and one of our favorite food holidays. Black garlic, white garlic, elephant garlic, smoked garlic; powdered, roasted, raw, crushed or whole, include some garlic in your bread!

Now for some lovely Garlic breads from our #BreadBakers family of amazing bakers:


BreadBakers

 #BreadBakers is a group of bread loving bakers who get together once a month to bake bread with a common ingredient or theme. Follow our Pinterest board right here. Links are also updated each month on this home page.

We take turns hosting each month and choosing the theme/ingredient.

If you are a food blogger and would like to join us, just send Stacy an email with your blog URL to foodlustpeoplelove@gmail.com.

Wednesday, 3 February 2016

BLT Pie #FoodieExtravaganza

Foodie Extravaganza{Party}'s February 2016 event is 'Pie' or as the lovely Wendy Klik of 'A Day in the Life on the Farm' coined it as 'Bye Bye Miss American Pie'. Wendy that song has been playing in my head for a while since your event posting now :D. Thank you whole heaps Wendy for this theme. What came as a challenge in this dish was the Butter Crust that I chose to make and now I am confident of whipping up a fabulous butter crust anytime.


The first 'Wednesday' of every month, Foodie Extravaganza {Party} hosts a theme based cook-off where food bloggers come together to celebrate the food event of the month from the American National Food Holidays


I know Wendy said that we need not constrict ourselves to American Pie and the theme title came only as a result of the song. But I wanted to challenge myself to make an All-American Pie and BLT just popped up in my head. Of course the 'L' in BLT stands for Lettuce but to introduce lettuce into a pie filling would just make it mushy. I needed something firm but similar to lettuce. Enter a passing moment at the grocers where a lady asked the vendor whether a cut of leaves were lettuce. He informed her that it was Chinese Cabbage. 


Then I remembered why not Leek too. I also wanted the pie filling to reflect a breakfast meal of bacon, eggs and maybe some potatoes on the side. Egg of course came on top of the pie crust. I then introduced some cheese. In fact I decided it would be two kinds of cheese. 


I have to admit I struggled with my first try of the butter pie crust but then I remembered my Christmas Shortbread cookies and well yes you probably guessed right, the second try was a breeze. 


The only thing I would do next time is if I plan on Bacon or Pork or anything else as fatty as protein, then I would not go with a Butter Crust as it can be quite filling. Well that is why the serving number on this dish went up. Otherwise it would be 4-6 adults. 


The Butter Pie Crust would go well with fruit or nuts or both. 


Well let me not go on and on with the background story and get on to the recipe:


You need:

For the Pie crust:

  • 21/2 cups of flour (plus additional for dusting/sprinkling)
  • 16 tbsp of cold butter, chopped in cubes *(refer notes)
  • 1/2 tbsp salt
  • 6-7 tbsp of ice cold water

For the Pie filling:

  • 1 tbsp unsalted butter
  • 600 gms of bacon, diced
  • 2 medium sized potatoes, skinned and chopped into cubes
  • 3 large tomatoes, diced into cubes
  • 1 shallot, finely diced
  • 2-3 cloves of garlic, diced
  • 2 bulbs of leek, diced (include the edible leaves too)
  • 1 cup thick tomato puree
  • 1 egg, beaten or 2 tbsp milk
  • Mozzarella and Cheddar Cheese - 2 tbsp each
  • A good shake of pepper

The Make:

Please take a note of the notes below before attempting to make your Pie.

For the Pie crust:
1. In a large bowl, take the flour, salt and butter cubes*(refer notes) and mash with your finger tips into the flour till combined and no dry flour left aloof in the bowl.
2. Next add the water bit by bit into the flour until well-combined and the dough formed. The water is used as a binder. Wrap in cling film and transfer to the fridge to remain cool till you prepare the table top for the next steps.
3. Prepare the counter top or your silicone baking mat by sprinkling some flour on top. Make sure if you are using your counter top to keep it clean and free off any materials. Preheat the oven at 180°C.
4. Sprinkle some flour on the pie dish as well. You can use any kind of pie dish, I used to bottom shifting, 9.5" pie crust tray that belong to Mummy. Since there is sufficient butter in the pie crust you do not need to butter your pie dish.
5. Take out the pie dough, cut in half and place one half in the center of the prepared mat or on the counter top and with a rotating motion of the fleshy part of your palm, just gentle roll on top.  Return the other half of the pie dough to the fridge.
6. Next press the dough ball down and roll using a lightly floured rolling pin, making sure to turn it over each time you roll flat. Make sure to evenly roll out. Once it has reached about 8" you would need to flip it using the side of your mat.  Since I used a 9.5" pie dish, I needed to roll it to almost 12 inches for the bottom crust to ensure the sides of the pie dish are covered. 
7. If you find that your dough is tearing up slightly while flipping, stop and then mend and then flip over and roll till you reach your desired size. Then flour your rolling pin once more and sprinkle some flour on top the rolled pie dough. Using both hands, gently place one end of the rolled pie dough over the rolling pin and without pressing on the dough lift the dough off the mat and rest it well onto the pie dish, making sure to blanket the sides well and to go over the top edges of the pie dish. Any extra dough hanging off the pie dish can be cut off. You could use the extras to fix any holes of the top crust or can be baked on a tray with some sugar and cinnamon on top as an in-between baking treat ;) .
8.  Blind bake the prepared dough for 10 minutes. Meanwhile prepare the filling of the pie.

For the Pie Filling:
8. Heat a pot and add the butter followed by the potatoes and bacon. Saute for about a minute and add in the remaining ingredients except the puree and saute well for about 5 minutes. Add the puree and cover and cook for another 5-10 minutes. Uncover and allow to cook to room temperature or until warm.

9. Next place the filling inside the prepared pie dish, toss in some pieces of cheddar and roll out the top crust of the pie. Follow the same steps as for the bottom crust and place well over the filled pie dish and seal the edges well. With the tip of your kitchen blade draw a cross on the top of the pie crust. I added a few pieces of mozzarella there.

10. Brush the beaten egg or milk on top of the pie crust, grate some mozzarella on top if desired and place into the oven at 180°C. Make sure to take your oven spill tray and place it on the rack just above the pie rack (only in case you are using an oven with only bottom heat). Bake for 1 hour to 1 hour and 20 minutes. Check to see if you have achieved a golden crust or a dark brown one in case you are using milk.

Slice and serve hot with your favourite dips/sauces. Bon Appetit!


Notes:
1. Time to bake will depend on the type of oven you have. In case you have an oven with only lower heat and no upper, this may take up to 1 hour and 20 minutes.
2. For those of you who do not have an upper heat coil in your oven, then you need the spill tray or oven tray to cover your pie dish to get an even colour on your pie crust.
3. The butter used in the recipe has to be cold, which is why once you chop the same please transfer it to the oven to remain cold.

So that is my Bacon, Lettuce and Tomato Pie or BLT Pie. This was what was for dinner last night.


Take a look at the gorgeous pies our Foodie Extravaganza Party has brought to the table today:


Friday, 15 January 2016

Malaysian Red Snapper with Lime Leaves #FishFridayFoodies

I have always been a lover of seafood and just loved that Wendy Klik of A Day in the Life on the Farm started this new group of Fish Friday Foodies of Fish food lovers.


Red Snapper is a low-calorie, lean source of protein rich in selenium, Vitamin A, potassium and Omega-3 fatty acids. Besides this is quite a flavoursome fish as well.


I grew a small potted lime plant in my balcony at my last place of residence. After a few months of seeing some produce from the plant, sadly I had to let go of it as it became diseased. Hopefully if ever I move into a home with a better garden area, I will attempt at growing the lime tree :)


Now while I had a chance to use the produce off my young lime plant, I made this Red Snapper with Lime leaves. The fragrance throughout my home that day was amazingly uplifting and fabulous.

You need:


  • 1 kg Red Snapper, cleaned and cut into medium sized pieces
  • 2 large shallots, quartered
  • 1/2 tbsp Peppercorns
  • 3-4 Star Anise
  • 4-5  Lime Leaves + 2-3 for garnish
  • 3-4 garlic cloves, crushed and quartered
  • 2 tsp Freshly Ground Coriander
  • 1/2 tsp ground turmeric
  • 1 tsp fennel seeds
  • 1 cinnamon stick
  • 1 tbsp cooking oil
  • 2 tsp sugar
  • 2 red chilies quartered
  • 250ml of coconut milk
  • Zest of 1 small lime
  • Salt to taste
  • Drinking water, heated


The Make:
Preparation Time: 15 minutes | Cooking Time: 30-40 minutes | Serves 4-6 adults

1. Heat 1/2 tbsp oil in a clay pot or a wok and toss in the star anise, fennel seeds, red chilies, cinnamon sticks and set aside after a minute.
2. In the same pot, add the remaining oil and toss in the shallots and saute till translucent on medium heat.
3. Next add the garlic, coriander, turmeric, salt and peppercorns and saute for another minute or until the spices leave the sides of the pot and is cooked. 
4. Lower the heat and pour half the quantity of coconut milk, sugar and pour in a cup of heated water.
5. Add in the the sauteed spices earlier set aside and turn to medium heat again for a minute or until heated but not to a  rolling boil.
6. Lower the heat and then add the Red Snapper fish pieces, lime zest and lime leaves. Cover and cook for 30 minutes and then check if cooked well. If not increase by 5 minutes and check. Once cooked add the remaining coconut milk and allow to heat not boil else it will split.
7. Serve hot aside piping hot bowl of steamed rice of your choice. Garnish with lime leaves.

Bon Appetit!


Would you like to join Fish Friday Foodies?  We post and share new seafood/fish recipes on the third Friday of the month.  To join our group please email Wendy at wendyklik1517@gmail.com.

Visit our Facebook page and Pinterest page for more wonderful fish and seafood recipe ideas.


Word Press:

Wednesday, 7 October 2015

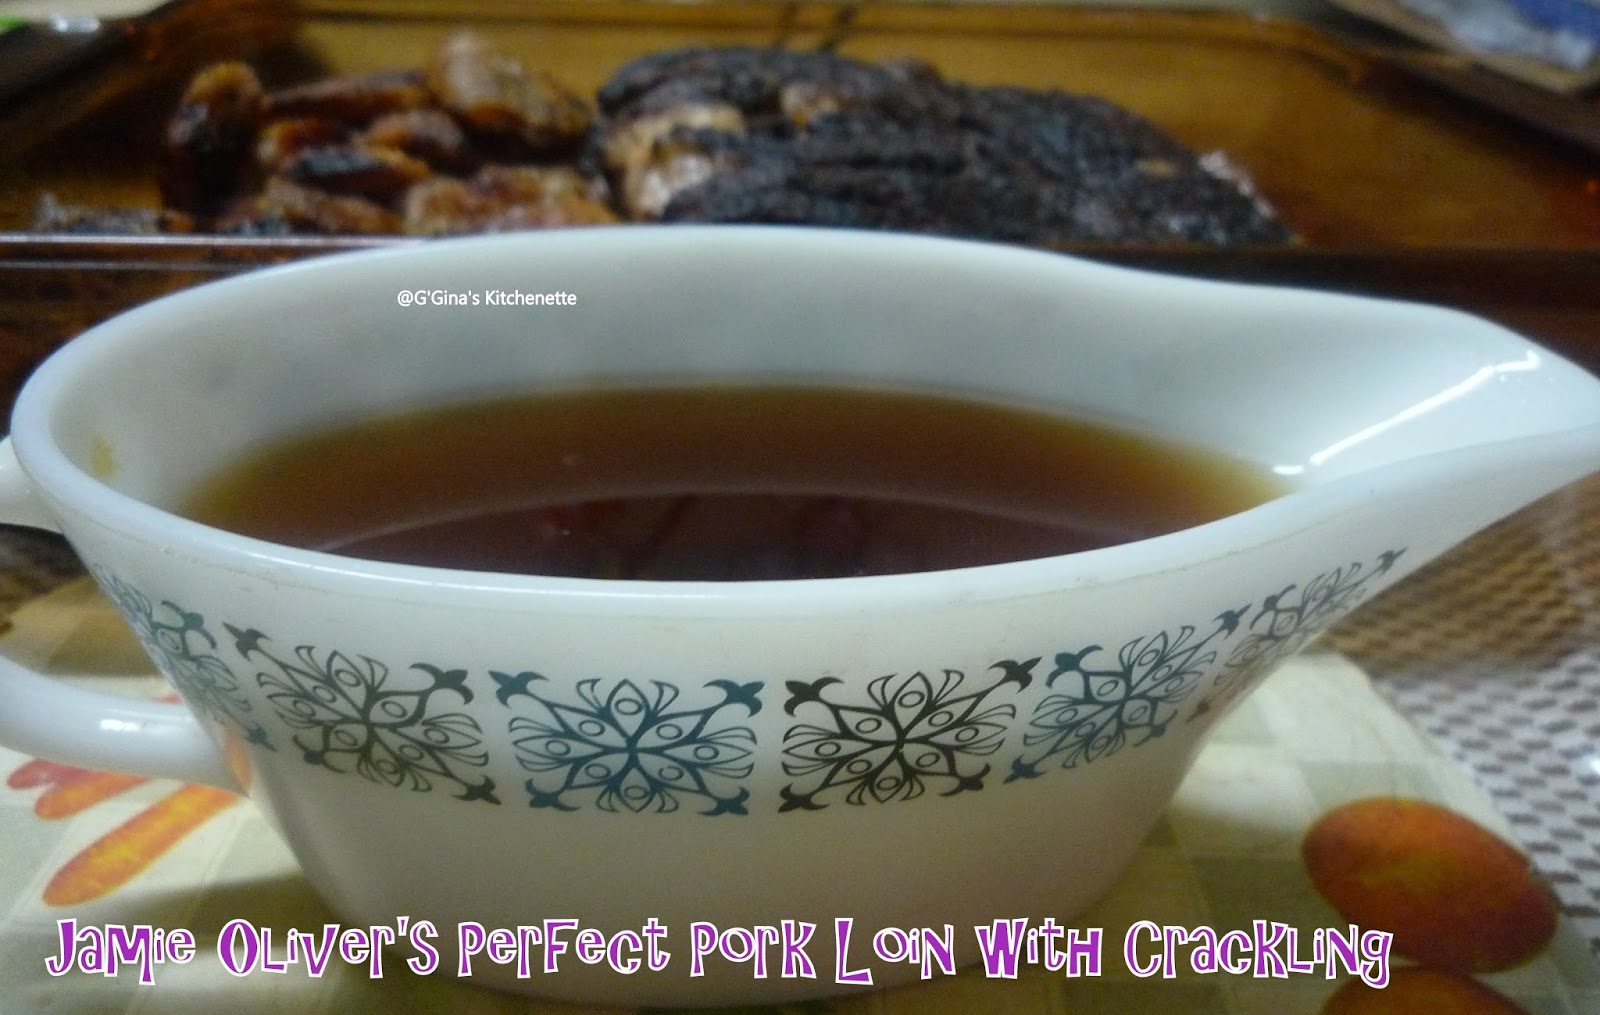
Jamie Oliver's Perfect Pork Loin with Crackling #FoodieExtravaganza

Ah this was a long wait. I made this for Christmas 2014 and its taken 10 months to write this post. I remembered the cook took a fairly long time too as I started late in the morning after church and a hearty breakfast after our fully vegetarian pre-Christmas lent of 24 days. Also I had a couple of eggnog breaks as well in between ;). Still remember how mum was kinda' scolding me over the phone for having started the cook late. Izzy and Anup were happy campers though as they had a ball of a time and over this meal as well. Well it sure was worth the wait! Thanks Jamie for making our Christmas 2014 a special one. He was practically there for the cook as I had to follow his online video to make this one. So yes this recipe is all him!


Mum has a large part to play in my courage to make dishes so hearty and large as these. Don't get me wrong it is not a difficult dish at all to plate up. Just that I wouldn't have the nerve had I not seen her make such large and wonderful festive meals. Love you Mum! You will always be at my side while I cook/bake.


I decided to post this recipe to honour Foodie Extravaganza{Party}'s October event 'Pork'. This is the first event I have joined of Foodie Extravaganza. The first 'Wednesday' of every month, Foodie Extravaganza {Party} hosts a theme based cook-off where food bloggers come together to celebrate the food event of the month from the American National Food Holidays. October's Foodie Extravaganza Pork Party was hosted by the lovely Lauren Mitchell of the blog 'From Gate to Plate'. 


Jamie is right, this is the most perfect pork recipe and is full of flavour as he promised! I did do a twist on his recipe of 'Oozy Beans and Agretti' side that accompanied this pork. That recipe I will share soon enough (hopefully not 10 months from now ;) )!


I have altered the recipe quantities based on the weight of the pork loin that I got from my butcher. Yes and I did get the fat separated from the meat of the loin at the butcher's place. If you do not have that luxury, then do follow Jamie's video here where he displays quite simply how to do the slice off.


You need:
  • 2 kgs pork loin, fat separated
  • 2-3 sprigs each of rosemary and thyme, chopped
  • Salt and Pepper to taste
  • Drizzle of EVOO (Extra virgin olive oil)
  • Half a bottle of balsamic vinegar (about 250 ml)
  • 10-12 cloves of garlic with skin on, smashed


The Make
Serves 12-15 people | Roasting Time: 60-70 minutes | Preparation and Resting Time: 15-20 minutes

Source: Jamie Oliver

1. First score the white side of the fat strip of the loin meat. I did a criss-cross scoring.
2. Rub the skin and meat with the chopped rosemary and thyme leaves along with salt and pepper all around.
3. Use a little EVOO to ensure that the leaves stick to the meat and fat all around.
4. Score the crackling skin with a sharp cooking blade or if you have a sharp pointy kitchen knife you could use the same. Use the tip to form the scores.
5. Put the skin fat side down first on a medium heated non-stick pan and hold for a minute until lightly browned.
6. Using tongs, take out the skin out carefully, and next place the skin side down of the pork meat and lightly brown for a minute . Then turn it over and caramelise the other side as well for about 2 minutes on medium-low heat.
7. Drizzle half a bottle of balsamic vinegar over the caramelising pork meat. Turn it over to coat the meat and then transfer it to a oven-friendly tray and pour all the balsamic vinegar over the top of the pork.
8. Place the garlic cloves into the tray all around.
9. Move the tray to an oven of 180°C . If you have a dual heating oven (top and bottom), you can place the skin on a grill sliding tray on top of the pork tray so all the juices would drip on top of the pork meat keeping it moist all through the cook. If not, you can do what I did and grill the skin separately in another compartment with a spill tray to hold the juices and intermittently using a ladle pour over the cooking pork in the pork tray. This would help create an amazing, simple gravy.
10. Roast over 60-70 minutes, intermittently turning the meat and the skin.
11. Take off the heat Rest the pork in the pork tray with all the juices for 10 minutes. Then take out the pork with a tong or a large fork and place on your serving tray.
12. Pour out the juices from the tray into a jug. You can then see the fat separated atop the jug. You can then take a ladle and scoop up the fat (even if a little gravy comes with it, that's ok) into a storing jar and refrigerate which can be used as a flavoursome stock later on.
13. Sieve out the juices from the jug, making sure to squeeze the garlic cloves to ensure its flavour comes through. This forms your gravy.
14. Serve your pork meat as a whole  or sliced with cracking strips at the side (the earlier scores will help you cut it through) and with some of Jamie's Oozy beans with Agretti  or my take of Jamie's recipe of beans (recipe to follow later). Pour over some of that amazing gravy.

And as Jamie said you are sure to hear of this make for years to come!

Bon Appetit!

Some delicious recipes from our fabulous Foodie Extravaganza members:

Sunday, 20 September 2015

Coconut-Carrot Rice

Ah such a comforting meal we just shared with Dad who is in town. This recipe came out from two recipes, one from my sis-in-law Bhavna and the other from the Thai Coconut rice that I had shared. I tweaked the latter a bit more with the toasted coconut gratings. It was amazing. Just goes to show that if you put a little bit of love in the cook, it comes out unexpectedly amazing. The rice was nice and fluffy too. I am sure that Mum would have loved it and plus the texture was exactly as she enjoys it -not mushy at all.


You need:

  • 1 cup of fresh coconut gratings or 1 cup of coconut cream
  • Salt to taste
  • 2 cups of basmati rice / long grained rice, cleaned and set aside in bowl with water to soak
  • 2 cups of boiling hot water
  • 3-4 large carrots, grated
  • 1 tbsp of butter (optional)
  • 2 drizzles of oil


The Make:
Preparation time: 10 minutes | Cooking Time: 15-20 minutes | Serves 3 adults

1. Grind the coconut to take the first milk and second milk (Refer Coconut Milk recipe here). Set aside the gratings from milk extracted coconut.
2. In a large wok, drizzle some oil and saute the residual coconut gratings until lightly browned. Set aside.
3. In the same wok, add a little oil and fry the carrot gratings on medium-low heat. Sprinkle some salt to taste. Saute for 5-10 minutes.
4. Add a tbsp of butter and then lower heat. Add in the second extraction of the coconut milk and the boiling hot water to the wok.
5. Once the water reaches boil point, add the cleaned rice from the soaking bowl, a fistful at a time.
6. Cover and cook for 10 minutes. Then add the first milk. Cover and cook for another 10 minutes. Check in between to see if the rice is not sticking to the wok. In the last few minutes before turning off the heat, top with the toasted coconut gratings.
7. Fluff the rice with a fork a and transfer to a serving bowl once cooked.

Serve hot with your favourite gravy. For us it was Pepper Chicken Drumstick in a light tomato gravy and Cucumber Raitha.

Bon Appetit! "This is what's for dinner tonight folks!"