"This is a journey of my life since I was all of 12 yrs when I started my hand in cooking to now with displays of my learning and creations of recipes from around the world. My inspiration and role model has always been my Mum who has always created dishes from around the world and excellently well. I do not believe I would ever match to her culinary skills. I remember the times she could cook and bake almost 4-5 dishes in one go without ever letting one go under cooked or burnt! I was born and raised in Dubai, UAE and recently moved to India for family reasons. Kitchenette just means that over the decades, my kitchen has changed from that of my mum's to my uncle and aunt's, to my home in UAE and now in India. Pala't'te, describes both global cuisines ('Palatte'-diverse flavours) and pleasing diverse 'Palates'."
Showing posts with label #BreadBakers. Show all posts

Tuesday, 12 April 2016

Easy-Peasy Garlic-ky Mini Rolls #BreadBakers #NoBake

I am thankful to our Good Lord for showing His Mercy on us. My dearest Daddy had a mild chest pain last Thursday and my little girl and I rushed over to Dad and Mum's home which is a little away from the city where we stay.


I did not remember about this BreadBakers' event as a result as I was too stressed having just lost Mummy 11 months ago. My sisters who are abroad were petrified and asked me to leave at the soonest. Luckily Dad's initial cardiac results were normal. He has to go through a TMT on Tuesday and so I am scheduling this post ahead of time. We also have to drive back to our apartment with Daddy as he plans on staying with us for a bit so I may be settled only by evening hours to complete the updated post links which is ok owing to the time difference which will still  meet the event challenge time. Since it is my first time at scheduling a post, I am a tad nervous it may not happen on time. Nevertheless, family is the most important, Food always takes second place to Family, so Karen please excuse me in case this does not happen on time.


I would like to thank my good friends (you know who you are) for checking in on Daddy's health and my well-being during this trying time even if for a day or two. Also thank you for cheering me up with shared laughter and moments via calls, visits and messages. You are amazing! Just goes to show who true friends are and the love that you bestow on me is irreplaceable. God bless your families and you abundantly.


Since I did not bake ahead of time and if you have been following my posts since last May, you would know that Mum's oven is at our other home which does not make it easy for me to go over just to bake these rolls. As although we have a full fledged kitchen there all the ingredients and tools are at this home . So what started as my experiment to make Garlic Dough Balls turned out to be Garlic Mini Rolls. We had a rough Sunday night with my little girl feeling ill and so when I made this on Monday afternoon, I was pretty groggy. Sorry about the last day name change of my recipe title Karen.


My husband and I consume raw garlic as a part of our morning routine. This was started a few years ago, when a nutritionist asked my husband to have it as he seemed to have a borderline high cholesterol value back then. Then it became a habit and when we learnt of the many benefits of garlic, then it just became a part of our daily routine.


So the last time I tried this technique of baking is when I was at home after Mummy's passing away and had committed to making Whole Wheat Pita Bread. Trust me when I say that this is not only an easy technique of baking but gives almost the same results as the oven if done right. For those of you who have an oven, I will provide instructions as to how to bake it normally in the oven as well.

Garlic happens to be my favourite condiment so I could not resist participating in this event. I would like to thank the lovely Karen H Kerr of Karen's Kitchen Stories for choosing this theme.

You can serve these mini rolls with your favourite soup or simple as an appetizer as well. 

The Verdict: My 6 year old gobbled up most of these rolls as a snack! :D


You need:
  • 1 pod of a medium sized garlic, peeled and cleaned; half the pod sliced finely, other half minced or microplaned
  • 2 tbsp of butter / ghee (Clarified Buter) / Olive oil
  • Salt - 1 tsp + a sprinkle
  • 1 cup of whole wheat flour 
  • A pinch of sugar
  • Luke warm water  -  to knead
  • 1 tsp Yeast


The Make:
Makes 8 mini rolls | Preparation time: 10 minutes | Rising Time: 30 minutes | Cook Time: 10 minutes

1. Proof the yeast by taking the yeast with a pinch of sugar and mixing it with some lukewarm water in a small bowl. Let it stand for 5-10 minutes till it froths.
2. Next in a large vessel, add the yeast, flour and salt and knead well with the lukewarm water added in bit by bit to form a smooth dough ball. Allow to rest in a warm, dark place for at least 30 minutes. The dough would have doubled.
3. Using a mortar and pestle, crush the finely sliced garlic pieces with the butter, ghee or oil. If you do not have a mortar and pestle you can do this with your grinder/blender and if using the oil, slowly trickle the olive oil in during the grinding process. The resultant will be a creamy garlic butter. Add a sprinkle of the salt and mix well. Set aside half of the garlic butter. If you are using a blender, do not exceed a minute.
4. Next knead in half of the garlic butter in the dough and roll the dough within your palms to a longish log, as evenly as possible. Cut out pillows of dough as even as possible and roll the dough into balls or in my case pillow-shaped. Repeat till the entire dough is used and placed on the vessel with some distance between the dough pillows to allow it to expand.
5. The dough bits will expand further. Next brush the top of the dough rolls with the remaining half of the garlic butter and place the minced garlic on top and lightly press down.
6. After brushing, heat the remaining garlic butter in a pan and place the dough rolls on the pan. Cover with a lid with a steam outlet or slightly left open to allow steam to pass. Heat each side for 2 minutes.
7. For those using an oven, butter the baking pan with the remaining garlic butter after brushing the dough bits and line the dough rolls at a distance from each other. Bake for 10 minutes until lightly browned. Flip over in case you do not have top heat in your oven.

Serve hot aside your favourite soup or as it is with some butterspread/cheese spread.

April 2016's #BreadBakers' event : Our ingredient of the month is GARLIC, in celebration of National Garlic Day in the United States - 19 April - and one of our favorite food holidays. Black garlic, white garlic, elephant garlic, smoked garlic; powdered, roasted, raw, crushed or whole, include some garlic in your bread!

Now for some lovely Garlic breads from our #BreadBakers family of amazing bakers:


BreadBakers

 #BreadBakers is a group of bread loving bakers who get together once a month to bake bread with a common ingredient or theme. Follow our Pinterest board right here. Links are also updated each month on this home page.

We take turns hosting each month and choosing the theme/ingredient.

If you are a food blogger and would like to join us, just send Stacy an email with your blog URL to foodlustpeoplelove@gmail.com.

Tuesday, 8 March 2016

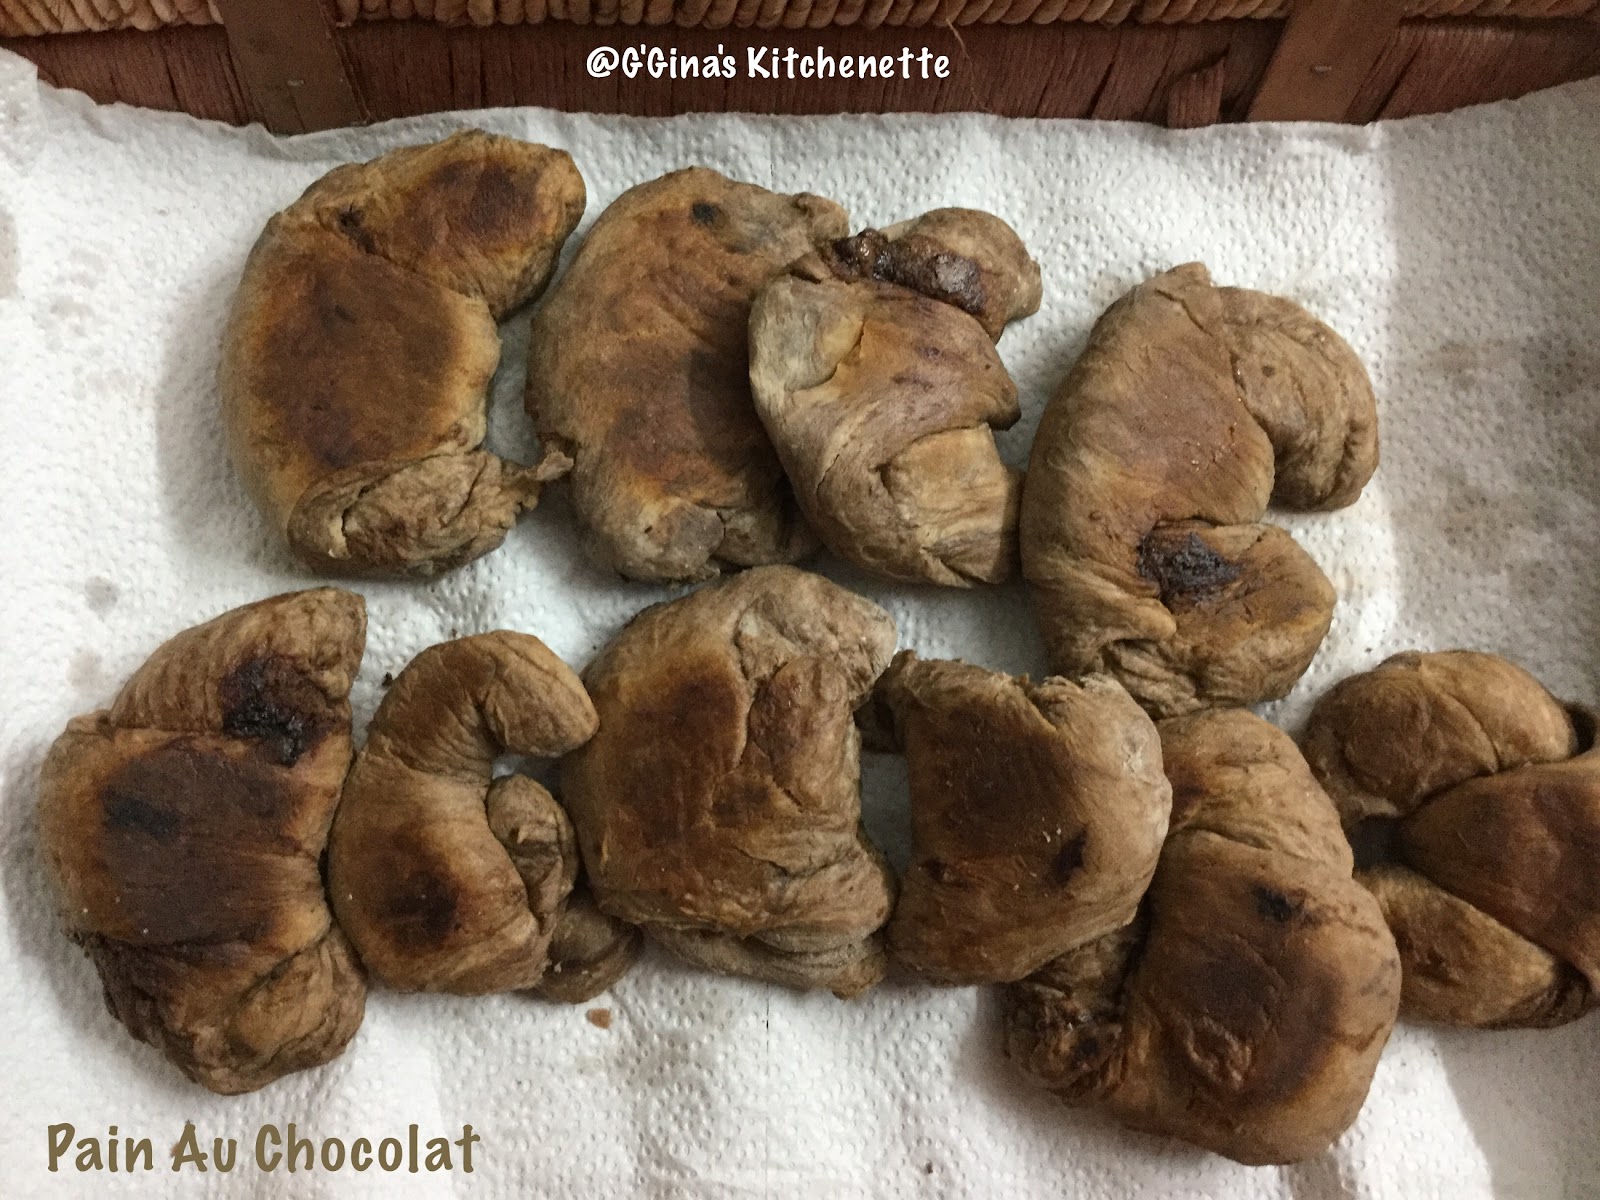
Pain Au Chocolat (Chocolate filled Croissants) #BreadBakers

Being Women's Day today this was the ideal challenge...'Chocolate'. Happy Women's Day to all you fabulous Women out there. I have mentioned at least three in this post who have made this post possible! Special thanks to Elizabeth, Manju and always you Shireen.

When I heard my good friend and college mate Shireen Pais-Sequeira of Ruchik Randhap chose Cacao, Cocoa or Carob for the Bread Bakers' March event, I was super excited. Many ideas flashed through my head. Thank you Shireen for hosting this lovely theme!


I have had a secret nickname given by my ex-colleague and friend Thomas Forsch...'Chocolate'. Yes he called me Chocolate, because he knew I could be bribed with Chocolate. He challenged me to a work related challenge at the company we worked at and when I met the challenge, he promised me the best chocolate cake there ever was! And yes all of it was all for me. I still remember when that day finally arrived, of how my buddy Nina Silva called me as I just finished conducting an interview. She told me of how she had opened the cake box and started sharing the cake. I was furious with her and she couldn't help but burst into a roar of laughter!!


Nothing has changed since then, I can still be bribed with chocolate. I also remember how a friend got out of an angry situation with me back in college days with a bar of chocolate. I didn't realise until I had actually cooled off.


Coming to the challenge, I had never made croissants before and recently I took up a dessert
challenge that had eaten into two full days of work and sleep time. It didn't turn out as expected but
the customer was happy and that was what mattered the most. While I began this challenge all excited, it got ugly pretty fast. To avoid a similar turn of events as the dessert challenge, I spoke to my recent good friend and fabulous neighbour Elizabeth Rita Samuel of whether she had made croissants earlier while we were walking up in school to pick our kids. She said that she had just made a batch of dough waiting to be baked after we returned from school for her lovely daughter Joanne who incidentally has become my daughter's favourite friend. We mums call them two peas in a pod.

As luck has it, apparently Elizabeth has had a lot of experience with croissants esp.when she stayed at Belgium. She told me some of the challenges involved with making croissants in such a challenging environment as we stay in a tropical place where the humidity levels are high and hot. Summer decided to come in a tad earlier this time. "Everything must remain cold" is what Elizabeth said and that means returning the dough each time during the preparation process back to the refrigerator. The rolling pin went in to the refrigerator as well. Elizabeth spoke of the ratios of ingredients and how to roll and shape the croissants.


I then came up with one more idea which was to freeze my room and kitchen as much as possible
which meant all doors were closed and I turned the aircon down to 18°C, as low as it would go.


Since this challenge was all about Cacao, I decided to include it both in the dough and in the filling.
'Pain Au Chocolat' traditionally has a half moon puff pastry look filled with chocolate pieces and translates literally to 'Chocolate bread'. But like I said I wanted to try the traditional look of croissants as Elizabeth spoke of since it was the first time I tried my hand in croissants. The dough essentially of the croissants and 'Pain Au Chocolat' is the same. It is the shape that differs.  Of course, the chocolate filled croissants also gained the name 'Pain Au Chocolat'. So it was a win- win situation either way name wise.


I seriously thought that all this would be a 'pain'ful effort with the turn of ugly circumstances that I mentioned earlier in this post which arose in the process of making these croissants. My workstation that I use to post all my recipes and do my multiple other jobs from met with a coma. It is on its way to another state to get fixed as the rotten retailer who promised an All-India service failed to meet its promises. Sigh!So as I write this post, I am still unsure of its successful post as mentioned to today's gracious hostess Shireen.

And now an update, the retailer turned out to be not-so- rotten after all. But it remains to be seen when I visit the service center this weekend *fingers crossed*.

You can use a normal egg wash to glaze the croissants, I used milk as we are on Lent. I finally completed this post on my neighbour friend Manjusha Manusmrithi's desktop as the IPad I tried to work most of this on started acting funny in the nth hour right before posting.

On with the recipe...

You need:

  • 2.5 cups (300 gms) plain flour
  • 200 gms cold butter, cubed
  • 7 gms active dry yeast
  • 1/2 tsp salt
  • 3/4 cup (180 ml) lukewarm milk + 4-5 tbsp of milk for brushing
  • 4 tbsp (60g) sugar
  • 200 gms of chocolate cubes or 9 tsps of nutella/ chocolate cream


The Make:
Makes 9 croissants | Bake time: 20 minutes | Preparation time: 15 minutes | Resting and Rising Time: 10 hrs/ overnight

1. Place the yeast in a bowl and add the sugar and a tad bit of the milk. Stir until it dissolves. Then add rest of the milk except the one set aside for brushing. Set aside to cool down.


2. Combine flour and salt into a large bowl. Add the butter and using a fork combine until it crumbles together.

3. Add the milk-yeast mixture and gently combine until the dough comes together. The butter needs to remain in  pea-sized pieces. Next roughly shape the dough into a square and wrap the top of the bowl in cling film and refrigerate for 2 hours. If you like you can also freeze it for 30 minutes to hasten the process along.

4. Remember to keep your work tools as cold as possible. Next dust your cleaned work surface and rolling pin with flour. Start rolling the dough into a rectangular shape at least two or three times as long as it is wide. Do not worry if the dough is hard to work with at this stage. It will come together during the rolling and folding process that follows.

5. Next fold the short sides (breadth) of the rectangle dough into the middle.  Rotate the dough by a
half turn. Roll out to lengthen. Fold the short ends again towards the middle.

6. Next flip the dough over so the folded seams are underneath. Repeat the rolling and folding process steps 4-5,  four more times, giving the dough a total of five times of rolling and folding. Place the dough in a wide bowl and cover with plastic wrap. Refrigerate for 8 hrs or overnight.

7. On a lightly floured surface roll out the dough into a rectangular of 18" X 12".  Cut the rolled dough into triangles, it will make about 9 triangles of 14" long and 5" at base.


8. Place a chocolate cube or a tsp of chocolate in the center of each triangle base. Then gently roll the croissant starting from the wide part up to the top, curving the ends inwards giving it the croissant shape.


9. Place the croissants with final rolled tip side down onto a prepared baking sheet lined with parchment paper. Cover with plastic wrap and let rise for 2-3 hours at room temperature.

10. Preheat the oven to 220°C. Brush the croissants with milk. Lower the heat to 180°C and b
ake for 20 minutes until golden brown. If your oven is anything like mine where the heat is only at the bottom, please turn over after the first 10 minutes.

11. Cool on wire rack before serving with your hot cuppa' coffee or tea.


Breads with Cocoa, Cacao or Carob in any form
BreadBakers Breads with Cocoa, Cacao or Carob in any form #BreadBakers is a group of bread loving bakers who get together once a month to bake bread with a common ingredient or theme. Follow our Pinterest board right here. Links are also updated each month on this home page.

We take turns hosting each month and choosing the theme/ingredient.

If you are a food blogger and would like to join us, just send Stacy an email with your blog URL to foodlustpeoplelove@gmail.com.

Tuesday, 9 February 2016

Swedish Polar Bread #BreadBakers

Whew! This was one challenge I will never forget. After the relocation last year, there are a few places I have learnt which sell baking items. My choice of Polar Bread would do well if there was Rye of any form either Light Rye or Dark Rye and this I learnt after my research in the last few days. This is the very first time that I have left my baking to the last minute. My dough is still proving as I type this. Thank God for time differences which makes me hopeful to post this recipe before 800 hrs EST.


Since I live in India now ingredients such as Quinoa, Rye, etc can be availed if ordered online earlier. Of course it has a steeper price owing to the import tax but all in the name of Baking. I was super busy with the family and myself since the last few weeks with weddings, engagement, School Cultural Fest, Karate assessment, etc. Oh by the way I now hold a colour belt in Karate (Shito ryu)...Hya!! Just got to know last evening.


I began my research on this bread late which gave me little room to notice the Rye or even think of looking for it. Lulu Mall here also has its presence in the Middle East and I foolishly thought I could avail the flour there. Unfortunately, Rye primarily grows in Eastern, Central and Northern Europe and its growth belt stretches from Northern Germany, Poland, Ukraine, Lithuania and Latvia into central and Northern Russia. It is also grown in North America, parts of South America, Oceania (Australia and New Zealand), Turkey, Kazakhstan and in Northern China.


I did find an online portal and a company that would have delivered the Rye if I had not waited till the last minute. Yesterday the one day I got free from all my personal commitments, I spent close to 4 hours++ in search of Rye. By the way I find it strange to say Rye so much as I have a school friend Ryan who I nicknamed Rye ..hahaha!

Polar Bread is a Scandinavian bread and it has very little information online. In fact, in Sweden I believe Polar Bread is known as Polarbröd which one site even claimed is the  brand name for Mjukkaka. Mjukkaka is the bread of Northern Sweden and literally translates to 'Softcake'. Polar bread probably derives its name from a company 'Polarbröd' founded in the 1800s and is a  family company with old traditions. You can read more about the origin of this bread here.

Coming back to my predicament of being a last minute baker for the first time for a blogging event, I still did not hold the Rye. My friends and neighbours of the community apartment complex I lived in gave me several options. One suggested I visit a store near by which led me to another branch where after almost reaching the store I was informed by the owner that it was unavailable at that branch and to drive back to a place closer to home. Unfortunately what I said was Rye and what he heard was Rice Flour! Oh gosh! So then on returning home began the research of what could be substituted instead of Rye and that brought in suggestions such as grounded brown rice, finger millet (Ragi), Red Rice powder (for the Dark Rye colour), buckwheat, etc. One of my neighbours Ritu suggested using the Rye flakes found in certain kinds of Muesli. Unfortunately even that type of Muesli is not found here locally. 

Rye is low in Glutenin and high in Gliadin. Of course the Mjukkaka requires some amount of white flour or bread flour. I finally succumbed to a combination of Finger Millet, Bread flour and Red Rice flour considering the darker Rye. Hope this works (remember my bread is still proving). Like Daddy said last night when I asked about Rye Flour availability in Dubai (he is on his break there) is to use what is locally available. I remembered how I used to resort to asking Mum whenever I was stuck in my cook or bake. I took it as her word and decided to go with what I have.

If you are using Rye, remember that you can alter the ratio of Rye to Bread flour keeping in mind that the total quantity should be equal to the recipe requirements. The more Rye you add, the denser the bread gets. I had taken an equal quantity of Bread Flour and Finger Millet with Red Rice flour. The only thing I would do now that my bread is all baked is to have a higher ratio of Bread Flour to Finger Millet and Red Rice (hence I have resorted to the original quantities in the recipe below). Also the next time I will try and make this with Rye Flour. In my haste I rolled out the bread a little thinner than the 1/4" thickness so it did not turn out to be as fluffy as I would have liked it. More reminded me of the darker brown Mediterranean flatbread 'Kuboos'. 

These are the ingredients that Polarbröd use to make their soft bread taken from this link. You may have to hit 'Translate this page' to read it in English : 

INGREDIENTS

Wheat flour, water, sifted rye flour (20,4%), syrup, sugar, wheat gluten , rape seed oil, sugar beet fiber, salt, fermented wheat flour, yeast, emulsifier (mono- and diglycerides of fatty acids, mono- and diglycerides of mono- and diacetyl tartaric acid), baking soda (antler salt), fruit sugar, malt flour ( barley ), flour treatment agent (ascorbic acid), enzyme.
Contains gluten. Milk free.

I am going to give you two options, one of my modified Finger Millet and Red Rice Flour additions and one with the original Rye flour. Please revert to the Rye flour for all available purposes, i.e. in case you have Rye flour where you stay at - use it! I do not want to change history at least not for now. 

You need:

  • 500 gms of plain flour or white bread flour
  • 60 gms of Rye flour (or in my case 20 gms of Red rice flour and 40 gms of Finger Millet)
  • 60 gms of Yoghurt (or you can also use Sour cream or Crème Fraiche)
  • 5 tsp sugar or honey
  • 2 tsp fennel seeds or anise seeds
  • 2 tsp salt
  • 1 tsp dried yeast

The Make:

Preparation Time: 10-15 minutes | Proof time: 1 hr, 20 minutes | Cook time: Up to 6 minutes per soft bread | Makes at least 6 soft breads

1. First mix the sugar and yeast in the water and leave it to rest for 10 minutes.
2. Next add the flours, salt and seeds in a large bowl and mix well. 
3. Add the yeasted water and yoghurt to the flour mix and knead well to a sticky dough.
4. Continue kneading on a floured surface for about 10 minutes until smooth.
5. Place the kneaded dough in a lightly greased plate/bowl and leave it to prove in a warm place and double in size. This should take about 20 minutes.
6. Turn out the dough to a floured surface and knock the air out of the dough.
7. Divide the dough into equal sizes (6 numbers) and roll out each dough ball into a 1/4" thickness. Try to roll out perfect rounds and if not possible do your best.
8. Prick the rolled dough circle on both sides with a fork.
9. Next place the dough discs on a floured surface, cover and allow to rest for 40-60 minutes.
10. Preheat a griddle or in my case a cast iron flat pan or skillet or any other pan and place the dough discs onto the griddle on medium heat and cook each side for at least 2-3 minutes.

Serve warm with your favourite stuffing or dip. Bon Appetit! I love saving the best for last....

February's #BreadBakers event is 'Griddle Breads' hosted by Anshie Dhar of Spice Roots. She had openly themed the griddle breads to include anything from Rotis, crumpets, English muffins, etc. Thank you Anshie for choosing this theme. I was almost certain that I would back out after yesterday's fiasco but yaaay I made it in time! Here are some of the griddle breads from our Famous and Fabulous Bread Bakers' family...


February's Griddle Breads
BreadBakers 

 #BreadBakers is a group of bread loving bakers who get together once a month to bake bread with a common ingredient or theme. Follow our Pinterest board right here. Links are also updated each month on this home page.

We take turns hosting each month and choosing the theme/ingredient.

If you are a food blogger and would like to join us, just send Stacy an email with your blog URL to foodlustpeoplelove@gmail.com.

Tuesday, 8 December 2015

Herbert's Traditional Overnight Bread Loaf #BreadBakers


I am still very much a novice where it comes to baking breads. Mum was always good at baking and she never failed where it came to rising dough of any sort.


This month's theme at our #BreadBakers family is hosted by the lovely Holly Baker of A Baker's House. I love the way you have Baker built into your name Holly! Thank you hosting the 'Overnight  Breakfast Bread' theme. I just loved working with this theme as it gave me some experimentation to work with and I have always mentioned in my blog that I work best with experimentation. My best creations have come from some of the wildest experiments I conducted at various Kitchenettes.


This time I decided to work with an experienced baker's tips. Thomas Herbert baked at a time when yeast used to be pretty expensive (can you believe that?). So during those time of economic necessity, people had to come up with innovative ways to make their bread rise. Herbert used 1/10th of the quantity of yeast that was used in a modern day commercial institution. And hence the concept of overnight bread rose. Overnight breads makes for a mean toast which my little one and I had with melted cheese. The lush flavour comes from the long, slow, overnight fermenting process. The best part of the overnight bread is because only a tiny bit of yeast is used in the process, it actually last a longer time than most bread loaves and it is easy to digest by almost all people owing to the tiny amount of yeast. So yes it should also be called a 'Win-Win Bread Loaf'.


I admit that I had to try this bread a couple of times before it turned out right. I had to borrow a bread loaf pan from my neighbour Joshia for the second try. Yes I have lovely neighbours now and they are very good bakers as well. Ah my luck! :) So now I have the option of having them taste my creations and get candid and clear feedback as to how to improve on my next batch.

During the Christmas and New Year months, you may want to couple your roasts with a loaf of this traditional bread loaf. 


What you need:

  • 560 gms white flour (maida)
  • 10 gms salt
  • 10 gms sugar
  • 2 gms dried yeast
  • 4 gms butter
  • 100 ml full cream/full fat milk
  • 200 ml cold water


The Bake:
Preparation time: 15 minutes | Rising time: 2 hours + 8 hours + 1-3 hours | Bake Time: 55 minutes

1.  In a wide, large bowl, mix all the ingredients together for 15 minutes by hand or until you have a smooth and stiff dough. (Tip#1) Cover and allow to rest in a cool place for 2 hours.
2. Mould to fit in a large tin. Cover and leave it overnight to rise in the fridge.
3. After the 8 hours, in the morning, the loaf would have slightly risen. Remove it from the fridge and leave it to continue rising in a warm, dark place. This could take anywhere between 1-3 hours.
4. Preheat the oven to 240°C or to the highest temperature up to 240°C. Lightly dust the risen dough with flour and given it five slashes (you can add more or less slashes but I thought Herbert's five slashes were in sync with the size of my loaf and also is my fave number :D )  with the tip of a sharp knife or kitchen blade.
5. Steam the oven (Tip#2) and bake the loaf  for up to 10 minutes on the same temperature. Lower the heat to 180°C for about 35 minutes or until baked to a beautiful golden colour and it rings hollow when tapped on the bottom.
6. Remove the bread from the oven and allow to cool on a wire rack.

Your fabulous overnight bread is ready to be toasted and used with your favourite spreads. In my case, my little girl and I had some fine melted cheese sandwiches..ah bliss!

Tip:
1. If the dough comes together in the 15 minutes stop. Please do not over knead as you will come up with a dense bread. However if you do not knead enough (the 15 minutes maximum) to bring the dough to a smooth, stiff texture you could end up with a flat and not so fluffy bread.
2. How to steam your oven: there are several methods to do this but I chose the most natural method of them. Cover the baking bread with a large bowl or pan for the first 10-15 minutes of the bake to trap naturally released steam.


As I mentioned a little earlier, the #BreadBakers theme this month is Overnight Breakfast Breads. This includes yeasted breads that you prepare the night before then bake in the morning as well as quick breads that you prepare ahead of time then mix and bake in the morning. December is a busy time for celebrations and getting together with family and friends. It is always nice to think ahead and to make dishes ahead of time so that you-- the baker-- can enjoy the fruits (or breads!) of your labor with your loved ones. Here is what the group is sharing today, enjoy!


BreadBakers #BreadBakers is a group of bread loving bakers who get together once a month to bake bread with a common ingredient or theme. Follow our Pinterest board right here. Links are also updated each month on this home page. We take turns hosting each month and choosing the theme/ingredient. If you are a food blogger and would like to join us, just send Stacy an email with your blog URL to foodlustpeoplelove@gmail.com.

Tuesday, 13 October 2015

Pumpkin, Poppy and Papaya seeded breadsticks #BreadBakers

Woohoo another fabulous Bread baking event that I am glad to be a part of and ever-so ecstatic to be a part of this beautiful heart warming family of bread bakers. This month's event 'Hearty Fall Breads' is hosted by the lovely Wendy Klik of the 'A Day in the Life on the Farm'. Thank you Wendy for this lovely baking opportunity. I am so excited that I could dish out these breadsticks despite my doubts and apprehensions.


Breadsticks in my opinion need to be nice and crunchy and shared over a big bowl of healthy soup. I made almost 3 batches of these breadsticks but the best ones are those that I rolled out thinner. Of course the thicker ones actually tasted better with some dressing/cheese even. So you can actually serve up two makes out of this recipe a thicker wholesome one and a thinner crunchier one. I served these breadsticks with Chef Donna Hay's 'Roasted Pumpkin soup' for the soul. What's best was when I made these breadsticks and soup, it was heavily raining and there was this chill in the air.


If you have followed my earlier recipe on 'Papaya Pudding', I did mention how Mum had planted these amazing Papaya seeds which then gave its first crop just a month ago, I saved the seeds off this Papaya fruit that Dad shared with me. I have added these seeds in the bread. So I am super glad that these breadsticks turned out the way they did.


The Pumpkin is also homegrown and was shared by Dad. I love being so close to home where I can get to taste all of Mum's and Dad's fresh grown produce of fruits and veggies.


This is such a simple make if you stay calm throughout the bake :) My first batch I was super nervous for some reason..hmmm! I think I am watching too much of Masterchef Australia :D


You need:

  • 3 cups of whole wheat flour
  • 1.5 cups of plain white flour
  • 1 tsp of dry active yeast
  • 2-3 tbsp of lukewarm water
  • 1 tbsp salt
  • 1 tsp sugar
  • Luke warm Water to knead
  • 100 gms of poppy seeds
  • Seeds from a medium size pumpkin, cleaned and air dried 
  • Palmful of papaya seeds, cleaned and air dried
  • Olive oil to brush
  • Reserve white flour for kneading


The Make:
Preparation Time: 10 minutes | Resting Time: an hour | Makes enough for 4-5 adults or more depending on the size of the roll

1. In a small bowl, combine both the dry active yeast and the sugar and 2-3 tbsp of lukewarm water to mix well. Allow to activate and if it does not fluff up, then use a new batch of yeast and repeat.
2. In a large mixing bowl, combine both flours, salt, the proven yeast and knead. Then add some lukewarm water and knead to a sticky albeit mouldable consistency.
3. Allow to rest in a dark, warm place for an hour in a well-oiled bowl and cover with cling film or until the dough almost doubles in size. My oven or microwave oven is almost always a sure bet esp. in cold weather when I preheat my microwave for a minute and then allow the bowl to sit in the switched off, preheated oven.
4. Meanwhile dry roast the papaya and pumpkin seeds separately.
5. Sprinkle some white flour on a clean surface, place the doubled up dough and punch out the air off the doubled up dough.
6. Knead the pumpkin and papaya seeds into the doubled up dough.
7. Line a baking tray with some parchment paper or brush some oil onto the surface of your baking tray.
8. Grease your palms with some oil and keep a bowl aside with some oil to repeat in between rolls. Roll the dough into breadsticks between your palms in horizontal manner to the thickness you prefer, to avoid the dough from lengthening and breaking off on its own. Place the palm-rolled dough onto the baking tray, leaving some gaps between each piece allow room to rise.
8. In a smaller bowl combine some olive oil and the poppy seeds and brush over the rolled dough pieces.
9. Preheat the oven to 180°C and place tray in the oven for 15-20 minutes. Keep a close watch between batches to avoid any burning. After the first batch, the subsequent batches would require less than 15 minutes.

Serve this up with your favourite soup or in my case this time was the Roasted Pumpkin soul for the soul.

Let's take a look at the other Fall Flavors being shared today
BreadBakers #BreadBakers is a group of bread loving bakers who get together once a month to bake bread with a common ingredient or theme. Follow our Pinterest board right here. Links are also updated each month on this home page.

We take turns hosting each month and choosing the theme/ingredient.

If you are a food blogger and would like to join us, just send Stacy an email with your blog URL to foodlustpeoplelove@gmail.com.

Tuesday, 14 July 2015

Peanut Butter and Chocolate Chips Oatmeal Scones #BreadBakers

I have been away for too long once again and dear readers I have to apologise once again but this time as most of G'Gina's Kitchenette facebook readers are aware, I have moved cities. Yes again! So a new kitchen, a new beautiful home and lots of hopeful expectations for better cooks & bakes. For now it's brown cardboard boxes that are waiting to be unpacked while I rest to recuperate from hurting myself during the packing and unpacking process.  


Scones has always been on my to do list and what better time to try it out as the lovely Rocio Rivera Gentil of  Kids and Chic hosts this month's #BreadBakers event 'Oatmeal Breads'. Thanks Rocio for the wonderful opportunity.


Scones find its origin in the United Kingdom and I first had the most perfect scone on our family's visit to United Kingdom during my schooling age. My Mum had gained a nickname 'London Leela' owing to the fact that she was one of the early medical staff who had trained in her profession in London. She always raved of the ways things were done in London. She also adopted a lot of the food and English culture at home. I owe this recipe to her as well.


The scone is a part of the traditional cream tea or Cornish cream tea or Devonshire tea, which is  a form of afternoon tea as a light meal consisting of scones with with clotted cream and jam. It differs from teacake or sweet buns which are made out of yeast.


I have included an option for those who are allergic to nuts/peanut butter.


This is a simple recipe too!


You need:


  • 21/2 cups of all-purpose flour
  • 11/4 cup Quaker oats (not quick oats) or traditional rolled oats * see Notes 1. 
  • 7 tbsp cold unsalted butter, cut into cubes
  • 1 cup buttermilk
  • 1 egg, separated
  • ½ cup cold peanut butter (or 1 cup small bananas mashed) 
  • 1 tsp baking powder
  • 1 tsp baking soda
  • ¼ tsp salt
  • 1/2 cup dark brown sugar
  • 1 cup dark unsweetened or semi sweet chocolate chips
  • White powdered or raw sugar,castor sugar or icing sugar for sprinkling
The Make:
Preparation Time: 15 mins | Bake Time: up to 30 minutes | Makes 8 scones


1. Preheat the oven to 200°C and place a butter paper or baking sheet on your baking tray and set aside.
2. In a large bowl, blend the flour, oats, brown sugar, baking powder, baking soda and salt together. 
3. Add the butter and using your fingertips (* see Notes 2.) to blend the butter into the flour mixture.
4. In a small bowl, whisk the buttermilk and the egg yolk together taking care not to whisk too much.
5. Make a well in the center of the flour mixture and pour the buttermilk and yolk mixture into the well and then add the peanut butter and gently fold the mixture together until it blends together. 
6.Then add in the chocolate chips and gently knead with your hand until just incorporated taking care not to over mix the dough
7. Turn the dough out on to the butter paper or baking sheet and mould the dough into a round disk about 8-9" in diameter. Pat to smoothen the surface as much as possible.
9. Brush atop the dough with whisked egg white, and sprinkle the top with powdered sugar.
10. Cut the dough into 8 wedges taking care not to separate them.


11. Bake the scones for 25-30 mins, or until the scones are nice and golden brown or until a toothpick inserted in the center comes out clean or sometimes with a few crumbs attached
11. Remove from the oven and let it cool aside for 5 minutes, then slice the already wedged 8 pieces and separate them this time.
12. Transfer to a wire rack to cool completely, or serve slightly warm. Store in an airtight container at room temperature for up to 2 days or refrigerate and use up to 4 days. Slightly warm in the oven before serving though if refrigerated. Optionally serve with some plain unsweetened cream or even sour cream on top. 


 * Notes:
1. Rolled oats are traditionally oat groats (hulled kernels of oat cereal or the wholegrain of the oats that have been husked and includes the bran, cereal germ and endosperm) that have been de-husked, steamed and then rolled into flat flakes, then stabilised through light toasting process.
2. You can also use a pastry blender instead of using your fingertips.


This is my cup of tea with my slice of scone on the next day of baking these scrumptious scones :)....

Tea and Scones Anyone? ...


#BreadBakers is a group of bread loving bakers who get together once a month to bake bread with a common ingredient or theme.  Follow our Pinterest board right here. Links are also updated each month on this home page. We take turns hosting each month and choosing the theme/ingredient. If you are a food blogger and would like to join us, just send Stacy an email with your blog URL to foodlustpeoplelove@gmail.com

Oatmeal Bread themed #BreadBakers:

  • Agave Oatmeal Sour Dough Bread from My Catholic Kitchen
  • Applesauce Oatmeal Bread from Hostess at Heart
  • Banana Oatmeal Loaf from Basic N Delicious
  • Blueberry Currant Oatmeal Bread from Cindy's Recipes and Writings
  • Cinnamon Raisin Oatmeal Bread from Karen's Kitchen Stories
  • Honey Oatmeal Bread from A Day in the Life on the Farm
  • Honey Oatmeal Bread from Recipes, Food and Cooking
  • Honey-Oatmeal Muffins from A Baker's House
  • Honey Oats Bread Loaf from Gayathri's Cook Spot
  • Honey Nut Oatmeal Waffles from Magnolia Days
  • Honey Wheat Oat Bread from Hezzi-D's Books and Cooks
  • Irish Oat and Whole Wheat Bread from Cali's Cuisine
  • Lemon Blueberry Oat Bread from Kids & Chic
  • Multigrain Twist Bread from What Smells So Good?
  • Oat Breadsticks from Passion Kneaded
  • Oatmeal and Whole Wheat Rolls from Sneha's Recipe
  • Oatmeal Buttermilk Bread from Ruchik Randhap
  • Oatmeal Porridge Sandwich Loaf from Bakers and Best
  • Oatmeal Stout Loaf from Food Lust People Love
  • Oat & Honey Bread from La Cocina de Aisha
  • Oats and Millet Idli from Spice Roots
  • Oats Bread with Maple and Walnut by Cook's Hideout
  • Oats Garlic Kulcha from SimplyVeggies
  • Peanut Butter and Chocolate Chips Oatmeal Scones from G'Gina's Kitchenette
  • Rolled Oat Sourdough Boule from A Shaggy Dough Story
  • Savory Oats Scones from Sara's Tasty Buds
  • Triple Seeded Oat Bread from Culinary Adventures with Camilla
  • Whole Wheat Honey Oatmeal Bread from Spill the Spices


  • BreadBakers