"This is a journey of my life since I was all of 12 yrs when I started my hand in cooking to now with displays of my learning and creations of recipes from around the world. My inspiration and role model has always been my Mum who has always created dishes from around the world and excellently well. I do not believe I would ever match to her culinary skills. I remember the times she could cook and bake almost 4-5 dishes in one go without ever letting one go under cooked or burnt! I was born and raised in Dubai, UAE and recently moved to India for family reasons. Kitchenette just means that over the decades, my kitchen has changed from that of my mum's to my uncle and aunt's, to my home in UAE and now in India. Pala't'te, describes both global cuisines ('Palatte'-diverse flavours) and pleasing diverse 'Palates'."
Showing posts with label Easy. Show all posts

Wednesday, 4 May 2016

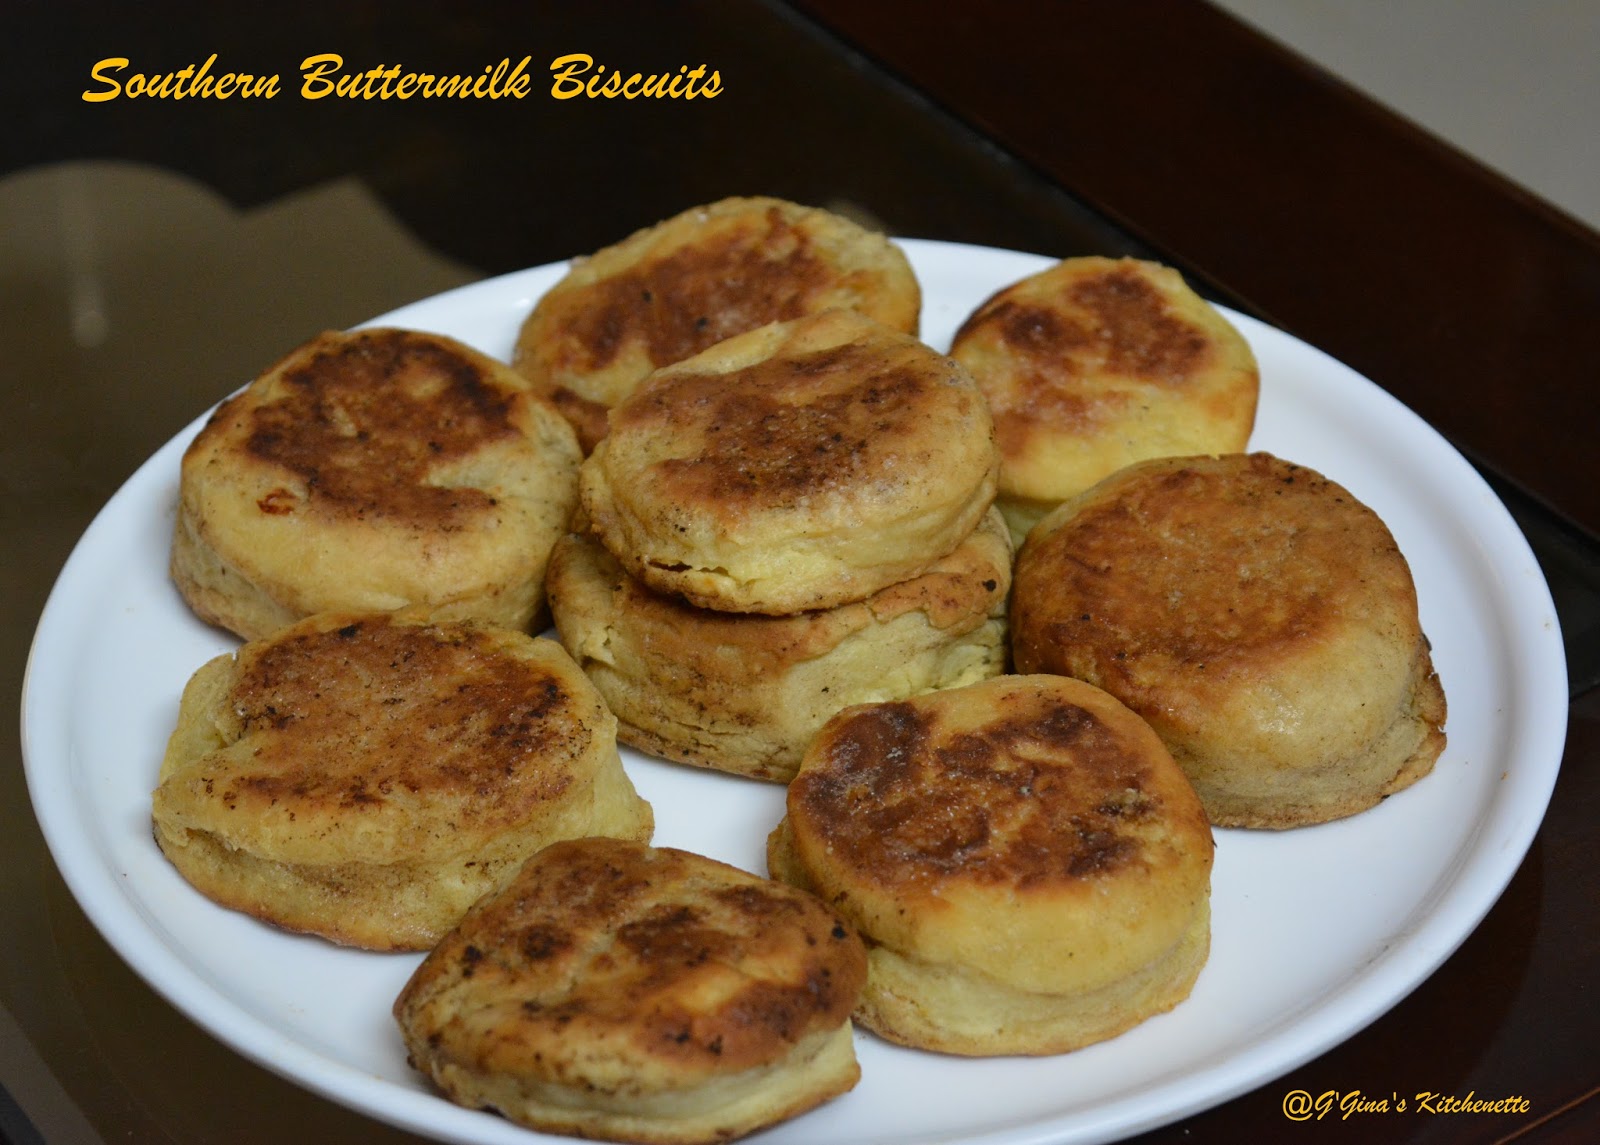
Southern Buttermilk Biscuits #FoodieExtravaganza

May's theme of Foodie Extravaganza is Buttermilk Biscuits. Our host is Kathleen Coe Clegg of Fearless Creative Mammas has picked a theme true to her roots. Her family is from the South of the United States where biscuit is a staple. The idea behind this month's theme is to get fun and creative with the staple biscuits of the South. 


Thank you Kathleen for sharing with us about your family's roots and I can honestly say I enjoyed learning more about the South. I have always loved Southern cooking and will attempt more recipes from the South of US in my cooking.
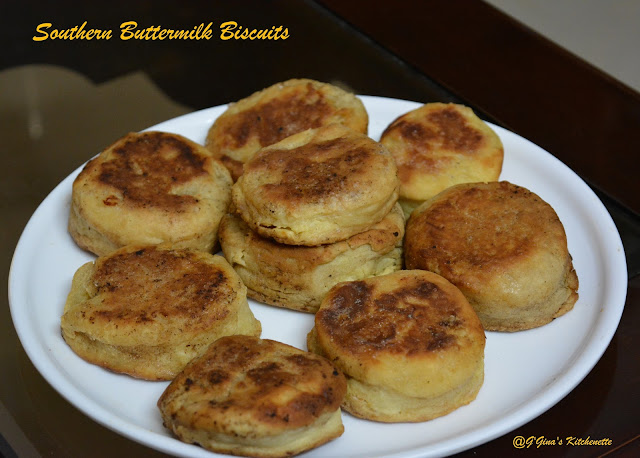


I first misunderstood the biscuits to be that of a normal crispy,flaky biscuit. So when I attempted to make them and found them to be more scone like, I was a little puzzled. I imagined it to be a flaky, crunchy biscuit. Of course, the biscuit ended up having a nice, crusty exterior with a moist, flaky interior. 


You can either try to slap some butter, jam, jelly or honey in this biscuit in which case I would ask you to sprinkle some sugar on top which would be a nice addition or you can have it as a savoury. In my case, when my sister-in-law and family were visiting our home a few weeks ago, I had attempted a savoury muffin, so I used the same kind of filling for the biscuits as well. It made for a nice and satisfying meal.


My first ever biscuits or cookies were attempted at Mum's kitchen in our home at Dubai. I even remember how I had a little tea party with my school friends. My first batch of perfect biscuits were made for my school buddies and I had iced their names on each biscuit.


Mum's first anniversary is in six days. I cannot imagine how I lived a year without Mum. Of course the Good Lord has been Kind and Merciful as always to me. I have always heard Mum's voice or felt her guidance through Him in every time of need. I could have been angry with Him for taking her so soon or for even taking her on Mother's Day last year.  Life will never be the same without Mum. You know what though, He always brings her voice or memory or guidance even when I need her the most. 


There is a little something I am expected to allow in my life but I have not been able to so far. Let's see how life progresses on that. Until then if you believe in God or say prayers, do keep me in your prayers or just send happy thoughts my way.


The best way to eat these biscuits are right out of the oven and in the US it is eaten as a savoury on top of chicken pot pie filling, slathered with some gravy on the side or even with fried chicken. A shorter description of these biscuits are that they are moist, fluffy and light.


You need:


  • 2 cups of plain flour or pasta flour (if you can find pasta flour, it would be the best)
  • 1/4 tsp baking soda
  • 1 tablespoon baking powder
  • 6 tbsp of cold butter (cut into cubes and refrigerated) + 1 tbsp reserve
  • 4-6 tbsp of sugar (optional)
  • 1 cup of chilled buttermilk
  • 1 tsp salt (in case of unsalted butter)


The Make:


Preparation Time: 10 minutes | Resting time: 10 minutes + 10 minutes (optional) | Baking time: 15-20 minutes | Makes 9 biscuits of 7" in diameter each


I did not use a food processor or the kind, just my good ol' hands. So I am unsure if your queries revolve around how to make this recipe using a food processor or a Kitchen Aid or the kind. I am sure the below instructions would serve well for both methods although I cannot be completely sure. So do let me know if you are using any processor to make these biscuits.


1. Preheat your oven to 200°C.

2. In a large mixing bowl, add the flour, baking soda, baking powder and salt and sift well.
3. Next add 6 tbsp of the cold butter to the flour mixture and mix in until it appears like a coarse meal. Place the flour-butter mixture back into the refrigerator. This will help create those lovely flaky layers of the biscuit. Let it stay refrigerated for at least 10 minutes. If you have left it in longer, it does not matter and will not affect the biscuit in anyway negatively.
4. Next add the cold buttermilk bit-by-bit into the flour-butter mixture until just combined. You will have a sticky, clumpy mixture and not a smooth dough. You will be left with at least 2-3 tbsp of buttermilk which you can use to brush on top of the prepared dough circles. Refrigerate the dough for 10 minutes if you find that your butter has melted.
5. Take the dough onto a floured surface and pat gently to about 1/2" thick. Fold the dough and repeat the process. Do this at least 5 times. Then gently pat the dough down to 1" thick.
6. Using a round cutter, cut out at least 8-9 circles and place them on a buttered baking tray about 1" apart to get a crusty top and bottom. Brush the top of the biscuits with the remaining buttermilk.
7. Bake at 180°C for about 10 minutes. Brush the top and bottom of the biscuits with the remaining butter and continue baking for at least 5 minutes when a golden brown colour is achieved. If you are planning to use the biscuits with a sweet filling, you could sprinkle some sugar on top.

Your biscuits are ready to be eaten straight out of the oven. So hope you have your sides or fillings and your family/guests ready to gobble these flavoursome delights right away.


Today's Foodie Extravaganza day is celebrating the Buttermilk Biscuit. Kathleen, from Fearlessly Creative Mammas is the host this month, and to celebrate her southern roots, she picked Buttermilk Biscuits as the theme. 
May 14th is actually Buttermilk Biscuit day, but we get to pick from any of the foods in the specific month, so Buttermilk Biscuits it is. We pick our foods from the website The Nibble
Posting day is always the first Wednesday of each month. If you are a blogger and would like to join our group and blog along with us, come join our Facebook page Foodie Extravaganza

We would love to have you! If you're a spectator looking for delicious tid-bits check out our Foodie Extravaganza Pinterest Board! Looking for our previous parties? Check them out HERE


Friday, 15 April 2016

Mediterranean Roasted Red Snapper with Sauteed Veggies #FishFridayFoodies

I often go back to the land where I was born at, in my thoughts. It is hard to be away from Dubai, UAE as there are so many fond memories of the place. Growing up, we lived in a place very close to the first fish market. Seafood has always been at home as long as I can remember at least for lunch.


Mummy made the best roast /grilled fish too. Since Dad has not had spicy food in decades now owing to his health, Arabic/Mediterranean food seems to be the best choice! And nothing like having Fish grilled or roasted which brings out its natural flavours and does not need much oil owing to its natural oils. I miss Mum's cooking a lot these days. The image below is of a post card I had since college days. Well I used to miss her cooking back then too when we stayed away from home.


This fish was grilled when my Papa (Hubby's Dad) came to stay. He has been unwell since last year and has a lot of diet restrictions, so I thought it best to make this fish roasted. He thoroughly enjoyed this fish and make. What's best is it was devoid of any oil and used a lot of good, healthy ingredients. The Red Snapper in itself is quite a flavoursome fish. You can add other vegetables too but like I said he has many restrictions on the type of vegetables too. Suggest adding some whole shallots and tomatoes with slits on either side. Ironically though my recipe is titled as with Sauteed Veggies, it really does only give the look of being sauteed as that is how it cooked when roasted with the fish.


Red Snapper can be cooked in many ways. Rich in Selenium, Vitamin A, Omega-3, it can be baked, broiled, poached, grilled, sauteed or steamed.

I am a fan of one pot or pan cooking. So it was neat to have the veggies cooked atop the fish. Although I had to do a bit of flash cooking prior to placing the beans on the baking pan.

April's Fish Friday Foodies is hosted by the lovely Camilla M. Mann of Culinary Adventures with Camilla. Thank you Camilla for this awesome theme.

You need:

  • 1.5 kgs Red Snapper
  • 4-5 cloves of Garlic
  • 2 tbsp of crushed black pepper
  • 250 gms of French beans
  • Sprinkle of Salt
  • 1/2 medium sized lemon (Preferable, but I had to leave it out owing to Papa's diet restrictions) or 1 tbsp of vinegar
  • 1 large shallot, diced or cut finely


The Make:
Preparation time: 10 minutes | Marination time: 20 minutes to an hour | Cooking Time: 30 minutes | Serves 4 adults


1. Slit the sides of the Red Snapper and sprinkle some salt and rub down on both sides with the black pepper and vinegar (or lemon juice).
2. Crush the garlic using the back of a knife and press down. Place it in the cavity of the fish and around it as well. Allow it to stand for 20 minutes to an hour.
3. Line a baking pan with butter paper/foil or lightly grease the pan. Heat water and add a sprinkle of salt and bring to a boil. Add the cleaned French beans and shallots to the boiling water and  cook for 10 minutes. Turn off the flame and place the beans in an ice bath or chilled water.
4. Place the fish over the pan and add the beans and shallots on top. Loosely cover the fish with the edges of the butter paper or foil or you can even leave it open.
5. Heat the oven to 180°C and place the fish in the oven. Roast for at least 20 minutes to an hour.

Serve hot with kuboos / pita bread or any of your favourite flat bread and garlic paste or sauce.


Would you like to join Fish Friday Foodies?  We post and share new seafood/fish recipes on the third Friday of the month.  To join our group please email Wendy at wendyklik1517@gmail.com.


And now for some of the lovely, healthy Whole Fish Recipes by our awesome #FishFridayFoodies from around the world:


SELF-HOSTED WORDPRESS

Tuesday, 12 April 2016

Easy-Peasy Garlic-ky Mini Rolls #BreadBakers #NoBake

I am thankful to our Good Lord for showing His Mercy on us. My dearest Daddy had a mild chest pain last Thursday and my little girl and I rushed over to Dad and Mum's home which is a little away from the city where we stay.


I did not remember about this BreadBakers' event as a result as I was too stressed having just lost Mummy 11 months ago. My sisters who are abroad were petrified and asked me to leave at the soonest. Luckily Dad's initial cardiac results were normal. He has to go through a TMT on Tuesday and so I am scheduling this post ahead of time. We also have to drive back to our apartment with Daddy as he plans on staying with us for a bit so I may be settled only by evening hours to complete the updated post links which is ok owing to the time difference which will still  meet the event challenge time. Since it is my first time at scheduling a post, I am a tad nervous it may not happen on time. Nevertheless, family is the most important, Food always takes second place to Family, so Karen please excuse me in case this does not happen on time.


I would like to thank my good friends (you know who you are) for checking in on Daddy's health and my well-being during this trying time even if for a day or two. Also thank you for cheering me up with shared laughter and moments via calls, visits and messages. You are amazing! Just goes to show who true friends are and the love that you bestow on me is irreplaceable. God bless your families and you abundantly.


Since I did not bake ahead of time and if you have been following my posts since last May, you would know that Mum's oven is at our other home which does not make it easy for me to go over just to bake these rolls. As although we have a full fledged kitchen there all the ingredients and tools are at this home . So what started as my experiment to make Garlic Dough Balls turned out to be Garlic Mini Rolls. We had a rough Sunday night with my little girl feeling ill and so when I made this on Monday afternoon, I was pretty groggy. Sorry about the last day name change of my recipe title Karen.


My husband and I consume raw garlic as a part of our morning routine. This was started a few years ago, when a nutritionist asked my husband to have it as he seemed to have a borderline high cholesterol value back then. Then it became a habit and when we learnt of the many benefits of garlic, then it just became a part of our daily routine.


So the last time I tried this technique of baking is when I was at home after Mummy's passing away and had committed to making Whole Wheat Pita Bread. Trust me when I say that this is not only an easy technique of baking but gives almost the same results as the oven if done right. For those of you who have an oven, I will provide instructions as to how to bake it normally in the oven as well.

Garlic happens to be my favourite condiment so I could not resist participating in this event. I would like to thank the lovely Karen H Kerr of Karen's Kitchen Stories for choosing this theme.

You can serve these mini rolls with your favourite soup or simple as an appetizer as well. 

The Verdict: My 6 year old gobbled up most of these rolls as a snack! :D


You need:
  • 1 pod of a medium sized garlic, peeled and cleaned; half the pod sliced finely, other half minced or microplaned
  • 2 tbsp of butter / ghee (Clarified Buter) / Olive oil
  • Salt - 1 tsp + a sprinkle
  • 1 cup of whole wheat flour 
  • A pinch of sugar
  • Luke warm water  -  to knead
  • 1 tsp Yeast


The Make:
Makes 8 mini rolls | Preparation time: 10 minutes | Rising Time: 30 minutes | Cook Time: 10 minutes

1. Proof the yeast by taking the yeast with a pinch of sugar and mixing it with some lukewarm water in a small bowl. Let it stand for 5-10 minutes till it froths.
2. Next in a large vessel, add the yeast, flour and salt and knead well with the lukewarm water added in bit by bit to form a smooth dough ball. Allow to rest in a warm, dark place for at least 30 minutes. The dough would have doubled.
3. Using a mortar and pestle, crush the finely sliced garlic pieces with the butter, ghee or oil. If you do not have a mortar and pestle you can do this with your grinder/blender and if using the oil, slowly trickle the olive oil in during the grinding process. The resultant will be a creamy garlic butter. Add a sprinkle of the salt and mix well. Set aside half of the garlic butter. If you are using a blender, do not exceed a minute.
4. Next knead in half of the garlic butter in the dough and roll the dough within your palms to a longish log, as evenly as possible. Cut out pillows of dough as even as possible and roll the dough into balls or in my case pillow-shaped. Repeat till the entire dough is used and placed on the vessel with some distance between the dough pillows to allow it to expand.
5. The dough bits will expand further. Next brush the top of the dough rolls with the remaining half of the garlic butter and place the minced garlic on top and lightly press down.
6. After brushing, heat the remaining garlic butter in a pan and place the dough rolls on the pan. Cover with a lid with a steam outlet or slightly left open to allow steam to pass. Heat each side for 2 minutes.
7. For those using an oven, butter the baking pan with the remaining garlic butter after brushing the dough bits and line the dough rolls at a distance from each other. Bake for 10 minutes until lightly browned. Flip over in case you do not have top heat in your oven.

Serve hot aside your favourite soup or as it is with some butterspread/cheese spread.

April 2016's #BreadBakers' event : Our ingredient of the month is GARLIC, in celebration of National Garlic Day in the United States - 19 April - and one of our favorite food holidays. Black garlic, white garlic, elephant garlic, smoked garlic; powdered, roasted, raw, crushed or whole, include some garlic in your bread!

Now for some lovely Garlic breads from our #BreadBakers family of amazing bakers:


BreadBakers

 #BreadBakers is a group of bread loving bakers who get together once a month to bake bread with a common ingredient or theme. Follow our Pinterest board right here. Links are also updated each month on this home page.

We take turns hosting each month and choosing the theme/ingredient.

If you are a food blogger and would like to join us, just send Stacy an email with your blog URL to foodlustpeoplelove@gmail.com.

Wednesday, 2 March 2016

Kids' Special# 4 - Soft Noodles with Veggies and Poached Egg #FoodieExtravaganza


It has been a long time since the last Kids' Special. I started this tradition of sharing Kids' meals a few weeks before my Mummy passed away and frankly speaking I never wanted to restart it as it reminded me too much of her. 


When Lauren Mitchell of From Gate to Plate hosted March's  #FoodieExtravaganza event Noodles, I had no choice but to restart the Kids' Special as I had already prepped the dish and had to only post the same. And for this thank you from the bottom of my heart dear Lauren. Also special thanks for allowing me to partake in this month's Noodles event though I was a little late without which I would have probably further delayed the sharing of G'Gina's Kitchenette's Kids' meals tradition. 


I have always wanted to make noodles or pasta from scratch. Never had a chance to buy the pasta maker though (someday!! sigh!)


Although this is not Mum's Recipe per say, it reminded me a lot of how she would cook up noodles for her grand kids when we all came visiting home as all of them love noodles.


You need:

  • 1 packet of dried noodles of your choice (400 gms)
  • 1-2 eggs (optional, I used quail eggs)
  • Vegetables of your choice - chopped or diced (2 cups)
  • Salt to taste
  • Seasoning - A pinch each of turmeric, garam masala, coriander powder
  • Cup of Fresh stock or 1 stock cube
  • 1:1 ratio of Water to noodles
  • Water to boil veggies
  • 1-2 cloves of garlic shavings (optional)
  • Drizzle of oil
  • Drizzle of Soya sauce

The Make:

Serves 2 kids | Preparation Time: 5-10 minutes | Cooking Time : up to 20 minutes

1. Boil the noodles in same quantity of water (or a little less) on medium-low heat. Once the water is cleared, set aside. Boil the veggies until half cooked in another bowl. Drain and set aside.
2. Meanwhile in a wok, drizzle some oil in a wok and add the half cooked veggies and garlic shavings and saute well. 
3. Next add the stock cube, seasoning, salt to taste and saute for a minute.
4. Toss in the noodles and a drizzle of soya sauce (my kid likes it. You can skip it if you like) and saute it for a minute.
5. Serve hot with a poached egg on top. I intentionally did not swirl the water while poaching the egg as my kid likes to see the yolk. This was done with quail egg.

Foodie Extravaganza

Posting day is always the first Wednesday of each month. If you are a blogger and would like to join our group and blog along with us, come join our Facebook page Foodie Extravaganza. We would love to have you! If you're a spectator looking for delicious tid-bits check out our Foodie Extravaganza Pinterest Board! Looking for our previous parties? Check them out HERE.    

And now for the star recipes from the #FoodieExtravaganza Noodle Party goers:

One Pot Garlic Pasta by From Gate to Plate
Haluski (Fried Cabbage & Noodles) by Making Miracles
Homemade Chinese Noodles by Fearlessly Creative Mammas
Spicy Shrimp with Peanut Noodles by cookinandcraftin
Bacon and Beer Mac & Cheese by Sew You Think You Can Cook
Sopa Seca de Fideo - Spicy Mexican Noodles by Food Lust People Love
Green Bean and Squash Laksa by Caroline's Cooking
Kakaós Tészta (Hungarian Cocoa Noodles) by Tara's Multicultural Table
MiMi's Baked Ziti by Cooking With Carlee
Tortellini and Tomato Salad by The Freshman Cook
Homemade Noodles by Our Good Life
Tossed Homemade Macaroni Noodles by A Day in the Life on the Farm
Kids' Special# 4 - Soft Noodles with Veggies and Poached Egg by G'Gina's Kitchenette

Saturday, 20 February 2016

Maryland Crab Soup #FishFridayFoodies

This month Fish Friday Foodies theme is 'Seafood Stews and Soups of the World'. Some suggested ones included: bouillabaisse, bourride, cioppino, caldo de mariscos, courtbouillon, chowder, bisque, Mae-un tang, Shui Zhu Yu, Tom Yum, etc. Our gracious host Stacy Livingston Rushton of Food Lust People Love set this lovely theme with a motto of 'Let's take a world tour together one comforting hot bowl at a time!'


I was glad to try this recipe out. Hope you enjoy making it as much as I did!


This recipe comes to you from the Chesapeake Bay area in the USA!! 


I made this prior to Lent 2016 as we do not eat any meat, fish or eggs during the days of Lent.


What do you need:

  • 4 large tomatoes, boiled and slightly mashed (in whole)
  • 1/2 cup of lima beans or white beans
  • 1/2 cup of sliced carrots
  • 1/2 cup of corn kernels
  • 1 tbsp of chopped onions
  • 11/2 cups of water
  • 2 tbsp of Old Bay Seasoning (Refer Notes*)
  • 1 cup  of beef broth 
  • 1/2 kg crab meat - either blue crab if available or in my case the Three-spotted crab (Refer Notes*)
  • 8-10 crab claws, steamed and cracked slightly
  • 11/2 litres water


The Make:
Serves 5-6 adults | Preparation Time: 10 minutes | Cooking Time: up to 30 minutes

1. In a large cook pot (with a lid), place the tomatoes, carrots, corn, onions, lima beans and sufficient water along with the beef broth and Old Bay (or alternate) seasoning and cover and cook for 5 minutes on medium-low heat.

2. Boil the 11/2 litres of water to boil, add the cracked crab claws and boil for another 5-6 minutes. Drain the crab and set aside.

3. Next add in the crab meat and the claws if you are ok with it (*Refer Notes) to the cook pot. Serve hot with your favourite soup sticks, crackers, bread or on its own.


Notes:
1. Since we live in India now and Old Bay Seasoning is not available what you can do is take a mix of mustard powder, paprika, celery salt, bay leaf, black pepper, crushed red pepper flakes, mace, cloves, allspice, nutmeg,cardamom powder and ginger powder. Please feel free to avoid one or more of the ingredients based on availability. For eg. instead of celery salt, I added 2 tbsp of diced celery.
2. Some people do not like claws or shells or bones of fishes/meat in their serving plate so you can skip accordingly.
3. For the crab meat, you can either use already picked crab meat from the market if available or you would have to shell it yourself which is not too hard really. There are a lot of self help videos available. One such videos for your convenience is available here. In my case I love the bones and shells in my fish and shell food so I took the liberty of adding it in here. My daughter too loves to crack a claw and have the juicy meat of the crab so double the fun! 


Would you like to join Fish Friday Foodies?  We post and share new seafood/fish recipes on the third Friday of the month.  To join our group please email Wendy at wendyklik1517@gmail.com.

Visit our Facebook page and Pinterest page for more wonderful fish and seafood recipe ideas.


Tuesday, 12 January 2016

Eggless Sorghum and Pearl Millet Banana Muffins (Eggless Jowar and Bajra Banana Muffins) #BreadBakers

Happy New Year readers. I have had a good start to the year meeting friends of old and family. I feel blessed to have moved to our new location which is giving me a chance to meet lots of wonderful people from my life with many more to come in the days ahead. This is why you haven't heard from me since Boxing Day.


These days a lot of diets have non-gluten ingredients to make a way for those who are gluten intolerant. Although initially I thought of making these muffins using only Sorghum, I added in the Pearl Millet in small quantities and glad that I did so, as it adds some texture making it seem crunchy. Loved the reaction of my tasters. I had my daughter who at first point blank did not like it as it seemed too healthy to another toddler (Mahi) who downed two muffins as he loved it to another doll (Riddhi) also who pretty much gobbled it up as her mum said. So you know that with kids this muffin could go either ways. The adults all seemed to have liked it even though it was butterless, 'refined' flourless and colour wise looked different from your regular muffins.In fact one of the tasters who does not like banana in her muffins surprisingly did not notice the banana until it was pointed out to her. There were others who pointed out that the muffins tasted like a prasadam (holy food) they received from the temple. They did not particularly like it though they said it was edible and would be enjoyed by health freaks and kids whose parents were health conscious.


Sorghum or Jowar has heaps of health benefits including but not restricted to protection against diabetes, insulin resistance, inhibit cancer tumour growth, safe for people with celiac disease as it is gluten free, manages cholesterol and is known to help treat human melanoma.


Pearl Millet or Bajra (the poor man's grain) is an excellent source of protein and fiber with easy to digest amino acids than the ones found in wheat. It helps reduce cholesterol, maintains good heart health, reduces blood pressure and lowers the risks of heart attacks. Rich in phosphorous which is a constituent of lipid-containing structures such as cell membranes and the nervous system.Apparently recent studies have also declared Pearl millets to help prevent gallstones in women. It also increases insulin sensitivity and reduces triglycerides. It also provides protection against breast cancer in pre-menopausal women and reduces the occurence of asthma and wheezing in children. It also reduces the risk of type 2 diabetes and hormone dependent cancers.However do not overdo your Millet intake as there are risks involved owing to low iodine content and resultant goiter. You could include it in your daily diet in small quantities.


I must admit I was seriously nervous and fascinated at the same time to try out these flours in making a baked bread (vs. a flatbread) as I have never used either Bajra or Jowar as a baked bread. Flatbread yes I have tried both Bajra and Jowar separately and together as well. So I cannot tell you how pleased I was with the result of these muffins. All thanks to Robin Beck of A Shaggy Dough Story who chose this fabulous theme of  'Ancient Grains' for the first month of 2016 Bread Bakers's event. Thanks Robin.


Since the relocation of homes, I did not see either these flours or grains at our present local market so I had my hubby bring the flour and grain from his recent work travel. Sorghum was available as a flour but the Pearl Millet had to be ground. Thanks Stacy for the guidance to grind my own flour :) The Pearl Millet has this really interesting fragrance when pounded as well. *4. Check notes

Cashews or almonds are optional. Here for just two of the muffins I added the cashews that my mum had chopped herself and soaked for Christmas 2015 (I ate them on my own :( ). She had it soaked for a while as she didn't make Christmas cake the year before as my grandma had passed on. I am treasuring that bowl of soaked cashews.

On with the make..

What you need:
  • 1/2 cup Sorghum Flour / Jowar Flour , sifted
  • 1/4 cup Pearl Millet Flour / Bajra flour, sifted *1. Check notes 
  • 1/2 tsp Baking Powder
  • 1/2 tsp Baking soda
  • 6-7 tbsp Sugar *2. Check notes 
  • 1/2 cup Oil *3. Check notes 
  • Pinch of Salt
  • 1/2 tsp Vanilla Essence
  • Cashews or Almonds for topping (Optional)
  • 3/4 cup of mashed bananas (of your choice)


The Make:
Prep Time: 10 mins | Cook time: 20 mins | Makes: 8 Muffins

1. Sift the flours together and blend in the salt, baking powder and baking soda. Let it rest for a while (at least 10 minutes).
2. In a large bowl, whisk the mashed bananas with the sugar, vanilla essence and oil until the sugar dissolves.
3. Next mix in the flour bit by bit to the whisked banana mixture until no traces of flour is seen.
4. Preheat the oven to 180°C. Meanwhile line your muffin tray with paper cups.
5. Spoon in the batter into each paper cup halfway leaving room for the batter to rise.
6. Sprinkle some chopped cashews or almonds on top.
7. Transfer the muffin tray to the oven rack and bake for 20 mins at 180°C.
8. Once baked, do a clean test with a toothpick and set aside for at least 10 minutes.

I kind of enjoyed these muffins warm. It depends on your taste buds really. I loved it especially once it came out of the oven and after the 10 minutes rest. If it gets too cold then just slightly heat it in the oven for a minute or less. These muffins are really light on your palate and does not leave a heavy after taste owing to the lack of gluten in the flours. Hope you enjoy making these as I did.

Notes:
1. Bajra seeds can be ground using a coffee grinder or a spices grinder
2. The Sugar can be adjusted depending on how sweet your bananas would be.
3. Preferably use an odourless oil like sunflower oil or corn oil.
4. For those of you in India and do not have either of these flours in your local market, you can get your Bajra or Jowar from Amazon, India. For those of you with an Amazon.com reach, try to get your Bajra or Jowar from their online portal.

This month's BreadBakers' theme is Ancient Grains, hosted by Robin at A Shaggy Dough Story. Ancient grains are generally accepted to mean grains that have remained largely unchanged/un-hybridized over the last several hundred years, which means NO MODERN WHEAT. Here's what our creative bakers came up with.
#BreadBakers is a group of bread loving bakers who get together once a month to bake bread with a common ingredient or theme. You can see all our of lovely bread by following our Pinterest board right here. Links are also updated after each event on the #BreadBakers home page.
We take turns hosting each month and choosing the theme/ingredient. If you are a food blogger and would like to join us, just send Stacy an email with your blog URL to foodlustpeoplelove@gmail.com.


BreadBakers