"This is a journey of my life since I was all of 12 yrs when I started my hand in cooking to now with displays of my learning and creations of recipes from around the world. My inspiration and role model has always been my Mum who has always created dishes from around the world and excellently well. I do not believe I would ever match to her culinary skills. I remember the times she could cook and bake almost 4-5 dishes in one go without ever letting one go under cooked or burnt! I was born and raised in Dubai, UAE and recently moved to India for family reasons. Kitchenette just means that over the decades, my kitchen has changed from that of my mum's to my uncle and aunt's, to my home in UAE and now in India. Pala't'te, describes both global cuisines ('Palatte'-diverse flavours) and pleasing diverse 'Palates'."
Showing posts with label Vegetarian. Show all posts

Wednesday, 2 March 2016

Kids' Special# 4 - Soft Noodles with Veggies and Poached Egg #FoodieExtravaganza


It has been a long time since the last Kids' Special. I started this tradition of sharing Kids' meals a few weeks before my Mummy passed away and frankly speaking I never wanted to restart it as it reminded me too much of her. 


When Lauren Mitchell of From Gate to Plate hosted March's  #FoodieExtravaganza event Noodles, I had no choice but to restart the Kids' Special as I had already prepped the dish and had to only post the same. And for this thank you from the bottom of my heart dear Lauren. Also special thanks for allowing me to partake in this month's Noodles event though I was a little late without which I would have probably further delayed the sharing of G'Gina's Kitchenette's Kids' meals tradition. 


I have always wanted to make noodles or pasta from scratch. Never had a chance to buy the pasta maker though (someday!! sigh!)


Although this is not Mum's Recipe per say, it reminded me a lot of how she would cook up noodles for her grand kids when we all came visiting home as all of them love noodles.


You need:

  • 1 packet of dried noodles of your choice (400 gms)
  • 1-2 eggs (optional, I used quail eggs)
  • Vegetables of your choice - chopped or diced (2 cups)
  • Salt to taste
  • Seasoning - A pinch each of turmeric, garam masala, coriander powder
  • Cup of Fresh stock or 1 stock cube
  • 1:1 ratio of Water to noodles
  • Water to boil veggies
  • 1-2 cloves of garlic shavings (optional)
  • Drizzle of oil
  • Drizzle of Soya sauce

The Make:

Serves 2 kids | Preparation Time: 5-10 minutes | Cooking Time : up to 20 minutes

1. Boil the noodles in same quantity of water (or a little less) on medium-low heat. Once the water is cleared, set aside. Boil the veggies until half cooked in another bowl. Drain and set aside.
2. Meanwhile in a wok, drizzle some oil in a wok and add the half cooked veggies and garlic shavings and saute well. 
3. Next add the stock cube, seasoning, salt to taste and saute for a minute.
4. Toss in the noodles and a drizzle of soya sauce (my kid likes it. You can skip it if you like) and saute it for a minute.
5. Serve hot with a poached egg on top. I intentionally did not swirl the water while poaching the egg as my kid likes to see the yolk. This was done with quail egg.

Foodie Extravaganza

Posting day is always the first Wednesday of each month. If you are a blogger and would like to join our group and blog along with us, come join our Facebook page Foodie Extravaganza. We would love to have you! If you're a spectator looking for delicious tid-bits check out our Foodie Extravaganza Pinterest Board! Looking for our previous parties? Check them out HERE.    

And now for the star recipes from the #FoodieExtravaganza Noodle Party goers:

One Pot Garlic Pasta by From Gate to Plate
Haluski (Fried Cabbage & Noodles) by Making Miracles
Homemade Chinese Noodles by Fearlessly Creative Mammas
Spicy Shrimp with Peanut Noodles by cookinandcraftin
Bacon and Beer Mac & Cheese by Sew You Think You Can Cook
Sopa Seca de Fideo - Spicy Mexican Noodles by Food Lust People Love
Green Bean and Squash Laksa by Caroline's Cooking
Kakaós Tészta (Hungarian Cocoa Noodles) by Tara's Multicultural Table
MiMi's Baked Ziti by Cooking With Carlee
Tortellini and Tomato Salad by The Freshman Cook
Homemade Noodles by Our Good Life
Tossed Homemade Macaroni Noodles by A Day in the Life on the Farm
Kids' Special# 4 - Soft Noodles with Veggies and Poached Egg by G'Gina's Kitchenette

Wednesday, 25 November 2015

Jamie's Oozy Beans with Spinach

This recipe is long overdue and as I had mentioned my last blog post on Chicken Masala Roast with Soya Sauce, I will be sharing roasts as we get into the holiday season of Thanksgiving, Christmas and New Year to help you prepare your celebratory meal. This is a perfect side to your Roast. I had served this with Jamie Oliver's Perfect Pork Loin with Crackling. Of course Jamie's Oozy Beans were Borlotti Beans (aka Cranberry beans) served with Agretti. Since Agretti was unavailable, I substituted with Spinach and Parsley. Also since I had no idea of where to get Borlotti Beans from or if they were even available in the local market, I substituted it with black-eyed beans or black-eyed peas which in some cultures are served within a New Year meal as it is supposed to ward of evil eyes. As noticed above, I have also substituted a couple of ingredients owing to the fact that it was no available in the local market.


This has to be the most simple side dish you can prepare to go with your elaborate main course and it is incredibly healthy. 


You need:
  • 1 small potato, cut in half
  • 1 large tomato
  • Water as required
  • 3 cups of black-eyed peas/ black-eyed beans
  • Bouquet of garni (as Jamie calls it - thyme, bay and sage leaves tied together. I used dried sage instead)
  • Pinch of Soda Bicarbonate
  • 6 tbsp + 1 drizzle of EVOO (Extra Virgin Olive Oil)
  • Pinch of salt
  • 1 tsp white vinegar
  • 1 bunch of parsley, few basil leaves, chives, thyme leaves (as available), finely chopped
  • 1 bunch of spinach, cleaned and chopped


The Make
Preparation time: 10 minutes | Soaking Time: 4 hours min | Cooking Time: up to 1 hour | Serves 4-5 adults

1. If you were using dry Borlotti Beans then you could soak it overnight in  a large pot with the beans covering only 1/4 of the pot and the rest covered with water and a pinch of soda bicarb. Then discard the water. In my case, since I was using the smaller black eyed peas, I soaked mine for 4-5 hours only.
2. In a large pot add the beans, herb bouquet, potato and tomato in full. Fill the pot up with water (twice as much as the beans).
3. Bring the beans to a gentle simmer for 50-60 minutes. When it is about to boil, turn down the flame. Resist the urge to cook these beans in a pressure cooker as the turn out would be different and so would the taste.
4. Next take out the potatoes, the herb bouquet, squish some of the tomato pulp with the back of a ladle into the pot and take the tomato out.
5. Next pour out 80% of the residual liquid from the pot into a bowl. Mash up the cooked potato halves and put some of it back to the pot to add a creamy texture.
6. Add the olive oil in the pot with the salt and vinegar and toss it over in the pot taking care not to mash the beans. Add one more drizzle of EVOO on top.
7. Add the chopped herbs and toss once more.
8. Cook the chopped spinach in salted, boiling water in another pot for 2 minutes and then drain it out and toss it in the roasting pan of your cooked choice of roast as if cleaning the roasting pan with it.
9. Add a bit of the reserved residual liquid from the pot which was set aside earlier to the beans pot and toss. Taste and add more EVOO and vinegar if required.
10. Serve the beans on a flat serving tray and top with the spinach tossed in the roasting juices. Then pour any residual juice from the roasting pan on top. Top with a slice of the pork loin or your roast and pour some of the roast's prepared gravy on top.

Jamie added a very important tip for those who hate beans for the obvious breaking wind ;) add Summer Savoury herbs. I checked it is available as an online buy on Ebay here. You can also add a few cloves of chopped garlic when cooking the beans.

Serve these Oozy beans with your favourite roast or Jamie's Perfect Pork Loin with Crackling.


Wednesday, 30 September 2015

Coleslaw (the KFC way)

Eating out is something which every family may want to do sometime or the other, most times during the weekend and with kids at home, it would probably be from the fast food chain. I quickly noticed on my move from UAE to India, that the one thing missing from most and literally all fast food chains was 'Coleslaw'. Even when I finally found one that did include coleslaw along with the main protein, it lacked the flavour that a good coleslaw contained.


Kentucky Fried Chicken (KFC) is one such outlet in the UAE, whose coleslaw I came to like. I say came to like as when I was young anything related to mayonnaise would give me a headache like you would not believe. I disliked coleslaw as a result back then.


Well I have been meaning to try out mum's version of KFC for a long time now and I am getting close. In fact hers is the non-fry version, so I am keen to share it very soon. Since I bought a second head of cabbage quite recently and mainly for the purpose of making coleslaw, I went all out yesterday and made it along with some Crispy Fried Chicken and Calamari as well.


Oh my I did not expect the turn out of the coleslaw to be so good! It tasted so close to the KFC make itself, I am quite surprised I nailed it. In fact the only thing I would have done differently is to have used a smaller size onion and preferable a white onion with white pepper powder (not black pepper). I have made notes of this in the Ingredients section below.


I can guarantee that once you make this your kids would probably think you bought it from a KFC outlet. Actually I would recommend you serve it in one of your KFC takeaway bowls. Foolproof and a sure winner!

You need:

  • 4 cups of finely chopped cabbage (approximately 1/2 of a cabbage head) 
  • 1/4 cup shredded carrot (1 medium carrot) 
  • 1 tbsp minced white onion
  • 1/4 cup mayonnaise 
  • 1/3 cup granulated sugar 
  • 125 ml milk 
  • 125 ml buttermilk 
  • 11/2 tbsp lemon juice 
  • 3/4 tbsp white vinegar 
  • 1/4 tsp salt 
  • Pinch of white pepper powder

The Make:
Preparation Time:10-15 mins | Serves 5-6 adults

1. Ensure that the cabbage and carrots are diced finely to the size of rice grains. You can use your food processor. I used my very handy Philips hand blender.
2. In a large bowl, combine the rest of the ingredients and whisk well until smooth and creamy.
3. Next add in the chopped vegetables and onion and mix well.
4. Cover the bowl and refrigerate for at least 2 hours before serving.

Serve on the side of your favourite protein. 

Wednesday, 1 April 2015

Brahmin Sambar (Lentil based vegetable chowder)

I can tell you that Sambar is one of the many dishes I refused to try until I knew that I could make it just right! There are a few such dishes I took time to cook not withholding Keralite Fish curry which I have made countless times now, avial, etc!


The best Sambar I have had thus far are three, my Mom's (as always), my hubby's Mom (I refuse to call her my MIL as she is one of the sweetest people I have been blessed with. In fact when I was getting married, I was warned by my Dad not to upset her ever! Apparently everyone in the families knew of her nature and my dad knows what a little tom-boy I could have been. I can tell you for certain I have never upset her till date although I have cried on her shoulders a couple of times. She is an excellent listener too! I feel sorry for those who crib about their mom in law! Anyways I better stop about talking her. I know a zillion women who would be jealous at knowing that such a MIL exists :)! I don't want any bad eyes to fall upon her :D!) The third is of a woman I don't want to rave about as she turned out to be a thief - she was our part-time maid and there is this tradition of a new mum having mostly vegetarian food right after having a baby esp. during the first 40 days. This lady used to make me some amazing Sambar after I had Izzy. If I could I would ask her how to make it in lieu of some of the money she stole but even if I knew her number she probably would not answer as she owes us a lot of money (not considering the cash she stole from both Dad and Mom).


This was a recipe I have tried on my own considering all three recipes plus some advice from my friends who come from a Brahmin household. Remember Sambar can have as many variations of vegetables. I have suggested ones that I have recently tried. You can opt out any vegetable with which you are not comfortable.


Sambar goes well with rice, idlis (steamed cake of rice) or dosas (Fermented crepe made from rice and ground pulses). I remember in Dubai we used to conveniently get  cut vegetables called Sambar mix vegetables either from Sunrise Supermarket or Lulu. No such luck here! :-(


You need:


  • 5-6 small onions, crushed with the back of your knife
  • 7-8 cloves of garlic, crushed and diced (Nos of cloves are optional but I like my sambhar to be accented with garlic flavour)
  • 1/2 tsp Fenugreek seeds
  • Vegetables - carrots (2 nos), drumsticks(3-4 nos, each stick cut into 2" each), eggplants(4 nos small sized), ash gourd (400-500 gms), potatoes (2-3 nos), okra (300-400 gms), tomatoes (2 nos); chopped in medium bite size pieces
  • 1 cup Toor dal
  • 1 tbsp Chana dal (optional) [I sometimes add masoor dal or moong dal instead of chana dal]
  • 1 tbsp Sambar powder (My marital mom introduced me to Brahmins' Sambar powder. In case you do not have Sambar powder where you stay, you can attempt to make it. Recipe here or here)
  • 1/4 teaspoon Turmeric powder
  • 2 pinches Asafeotida
  • Tamarind (1 gooseberry sized ball ), soak in hot water and strained
  • 1 tbsp coriander powder
  • 1/2 tbsp Red Chili powder
  • 1 cup gated coconut (optional) [I would add coconut very rarely - not a practice at home]
  • Curry leaves, 1 sprig
  • Salt to taste


For the seasoning:

  • 1 tsp mustard seeds
  • Curry leaves, 1 sprig
  • Coriander leaves - 2 tbsp, chopped finely
  • Oil


The Make
 Cooking Time: 25-30 minutes | Preparation time: 10 minutes | Serves 3-4 adults

1. In the pressure cooker, cook the washed/cleaned toor dal, add a pinch of turmeric powder and asafoetida.
2. In a large covered pot, cook the vegetables (except the okra and drumsticks) with the turmeric powder, salt and tamarind juice.
3. Meanwhile, in a small pan, add a drizzle of oil, the onions, half quantity of crushed garlic and sambar powder. Saute well taking care not to burn it. Next add in the okra and drumsticks and saute for about 2 minutes. Add this to the cooked vegetables.
4. Next in the same small pan, add another drizzle of oil. Toss in the curry leaves, chana dal, fenugreek seeds, red chili powder and coriander powder. Saute well. Then set aside to cool and grind it a paste. You can add the coconut (optional) at this stage and make it into a fine paste.
5. Once the vegetables are cooked, add the ground mix and pressure cooked dal to it.
6. Add some oil to the small pan, add the mustard seeds, curry leaves and remaining garlic. Saute for a minute on medium-low heat. Set aside.
7. Add salt to taste to the cooked vegetables and allow it to run to a boil.Once bubbles appear, add the seasoned oil from the small pan.
8. Garnish the Sambar with the coriander leaves and serve hot with rice of your choice or idlis/dosas.


*The pictures I have added are from two versions of Sambar I made. Variations are in terms of the dals used and the choice of vegetables.

Tuesday, 3 March 2015

Muringaella Thoran (Drumstick tree (Moringa Oleifera)'s leaves with coconut gratings)

Somehow it is becoming increasingly difficult since Lent started to write my recipe creations. There is a lot of challenges I experience during Lent and quite unexpected too. I guess that is what happens in the spiritual world with a battle between Good and Evil! So it is probably but natural that a lot of these challenges and unwanted concerns arise during the season of Lent. How you deal with it is probably a test of your faith.  Also, I seem to have a lot going on at once and hence the delay in sharing this way too simple recipe.


You can prep this dish when you are free or even whilst doing another activity that does not involve using your hands. You can even get your toddler/little ones to assist. They will definitely enjoy doing so and you can have some fun time with them as well while prepping for the dish.


These  leaves came from my parents' garden. I have always loved the drumsticks' tree leaves. And as mentioned in an earlier blog post we grew up in a villa which had this huge Moringa Oleifera tree growing in our front yard garden! These leaves are rich in Vitamin B, C, Provitamin A, Vitamin K, Manganese, Calcium and yes Protein!! Remember overcooking these leaves as with some other leaves as well would kill some of its nutrients. So it is normally cooked on medium-low heat of up to a maximum of 60°C.

Prepping the leaves requires either some old newspapers or a 'Muram' which is either a bamboo or plastic tray. It looks like this. I have the plastic version and will share the photo soon. So you basically you take the drumstick branches and gently tap it on the newspaper or the Muram and the leaves fall off the branches and stems.

You need to make sure to discard the thinner stems as well as it can get in the way once you cook it and tends to taste more bitter than it should. Also its quite stringy so you really cannot chew your way through it. I have photos of version#1 for you where I experimented cooking the thinner stems. It was a pain to get them out of the cooked dish. So make sure you painstakingly discard the stems prior to cooking.


This is mum's recipe <3


You need:


  • 5 cups Drumstick leaves, washed clean and separated from branches and stems*
  • Half a small coconut, grated *
  • 1/2 tsp of Turmeric powder 
  • 1/3 cup Split Pigeon Pea (Toor dal/Tuvara dal), semi-boiled (optional but adds more texture and flavour and not to forget added protein!)
  • 1/2 cup Red pearl onions/shallots/small onions
  • 1 medium sized onion, finely diced
  • 1 sprig curry leaves
  • Salt to taste
  • Water to sprinkle
  • 2 Green chilies, chopped finely
  • 2 tsp cumin seeds (jeera/jeerakam)
  • 3-4 cloves garlic
  • Cooking oil


The Make:

Preparation time: 5 to 10 minutes | Cooking time: 15-20 minutes  | Serves 2 adults

1. Set the washed and separated leaves aside on a colander to drain.

2. Next using a mortar and pestle or a grinder, crush the coconut gratings, garlic, cumin seeds and pearl onions with only a sprinkle of water not more.

3. Transfer the drained Moringa Oleifera leaves and crushed ingredients to a large bowl and add the salt, green chilies and turmeric powder.

4. Add the drained semi-cooked split pigeon peas to the bowl.

5.Splutter mustard seeds in oil a large deep bottomed pot or wok and add the curry leaves.

6. Next add the sliced onion and fry for about a minute or until translucent.

7. Lower the heat to medium-low and add the drumstick leaves with the ground mixture blend and saute slightly. Cover and cook for not more than 15 minutes or until the leaves are cooked and no residual water present. The leaves turn to a nice dark green colour as well.

Serve hot with steamed rice.

*Note:
Since we eat very less coconut in our diet, I restricted it to half of a small coconut you could add more as you require and in proportion to the quantity of drumstick leaves. So for 3 cups of drumstick leaves, I added 1/4 cup of coconut.

Bon Appetit!

Thursday, 19 February 2015

Simple Penne Pasta with Mushrooms

With the Lenten season 2015 here, I believe many of you will benefit from some of these simple recipes to be shared on G'Gina's Kitchenette. Many practicing Christians abstain from non-vegetarian food to the extent of eggs and dairy being eliminated from all meals during Lent. These days a lot of people abstain from their favourite foods including chocolates or choice meals. Some even abstain from social networks, etc. While this is admirable, unfortunately I cannot abstain from social networks as most of my work is done online :)!


So for now it is still simple meals and vegetarian food. However I will share some other recipes as well to benefit my readers who are not practicing Lent.


You need:


  • 300 gms of penne pasta (I used a whole wheat variety)
  • 250 gms of Mushrooms, diced  (you can use any variety, I used smaller button mushrooms)
  • Extra virgin olive oil (EVOO)
  • Olive oil - cooking variety
  • Fresh or dried parsley (1 bunch or 2 tbsp)
  • Salt to taste
  • Paprika (optional)
  • Water to boil
  • 3-4 cloves of garlic, grated finely


The Make:
Preparation Time: 5 minutes | Cooking Time: 30 minutes| Serves 3-4 adults

1. Bring water to boil in a deep pot or wok and  once on a roll, lower the heat and pop in the pasta. Cover and cook on medium heat for 20 minutes or until al dente. Drain and set aside.
2. In the same wok, drizzle some olive oil and saute the mushrooms for 5 minutes. Pop in the grated garlic and parsley and saute for another 5 minutes. You can also add the paprika and salt at this point.
3. Add in the cooked pasta and toss well. Add in the EVOO and serve hot.

Sunday, 11 January 2015

Okra, Drumsticks and Chow Chow in tangy Tomato stew

Chayote or best know in India as Chow Chow is a rich in Vitamin C whether raw or cooked. It has several names (from all over the world) including but not limited to choko, pipinola, ishkus, guatila, sayote, etc.Okra or Lady's fingers adds nutrition in terms of Vitamin A, B-6, C, D, Iron, Magnesium and Calcium. Drumstick (Moringa Oleifera) is yet another vegetable which is a rich source of several vitamins, minerals, protein, etc. This combination of Iron with rich Vitamin C sources ensures higher chances of iron absorption.


Growing up drumsticks were my favourite vegetable be in the form of its pods or leaves. My mom had no issues in my having vegetables unlike some parents who have to fuss over their kids not having their greens. She did have to force my sister though who was a die hard non-vegetarian. Ok before she kicks me (virtually), I better not add to it. I used to refer to the drumstick as 'nyum nyum'. Now my darling little one too is a fan of this vegetable. She enjoys the leaves too. These days it is not sold in the market at metros however my folks give me a good supply when I visit Kerala. It is eaten treasured by us.

There was no shortage of supply of both the leaves and pods owing to the fact that we had a huge drumstick tree growing out in our garden (even though we lived in Dubai, UAE). It also was a source of supply for the neighbours, strangers and such. I remember my mom yelling at strangers picking from our tree who shamelessly went about their business of picking despite the yelling.

There is no source of this recipe, it was been tried due to nutritional factors, tested to improve repeatedly and enjoyed by us several times in our home.


You need:

  • 8-10 sticks of drumsticks, peeled and cut into pieces (1 stick makes about 3-4 pieces)
  • 3 medium sized chow chow, diced finely
  • 1/2 kg lady's fingers, chopped into bite sizes
  • 4 cloves of garlic, crushed
  • 1/2" ginger, crushed
  • 3-4 large tomatoes, finely diced
  • 1/2 cup of tomato puree
  • 2 green chilies (slit lengthwise)
  • 1 tbsp garam masala
  • 1 tbsp Kashmiri Chili powder or Paprika powder
  • 1/2 tbsp Amchur (Dry Mango Powder)
  • 1/2 tsp Turmeric powder
  • 1/2 tbsp Coriander powder
  • 2 tbsp tamarind water
  • 1 tbsp oil
  • 1/2 tbsp cumin seeds
  • 1 large onion, diced
  • Salt
  • 2 - 4 cups drinking water

The Make:
Serves 5 adults | Preparation time: 10 minutes | Cooking Time: 20-25 minutes


1. In a wok, add the oil and splutter the cumin seeds and add diced onion for a minute or until translucent.
2. Next add the ginger, garlic, green chilis and saute for about a minute.
3. Add the lady's finger and saute well for about 5 minutes.
3. Toss in the tomatoes and blend in until softened.
4. Add the dry spices and saute for about a minute. Add in the tomato puree and salt.
5. Next add the chow chow and drumsticks and cover and cook for about 10 minutes on medium-low heat.
6. Add the tamarind water and drinking water as required for the gravy and cover and cook for another 10-15 minutes taking care not to over soften the veggies.
7. Toss well and serve with rice, rotis or your choice of flat bread.

Bon Appetit!


Sunday, 26 January 2014

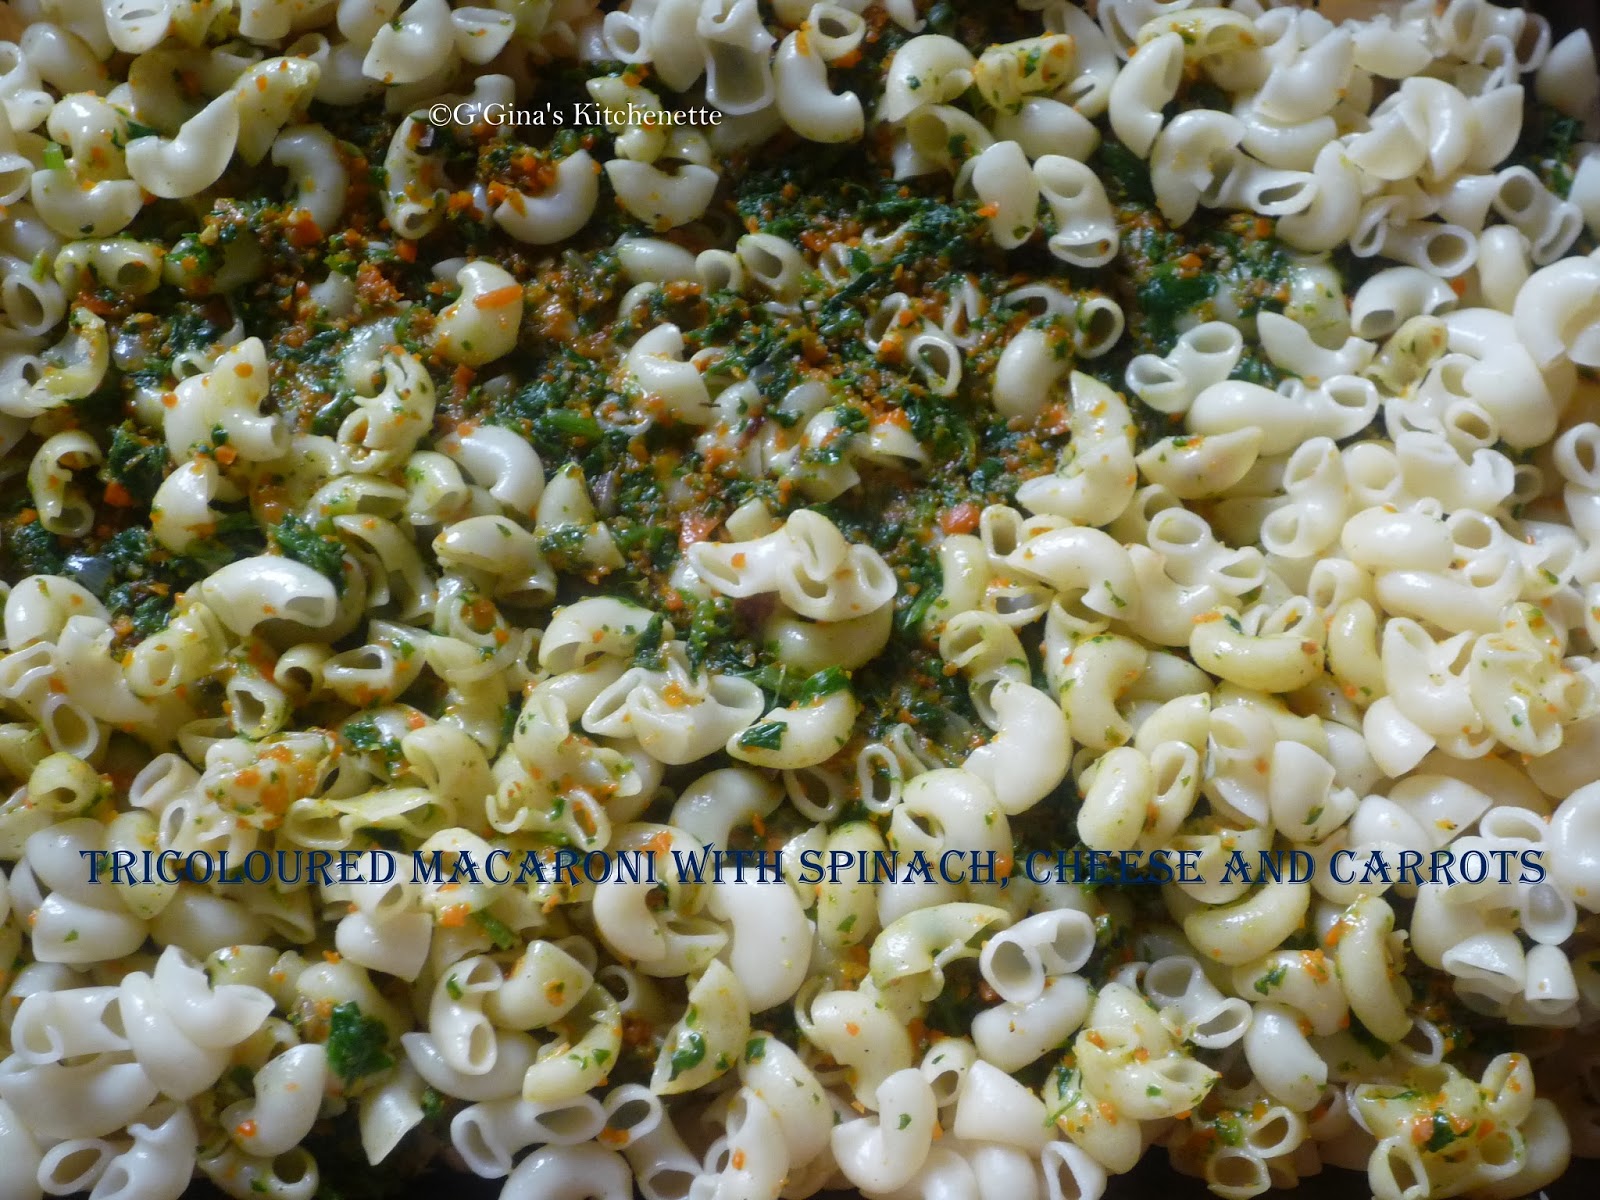
Tri-coloured Macaroni - Cheesy Baked Macaroni with Spinach and Carrots - An Indian Republic Day special

I was contemplating on whether to post this recipe so late in the day and it struck me that some of the readers from across the globe could still be beginning their day. I had a very long weekend with the family as it was my munchkin Isabelle's birthday on the 25th. Actually her birthday officially is on 25th  as per UAE time as she was born in the UAE. But as per Indian time she was born on 26th so you can say she is a Republic Day baby :)


I have been awfully busy, what with the three celebrations my darling had for her 4th birthday! I am glad to see she had a wonderful time with her friends. I too made some new friends as a result.


I know Macaroni is not a very Indian trend but all the main ingredients for this recipe were 'Made in India' and it reflects the colour of our Indian flag (Saffron, White, Green) so I am truly happy that what was a coincidental make actually turned out to be right in time for our Republic Day celebrations! Of course I would have loved if I could I have incorporated the Navy Blue Chakra colour as well but I think I will leave that for next time. Doing it this time amidst the birthday rush would have been a bit too ambitious! This is what is for dinner tonight folks, so I hope you enjoy making this simple Tri-coloured (and healthy) pasta.


You need:


  • 500 gms macaroni/pasta of your choice
  • 2 cups of grated cheese of your choice (you can opt for the low fat version)
  • 4 cups of grated carrots
  • 4 cups of finely diced spinach
  • 4 cloves of grated garlic
  • 1 small shallot, finely diced
  • Pepper to taste
  • Pinch of thyme
  • Pinch of dried Parsley leaves (you can use the fresh version)
  • Water to boil
  • Olive oil
  • Extra virgin olive oil  (EVOO)for drizzling (optional)


The Make:
Serves 7 adults | Preparation Time: 10 minutes | Cooking Time: 20 minutes

1. In a large pot of boiling water, add the macaroni and some salt. Lower the flame and allow to cook over the next 5 minutes. Stir occasionally to evenly cook. Make sure the pot is sufficiently large to allow the macaroni to cook and avoid breaking or sticking together.
2. Meanwhile, heat the oil in a deep-bottomed wok and saute the shallots until lightly brown.
3. Add the garlic, carrots, spinach, thyme and parsley, pepper and a pinch of salt and cover and cook on medium-low heat.
4.  Next in a Pyrex oven resistant baking dish, layer the macaroni, followed by a layer of grated cheese and the cooked veggies and then another layer of cheese and repeat.
5. Place the dish in the oven at 150°C and bake for 5-10 minutes. Leave in the oven until serving time. Drizzle some EVOO over the macaroni before serving.

Serve hot! Happy Republic Day dear citizens of India!

*Note: Non-vegetarians you can add some cooked mince to this dish with the veggies if desired. I didn't as I had vegetarian guests and also I wanted it to look similar to the colours of our Indian flag :)


Friday, 20 December 2013

Fried Rice - Mummy's recipe

As I mentioned in the Duck roast post, this Fried Rice would be an excellent accompaniment to the Duck Roast. Not only is this a simple to make accompaniment, it is also goes well with the Duck Roast Gravy! I used to always resign myself to the fact that rice was something I was never good at making esp. Fried Rice, Biriyani, etc. Well not until I followed mum's instructions to the 'T' and also had a televised encounter with Jamie Oliver :) So all it takes is good listening (and might I add obeying) skills to get it right (after a few tries).


This one is mum's recipe so it turned out pretty fab (Thank God as I had guests to feed).

To make this simple Fried rice,

You need:


  • 3 coffee mugs (about 600 gms) basmati (long grained) rice 
  • Salt to taste
  • 1/2 tsp cardamom powder
  • 1 large onion, diced finely
  • 1" ginger, diced finely or ground
  • 1" cinnamon stick
  • Veggies of your choice - carrots, green peas, beans, etc., diced finely
  • 6-7 cups of drinking water
  • 1-2 tbsp of cooking oil
  • 1 tbsp of ghee or clarified butter (optional)
  • Drizzle of oil (optional)


Method:

Serves 7 adults | Cooking Time: 15 minutes | Preparation Time: 15 minutes (to 1 hour)

1. Clean the rice and then soak for at least for at least 15 minutes to 1 hour. The reason for this is that the more you soak it, the lesser water would be required to be added during the cooking process which means lesser possibilities of turning up with a less than fluffed rice.
2. Boil 6 cups of water with salt and cardamom powder and a drizzle of oil (optional) to avoid the rice from sticking (I did not add any oil at this stage and it turned out fine) in a non-stick pot.
3. When the water comes to a rolling boil, lower the heat and take out a palm full of the soaked rice bit by bit, add it to the boiled water and discard the soaked water. Cover and cook until the rice comes to a boil. Turn off the flame and leave covered.
4. Heat the oil in a wok/non-stick pot and toss in the onions.
5. Saute the onions with a pinch or less of salt until translucent and then add the ginger and saute for a minute.
6. Toss in the cinnamon stick and saute for another minute.
7. Next add in the veggies and saute for a few minutes (with ghee - optional) until translucent.
8. Transfer the sauteed veggies to the half cooked rice and add another cup of water if required. Cover and cook for about 15 minutes on medium flame*.
9. Fluff the rice with a fork before serving. Serve hot with your favourite dish or Duck Roast.


*Tip: Medium flame as it would get too stodgy and take more time on low flame.

These pictures are again from a time before my blogging adventure began. I will replace them once I make this dish again. Just had to share the recipe as its only 4 days to go to Christmas :) 
Merry Christmas all!

Saturday, 28 September 2013

Kumble (Kumbul/Kumbil) Appam (Jackfruit wrap)


This recipe has been waiting to get posted since last year. Kumble leaves or a cousin version of the all-familiar Bay Leaf is used to make this wrap. It looks exactly like the bay leaf except bigger. The bark of the kumble tree does not get used commonly unlike the bay leaf tree whose bark  produces a milder variety of cinnamon. Kumble is pronounced as Kumbul or Kumbil not Kumbley as one would be tempted to especially the Cricket fans out there! :D


There are several versions to this wrap. I am posting the one that was made two holiday breaks ago (last September) at my parent's home in Kerala. Valsamma our maid/cook was behind this creation based on my mum's recipe. The recipe is fairly simple however it was being made for a large number of people which can be quite cumbersome.You can make it for a smaller number of people by equally reducing the quantities. The cooking time would also considerably reduce. It takes 20-30 minutes to make about 8-10 wraps.

The flavour of these leaves would go into the appams during the steaming process which is absolutely divine!


You need 
  • 20-30 nos. Kumbul leaves/ large bay leaves, cleaned and dried (You can even use banana leaves in case you do not get the Kumbul leaves)
  • 1 kg Jackfruit, diced (this is the actual weight of the jackfruit not after deseeding)  
  • 1 kg Rice flour 
  • 1 tbsp cumin (jeera) powder 
  • 1 tbsp cardamom powder 
  • Jaggery to taste and colour (I prefer the darker coloured kumble appam and it taste better too. 500 gms for 1 kg rice flour) / you can substitute with sugar but it just won't be as good  or healthy as jaggery :)
  • Water as required
  • Grated coconut (optional)


 The Make 

 Makes 20-30 wraps | Preparation Time: 15 minutes | Cooking Time: 60 minutes

1. Cook the jackfruit on low heat with jaggery, cardamom and jeera. If you have a slow cooker, this would work well. In our case, it was done at the fire place. This takes at least 30-40 minutes.

The jackfruit should soften and the resultant mix should be nice and pasty. Most of the water content should be gone, with just enough moisture and water content for the next step.


2. Once the mixture is cooled to room temperature, add the rice flour bit by bit and mix well. If the water content is insufficient, add a tad bit of water to help the mixture to be moulded together.

3. Next take about a golf ball sized dough and place the dough on end of the one of the leaves. Fold the other end tightly over the dough and use the remaining part of the same leaf to tuck into the dough as a pocket top. Repeat this for the remaining dough.


This version had lesser jaggery and some coconut as well

4. While doing the above process, heat water in the steamer or idli vessel and place the porous plate over it. Once the wraps are complete, place it in the steamer and cook each batch for at least 20-30 minutes. It would be helpful to have at least two steamers working in parallel for such a large batch.


Serve hot or cold as a snack or even as a breakfast meal. Bon Appetit!


Tuesday, 4 September 2012

Injera (Ethiopian Pancakes)

Whilst chapatis and dosas are common flatbread and pancakes of India, Injera is staple of pancakes in Ethiopia. Its texture is comparable to French crepes or Indian dosas. 'A' 's formative years were spent in Ethiopia when his parents worked there in their younger years. Lucky for me, as I have now begun to explore a cuisine which I never would have earlier on had I not known of it from A and my mom-in-law.

Injera is made of teff flour and is a yeast-risen flatbread with a slightly spongy texture. Teff is a unique grain which is iron-rich in nature. Teff flour is normally mixed with water and is allowed to ferment for days which is then used as a sourdough starter. The sourdough is stored for long periods and is subsequently used in batches of Injera batter to follow. The mildly sour flavour thus follows. Traditionally the batter for Injera is spread over a large clay plate. The batter has to be sufficiently liquid as that of a crepe to spread into a large circle. The bottom of the Injera would be smooth whilst the top would be porous in texture. The porous nature allows the Injera to scoop up stews, sauces and the like. I made the Injera with a Yefesoleya Wot (Ethiopian French beans Stew).
Injera with Yefesoleya Wot

I looked all over Hyderabad and did not find the Teff flour. 'A' checked with some of our Ethiopian church go-ers and they confirm that Teff was unavailable in Hyderabad and they are very  much adjusted to our chapatis and dosas now. They have promised to try and get me a batch of Teff flour in case someone known arrives from Ethiopia:). Reading online I read that some of the common variants to Teff flour is ground millet or ground Bajra. So I went with that.

You need:

  • 700 gms of millet flour or bajra flour
  • 1 packet of yeast (2 tsp)
  • 6 cups of boiled/cooled water

The make:

Cooking Time: 20 minutes | Preparation Time: 30 minutes | Makes 8-10 large injera

  • In a large deep bottomed pot/skillet, take 3-6 cups of the water and add the millet flour. Mix well by hand. Tip: Add 2-3 cups of water at first and the flour and slowly add more water as required till a sufficiently liquid batter is formed. Do not make it too watery.

The batter
  • Next add the yeast and mix well. Cover and allow the batter to rise up which takes a minimum of 10-20 minutes.
  • Preheat a large pancake pan to 425°F. I used an iron one I had from Mum's kitchen. 
Ladle in Injera batter
  • Take a deep curved ladle or a cup with at least 3/4 cup of the batter and pour it into the center of the pan and spread the batter with the ladle working your way in clockwise fashion. If using a cup you can pour from the outer circle and work your way in clockwise fashion to the center.
Injera batter spread on a heated pancake pan

  • Allow it to cook for 3-4 minutes and then transfer to a clean cloth. Continue the same way until the batter is completely used. Alternatively, you can also reserve a portion of the batter and refrigerate to use as a starter for your next injera batter mix. You can serve this with a stew of your choice. I served it with  Yefesoleya Wot (Ethiopian French beans Stew).
Injera served with Yefesoleya Wot
  • Serve warm. Cover and store in a cool, dry place for later meals. Refrigerated, the injera can also last 2-3 days.
Bon Appetit!