"This is a journey of my life since I was all of 12 yrs when I started my hand in cooking to now with displays of my learning and creations of recipes from around the world. My inspiration and role model has always been my Mum who has always created dishes from around the world and excellently well. I do not believe I would ever match to her culinary skills. I remember the times she could cook and bake almost 4-5 dishes in one go without ever letting one go under cooked or burnt! I was born and raised in Dubai, UAE and recently moved to India for family reasons. Kitchenette just means that over the decades, my kitchen has changed from that of my mum's to my uncle and aunt's, to my home in UAE and now in India. Pala't'te, describes both global cuisines ('Palatte'-diverse flavours) and pleasing diverse 'Palates'."
Showing posts with label Chocolate. Show all posts

Wednesday, 5 October 2016

Crispy Chocolate Surprise Balls #FoodieExtravaganza

Aaaah I'm back and for one of my favourites 'Chocolate'! Thank you Kathleen for my favourite Chocolate theme in time for me to pick up the pace on my food blog as well.


Kathleen Coe Clegg is the wonderful hostess of our October's theme 'Chocolate' over at Foodie Extravaganza. She is the owner of 'Fearlessly Creative Mammas', a wonderful blog sharing recipes from her home.


This time I wanted to do something similar to cake pops except it is presented a lot differently.


I enjoyed making this treat as I knew my little girl would love it.


Tuesday, 8 March 2016

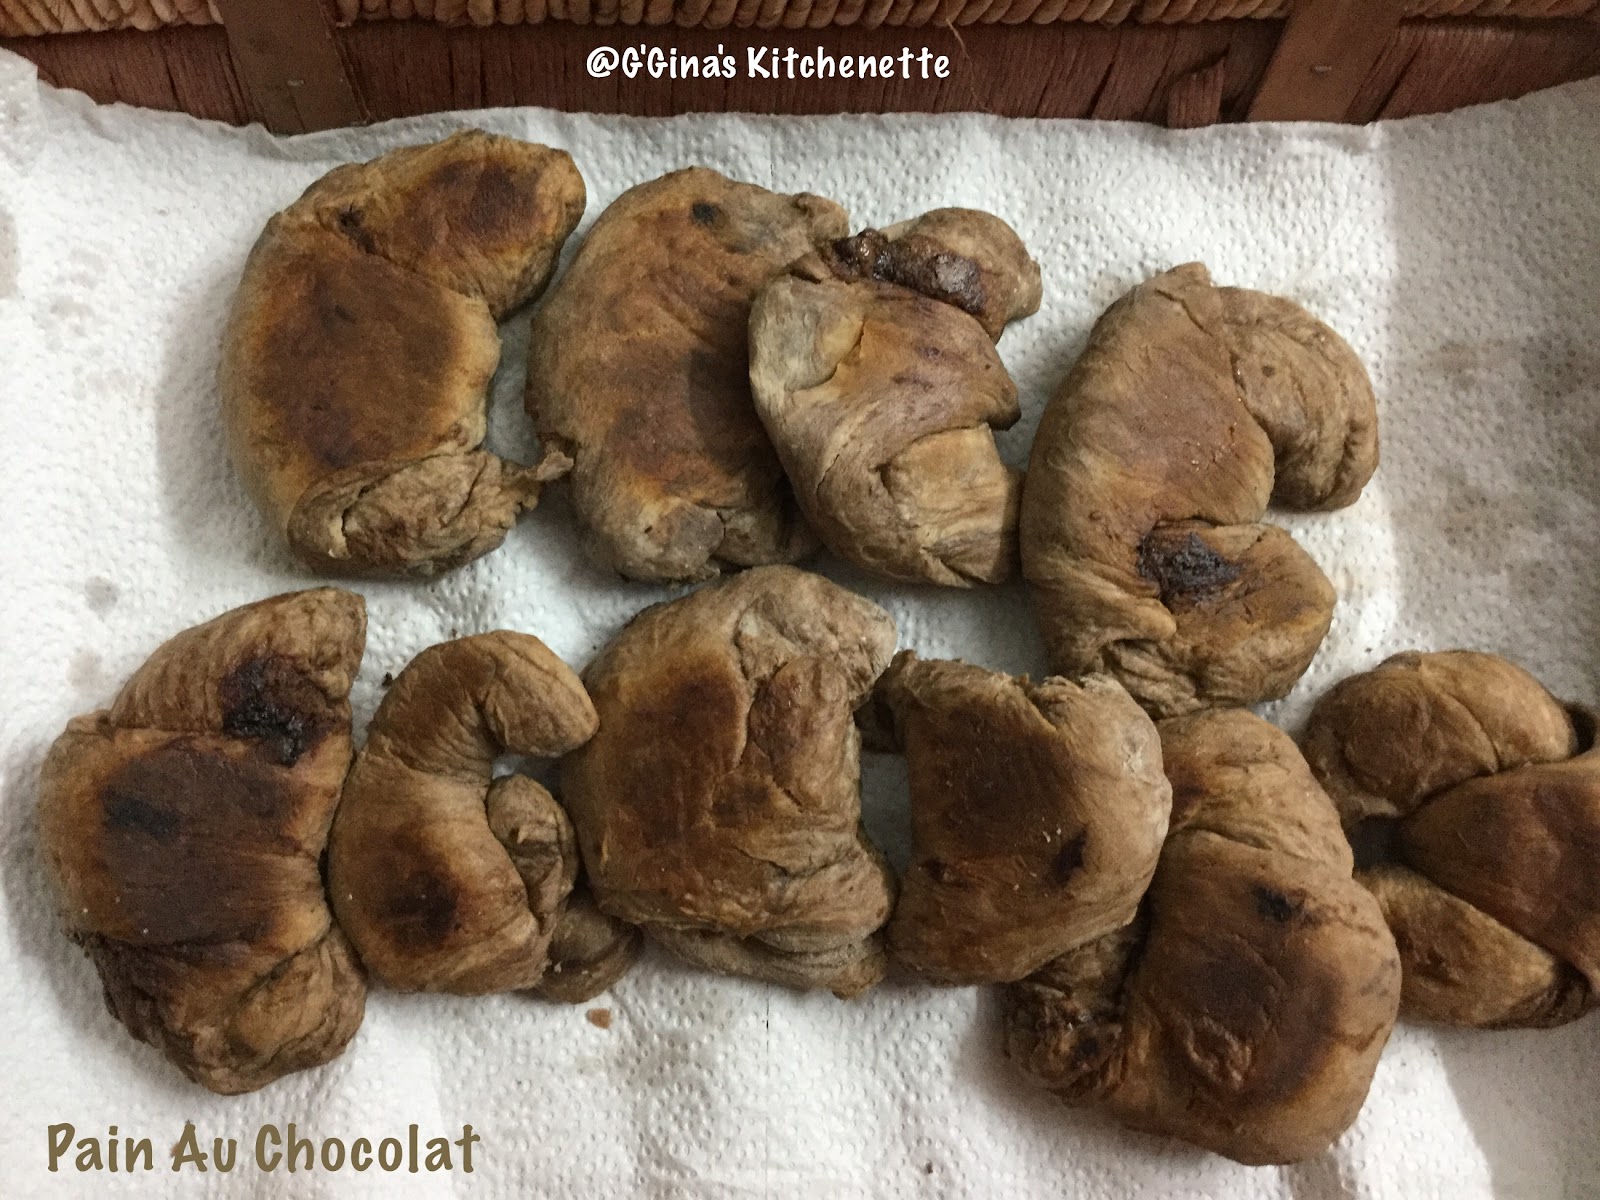
Pain Au Chocolat (Chocolate filled Croissants) #BreadBakers

Being Women's Day today this was the ideal challenge...'Chocolate'. Happy Women's Day to all you fabulous Women out there. I have mentioned at least three in this post who have made this post possible! Special thanks to Elizabeth, Manju and always you Shireen.

When I heard my good friend and college mate Shireen Pais-Sequeira of Ruchik Randhap chose Cacao, Cocoa or Carob for the Bread Bakers' March event, I was super excited. Many ideas flashed through my head. Thank you Shireen for hosting this lovely theme!


I have had a secret nickname given by my ex-colleague and friend Thomas Forsch...'Chocolate'. Yes he called me Chocolate, because he knew I could be bribed with Chocolate. He challenged me to a work related challenge at the company we worked at and when I met the challenge, he promised me the best chocolate cake there ever was! And yes all of it was all for me. I still remember when that day finally arrived, of how my buddy Nina Silva called me as I just finished conducting an interview. She told me of how she had opened the cake box and started sharing the cake. I was furious with her and she couldn't help but burst into a roar of laughter!!


Nothing has changed since then, I can still be bribed with chocolate. I also remember how a friend got out of an angry situation with me back in college days with a bar of chocolate. I didn't realise until I had actually cooled off.


Coming to the challenge, I had never made croissants before and recently I took up a dessert
challenge that had eaten into two full days of work and sleep time. It didn't turn out as expected but
the customer was happy and that was what mattered the most. While I began this challenge all excited, it got ugly pretty fast. To avoid a similar turn of events as the dessert challenge, I spoke to my recent good friend and fabulous neighbour Elizabeth Rita Samuel of whether she had made croissants earlier while we were walking up in school to pick our kids. She said that she had just made a batch of dough waiting to be baked after we returned from school for her lovely daughter Joanne who incidentally has become my daughter's favourite friend. We mums call them two peas in a pod.

As luck has it, apparently Elizabeth has had a lot of experience with croissants esp.when she stayed at Belgium. She told me some of the challenges involved with making croissants in such a challenging environment as we stay in a tropical place where the humidity levels are high and hot. Summer decided to come in a tad earlier this time. "Everything must remain cold" is what Elizabeth said and that means returning the dough each time during the preparation process back to the refrigerator. The rolling pin went in to the refrigerator as well. Elizabeth spoke of the ratios of ingredients and how to roll and shape the croissants.


I then came up with one more idea which was to freeze my room and kitchen as much as possible
which meant all doors were closed and I turned the aircon down to 18°C, as low as it would go.


Since this challenge was all about Cacao, I decided to include it both in the dough and in the filling.
'Pain Au Chocolat' traditionally has a half moon puff pastry look filled with chocolate pieces and translates literally to 'Chocolate bread'. But like I said I wanted to try the traditional look of croissants as Elizabeth spoke of since it was the first time I tried my hand in croissants. The dough essentially of the croissants and 'Pain Au Chocolat' is the same. It is the shape that differs.  Of course, the chocolate filled croissants also gained the name 'Pain Au Chocolat'. So it was a win- win situation either way name wise.


I seriously thought that all this would be a 'pain'ful effort with the turn of ugly circumstances that I mentioned earlier in this post which arose in the process of making these croissants. My workstation that I use to post all my recipes and do my multiple other jobs from met with a coma. It is on its way to another state to get fixed as the rotten retailer who promised an All-India service failed to meet its promises. Sigh!So as I write this post, I am still unsure of its successful post as mentioned to today's gracious hostess Shireen.

And now an update, the retailer turned out to be not-so- rotten after all. But it remains to be seen when I visit the service center this weekend *fingers crossed*.

You can use a normal egg wash to glaze the croissants, I used milk as we are on Lent. I finally completed this post on my neighbour friend Manjusha Manusmrithi's desktop as the IPad I tried to work most of this on started acting funny in the nth hour right before posting.

On with the recipe...

You need:

  • 2.5 cups (300 gms) plain flour
  • 200 gms cold butter, cubed
  • 7 gms active dry yeast
  • 1/2 tsp salt
  • 3/4 cup (180 ml) lukewarm milk + 4-5 tbsp of milk for brushing
  • 4 tbsp (60g) sugar
  • 200 gms of chocolate cubes or 9 tsps of nutella/ chocolate cream


The Make:
Makes 9 croissants | Bake time: 20 minutes | Preparation time: 15 minutes | Resting and Rising Time: 10 hrs/ overnight

1. Place the yeast in a bowl and add the sugar and a tad bit of the milk. Stir until it dissolves. Then add rest of the milk except the one set aside for brushing. Set aside to cool down.


2. Combine flour and salt into a large bowl. Add the butter and using a fork combine until it crumbles together.

3. Add the milk-yeast mixture and gently combine until the dough comes together. The butter needs to remain in  pea-sized pieces. Next roughly shape the dough into a square and wrap the top of the bowl in cling film and refrigerate for 2 hours. If you like you can also freeze it for 30 minutes to hasten the process along.

4. Remember to keep your work tools as cold as possible. Next dust your cleaned work surface and rolling pin with flour. Start rolling the dough into a rectangular shape at least two or three times as long as it is wide. Do not worry if the dough is hard to work with at this stage. It will come together during the rolling and folding process that follows.

5. Next fold the short sides (breadth) of the rectangle dough into the middle.  Rotate the dough by a
half turn. Roll out to lengthen. Fold the short ends again towards the middle.

6. Next flip the dough over so the folded seams are underneath. Repeat the rolling and folding process steps 4-5,  four more times, giving the dough a total of five times of rolling and folding. Place the dough in a wide bowl and cover with plastic wrap. Refrigerate for 8 hrs or overnight.

7. On a lightly floured surface roll out the dough into a rectangular of 18" X 12".  Cut the rolled dough into triangles, it will make about 9 triangles of 14" long and 5" at base.


8. Place a chocolate cube or a tsp of chocolate in the center of each triangle base. Then gently roll the croissant starting from the wide part up to the top, curving the ends inwards giving it the croissant shape.


9. Place the croissants with final rolled tip side down onto a prepared baking sheet lined with parchment paper. Cover with plastic wrap and let rise for 2-3 hours at room temperature.

10. Preheat the oven to 220°C. Brush the croissants with milk. Lower the heat to 180°C and b
ake for 20 minutes until golden brown. If your oven is anything like mine where the heat is only at the bottom, please turn over after the first 10 minutes.

11. Cool on wire rack before serving with your hot cuppa' coffee or tea.


Breads with Cocoa, Cacao or Carob in any form
BreadBakers Breads with Cocoa, Cacao or Carob in any form #BreadBakers is a group of bread loving bakers who get together once a month to bake bread with a common ingredient or theme. Follow our Pinterest board right here. Links are also updated each month on this home page.

We take turns hosting each month and choosing the theme/ingredient.

If you are a food blogger and would like to join us, just send Stacy an email with your blog URL to foodlustpeoplelove@gmail.com.

Friday, 17 January 2014

My Chocolate Souffle - Happy New Year 2014

Happy New Year 2014 my dearest readers, family and friends! I started this New Year with three letters of the alphabet 'Y.E.S'! This is the year of Good Tidings and all Good News! So for my first recipe of the New Year, I wanted to begin with something deliciously sweet. Incidentally, it also something borrowed (from almost a decade ago) and a rather simple make!


This recipe creation is one dear to my heart. It reminds me of a time when I was with my family in Dubai. This was before I was married and was staying with my parents, sisters and bros-in-law. My eldest sis was expecting her first bundle of joy then! My BILs used to tease me with the name souffle (sou-fly, etc.) I had made 'my chocolate souffle' all too often and it was a welcome dessert at home. It was a sure way to get to the heart! No wonder I remember this recipe so fondly!

You can make this recipe with cocoa or chocolate. You can also choose to use the dark-bitter sweet chocolate, white chocolate or regular cooking chocolate. I had used cocoa, a decade ago when I used to make the souffle often. This time I tried it with cooking chocolate.


Now for the souffle, it would be advisable to use ramekins however if you do not have ramekins available, your options could range between sturdy coffee cups, thick glass bowls, steel bowls or even orange peels as pointed out by my foodie group friend Sanaa.


You need:

  •  500 gms butter
  • 150 ml milk
  • 75 gms castor sugar/ brown sugar
  • 25 gms cocoa or 20 gms of cooking chocolate
  • 100 gms plain flour and 1/2 tsp of baking powder or 100 gms of all-purpose flour
  • 3 eggs, separate whites and yolks
  • Extra castor sugar for dusting
  • Water for cooking souffle and melting chocolate


The Make:
Makes 4 standard size ramekins | Preparation Time: 5 minutes | Cooking Time: 20-25 mins

1. Butter the ramekins well on all corner even the rim of the ramekin and set aside.
2. Melt the butter, milk, sugar and cocoa or chocolate in a double boiler.
3. Once melted, turn off the flame and set aside.
4. Add in the sifted flour in the melted chocolate mix and whisk well.
5. Whisk in the egg yolks and mix well.
6. Next add in the egg whites and whisk well till evenly blended.

For the cooking process, you can do this two ways, either on stove top or in the oven. In both cases, you need to place the ramekins in a deep-bottomed pot with a lid. Make sure to add enough water to half cover the ramekins from the base.

7. Pour the whisked batter into the prepared ramekins up to 3/4th of each of the ramekins allowing room for the souffle to expand. Tap the bottom of each ramekin on the table top to ensure the batter evenly sits in the ramekin.
8. Place the ramekins carefully in the prepared pot on a medium-low flame. Cover and cook for 20 minutes. If you are using the oven, preheat the oven to 180°C and place the deep-bottomed pot in the center of the oven and allow to cook for 15-20 minutes.
9. The souffle would have risen over the ramekin at least to 2/3rd its original height and would jiggle a bit but the top would be set.

I personally love having this souffle nice and warm but you can also have it at room temperature or cool as has been enjoyed by a few friends of mine.

Hope you enjoy making and serving this souffle. I call this 'My Chocolate Souffle' as I have experimented with this souffle so much over the years that it has become 'mine' :)

With Valentine's Day in less than a month you might want to try experimenting with/practicing this recipe creation ;) This recipe as I mentioned earlier is a sure way to one's heart :) You can  serve the souffle by making a small dip in the center of the souffle and adding a spoon of ice cream or cream or grated white chocolate or even melted cheese.

Bon Appetit!

Tuesday, 31 December 2013

Dark chocolate fudge brownies - Christmas/New Year Recipe

This recipe is my dear friend Sheritha Ravi-Neeraj's creation. I must say I enjoyed making these brownies and the taste is impeccable. My daughter Izzy could hardly contain her joy to try them out as soon as it came out of the oven. Sheri always made the best brownies I have ever had!


I made this batch of brownies for Izzy's school Christmas party. She has been excited about Christmas since the last 6 months. Probably since her birthday is exactly a month after Christmas, she was involved in her mama's Christmas preps even before she arrived in the world! :)


These brownies are special because not only are they fudgy when cooled, if you cut into them right away, it actually gives the effect of chocolate lava cake. The surface is nice and crispy as well.


This is an amazingly simple recipe as well. Hats off to you Sheritha. Most of the work goes into the resting time which is really no work at all for you! So if you are thinking of making these brownies for New Year's, I would say go for it as there is hardly any work needed to make these delicious brownie bites and your family and guests are sure to love it.


I doubled the quantity below as I planned on sharing some of these brownies with my friend Sireesha who requested my first ever cake order. Her son loved the Chocolate Cake I made him and expressed his interest in brownies/choco lava cake. So I think these brownies would be perfect for them. I am waiting for him to try these brownies.


You need:

  • 200 gms Dark cooking chocolate
  • 200 gms Butter
  • 3 Eggs
  • 50 gms plain flour
  • 350 gms Brown sugar
The Make:
Preparation Time: 10 minutes | Cooking Time: 20 minutes | Yield : one 9"X8"
Adapted from Sheritha Ravi-Neeraj's recipe

1. In a double boiler, melt the butter and chocolate.
2. Beat eggs separately, add the sugar and whisk well.
3. Add the choco-butter mixture to the egg mixture and blend thoroughly.
4. Next add the flour bit by bit and whisk well. You may need to fold in the flour to the mixture and stir briskly with a wooden spoon before you whisk with a beater as the flour may spray all over.
5. Prepare a cake tray of 9" X 8" and grease well on all sides. Preheat the oven to 180°C.
6. Pour the batter in the prepared cake tin and bake for 20 minutes at 180°C.
7. When you see the top surface of the batter nice and crusty and feel the center less gooey and more fudgey (not fully cooked), turn off the flame and allow to cool down for at least 10 minutes.
8. Once cooled, cut into equal squares. The center of each slice would be fudgy and still warm.

Hope you enjoy making these lovely fudgy brownies. Happy New Year 2014 everyone!

Hope you have enjoyed the 2013 ride with G'Gina's Kitchenette. I would like thank all my loyal readers who esp. helped to promote not only the G'Gina's Kitchenette blog site but also the Facebook and Twitter pages. I hope to see you all back here in 2014. Wish your family and you a wonderful year filled with sweet surprises ahead! God Bless!

Wednesday, 7 August 2013

Double Chocolate Brownies - The ultimate chocolate brownie recipe..

We have been celebrating quite a few birthdays since July, starting with my hubby Anup's to my Dad's and mine which was just 2 days ago. I love baking and most esp. for my loved ones. Incidentally for those of you who do not know me, I entered the kitchen through baking. Started with crash and burns and messing up my mum's cake tins :D I was known as the Dessert Queen for a long time as my explorations were limited to desserts. There were these almost two whole years I never touched a cake mixer or had anything to do with desserts. I kind of abandoned making them (used to still eat them though ;) ). Well that's a long story that needs another blog post.

These were special brownies and I sent them over to Izzy's CLO at school as she loved my Anniversary Love Cake surprise pics that is on my blog. She loved these brownies. In fact her message read, "It is really yummy, thanks a lot... U r a gr8 cook...Thanks once again". Rhea you are most welcome. I love baking for friends and loved ones so will do it again :) just be ready to try them out and share your feedback :)

So dear readers, if you follow these recipe details to the 'T', you will not go wrong. I know as I have experimented with variations of chocolate, butter and eggs. This post is dedicated to my dear friend 'Vidhya Venkatachalam' who has been asking me to post these brownies for a while now. I used to make these brownies quite often when I stayed with Mom in Dubai through school years and thereon. It was really a sweet surprise to hear from you. Miss you lots g-friend!


It will be sometime before I can bring you more of my recipe creations as I am going on a short break soon. Until then, I have a request. Please do visit G'Gina's Kitchenette Indiblogger Awards 2013 nomination page and click on 'Comment'. You comments are not only counted as a valuable vote but also will determine the nature/authenticity of my food blog by the jury in deciding if I win! Please visit today if you can. It takes only a minute and only requires that you log into your Facebook page. Thanks heaps in advance and hope you all enjoy a wonderful Eid that is soon to arrive. Eid Mubarak!


You need:

  • 1/2 cup flour
  • 1/2 tsp baking powder
  • 2 eggs
  • 1/4 cup milk
  • 1 tsp vanilla
  • 2 tbsp of unsweetened cocoa powder
  • 4 squares (1" per sqaure) of unsweetened baking chocolate
  • 1/4 cup butter, softened at room temperature
  • 1 cup sugar
  • Pinch of salt (not required if you are using salted butter)
  • 1/4 cup of chopped walnuts


The Make:

Preparation Time: 10 minutes | Cooking Time: 25 minutes | Serves 4

1. Preheat the oven to 210°C.

2. Melt the butter and the chocolate either in a double boiler on the stove top, whisking intermittently or in the microwave at the 30 minutes increments and stir at each increment up to a minute. Give it one last whisk and set aside.

3. Mix the dry ingredients. Place the flour, sugar, baking powder and salt in a mixing bowl. Using a whisk, toss the ingredients well until they are fully incorporated.

4. Add in all the the wet ingredients except the milk and eggs and mix well. Next add in separately whisked eggs and give it one more swirl.

5. Next pour in the chocolate and butter mixture, milk and eggs and stir the mixture together with a ladle until the batter mix is perfectly smooth and lump free.

6. Line the cake tin with parchment paper or butter paper to avoid the brownies from sticking and for a finer finish.


7. Pour the batter into the baking pan. Give the tin a tap on the kitchen top to ensure that the batter is even across the tin. Smoothen the top with the back of a ladle if required.

8. Turn the prepared cake tin to the preheated oven and turn down the temperature to 180°C.

9. Bake the batter for about 20-25 minutes. Test with a skewer or toothpick and ensure it comes clean when inserted into the center of the cake tin.

10. Allow it too cool to room temperature before cutting in. Try to cut the brownies in even squares each.


I still have not purchased my new cake tins and made this one which was given to me by Anup's cousin's wife Anu Abraham. Thanks a lot sis :) The cake tin is round and I could not cut all the pieces to even squares each owing to the shape.


Hope you all enjoy this recipe. It's simple to make and you can have it ready in under 30 minutes.

Bon Appetit! Eid Mubarak once again to all my dear readers!

Please do visit G'Gina's Kitchenette Indiblogger Awards 2013 nomination page and click on 'Comment'. Thanks whole heaps in advance!

Saturday, 22 June 2013

Chokolatty Chocolate Cupcakes

I made this batch of cupcakes for my darling muffin Izzy. She wanted to have cake and I had just got my superb cupcake tray so was rejoicing in the thrills of both being asked by her to have cake and the new cake tray.

This is a super simple recipe so you can make it in under an hour.I call this Chokolatty Chocolate Cupcakes as it is a celebration of chocolate. In case you are making 2 batches, then double the amount of ingredients and you can add a tbsp of expresso coffee powder or any instant coffee powder of your choice (add it with the dry ingredients)


You need:

  • 3/4 cup all-purpose flour
  • 1/2 teaspoon baking powder
  • 1/2 cup cocoa powder
  • 1/4 cup unsalted butter, room temperature
  • 1 cup sugar
  • 2 large eggs, room temperature
  • 1/4 cup plain chocolate of your choice (It does not have to be cooking chocolate, you can even use Cadbury silk) 
  • 1/3 cup full-fat cream
  • 1/2 cup sunflower oil
  • 1 tsp vanilla extract/essence
  • 1 tsp cinnamon
  • 1/2 tsp salt
  • 1/2 cup drinking water


The Make

Preparation Time: 10 minutes | Cooking Time: 30 minutes | Makes 10 cupcakes

1. Preheat oven to 180°C.

2. Lightly brush oil on the cupcake tray holders. You can also dust some flour and invert to remove any excess and set aside.

3. In a large mixing bowl,  mix the butter and sugar until well-combined.

4. Next, melt the chocolate in a double boiler.Once the melted chocolate is cool enough to handle, add it to the butter/sugar mixture and fold until combined.

5. Whisk the eggs separately and add in the egg mixture bit by bit and mix well.

6. Next add in the oil, vanilla extract and cream and fold well.

7. Sift together all the dry-ingredients - flour, salt, baking powder, and cocoa powder into a separate bowl.

8. Add dry ingredients to wet ingredients in batches, whisking well to avoid any lumps.

9. Next add the water and give it one good whisk. Stand the batter for 5 minutes.

10. Next fill the cupcake holders about 2/3 full and place carefully in the oven.

11. After 20 minutes, using a skewer, check to see if the center is cooked. The skewer should come clean otherwise return to the oven and check after another 5 minutes.

12. Remove cupcakes from the cupcake tin while still warm and place on a cooling rack or on the kitchen counter to cool to room temperature.


You could also make a butter cream icing to top your cupcakes or a plain chocolate(white/brown/dark) icing. You can also add some sprinkles, chopped nuts or berries/fruit.


Wednesday, 8 May 2013

Celebrating over 10,000 blog visits and over 100 likes on Facebook (gginaflavorspalatte) - Red Velvet Chocolate Lava Cupcakes and Cake - An Anniversary Special


Thank you dear readers, fellow bloggers, friends and family for making this milestone possible! G'Gina's Kitchenette has had over 10000 visits and the facebook page has over 100 likes. I am thrilled and humbled at the same time for having achieved this milestone which at one time I must admit I thought was never possible! I would like to apologise for the delay in this blog post as our family has been grieving the loss of my dear aunt (God rest her soul!). She was an excellent cook and hostess as well! I will miss her very dearly.


I started this blog with friends insisting that I should publish my food creations and hope one day that dream would be realised in print and other wise. I am thankful most especially to 'my mum' who unknowingly has inspired me as a child to create cuisines from all over the world - be it Indian, English, American, Italian or Mediterranean. For those of you who do not know this, this is how I christened the theme of my blog - 'Flavors from around the world'. Mum always was and will always be my mentor, guide and more. The love she puts into the food she creates has always touched our hearts (through our tummies of course ;-) ). The one thing I learnt from Mum is that always cook for 4 even if there are only 2 guests, you never know as more may drop in. (She actually got that from my granddad (God rest his soul!). Which has always been the case with Mum, there were always additional guests to share in the wonderful meals she cooked. Not only has she been an excellent cook, she is an excellent hostess as well. 
Thank you dear readers, family and friends! Immensely grateful!
http://www.facebook.com/gginaflavorspalatte


Now let me get right to the recipe. I had created this recipe for our 4th Wedding Anniversary which was on April 19th. 4 years flew past and we have a wonderful daughter, who I must say enjoyed this creation. So your little ones would definitely enjoy this make.


Red Velvet Cake is normally made with cream cheese topping but I could not do that as the icing needs to be firm and for the chocolate lava cake, it needs to be served almost immediately out of the oven to get that gooey effect. So there was a slight glitch in my first batch. I have served this with a white chocolate cream topping and the chocolate I used for the lava was also white chocolate.


You need:
  • 4 cups of all purpose flour / Plain Flour
  • 1 tsp baking powder
  • 3 cups of castor sugar/powdered sugar
  • 2 cups of butter/vegetable oil (1/2 tsp salt in case of unsalted butter)
  • 1 tsp distilled vinegar
  • 2 tbsp cocoa powder
  • 1 tsp vanilla extract/essence
  • 5 large eggs or 7 small-medium farm eggs
For the chocolate lava:
  • 300 grams of cold white chocolate, crushed in bits (using fine knife)
  • 1/2 stick of unsalted butter
For the fruit syrup(food colour):
  • 2 tsp red food colour or  any red fruit(s) ( I used strawberries and ground and strained pomegranate, if you have cranberries or cherries, then please use them. You can use a combination of red berries/fruits that would give you the red colour syrup)
  • 3 tbsp sugar (for the fruit syrup)
  • Drinking Water (quantity to half cover the fruits at surface)
For the cake topping:
  • 400 ml cold fresh cream
  • 200 grams of cold white chocolate, crushed in bits using fine knife
  • 100 gms unsalted butter, at room temperature (this was missing in my recipe and hence the outcome was a slightly runny topping, which I firmed up later in the refrigerator)
  • Sprinkles of your (or your little one's) choice


The Make

Makes 6 cupcakes and 1 cake (medium sized - 1.25 kgs) | Cooking Time: 45 minutes | Preparation Time: 15 minutes

1.  Half grind the fruits with a tad bit of water (esp if you are using cherries or cranberries). Place the crushed fruits, water and sugar in a deep-bottomed pan on medium-low heat. Stir and allow the fruits to bring out the color in the syrup. This takes about 8-10 minutes. Strain and set aside to cool. You can pre-make this syrup a day in advance as well and refrigerate.

2. Whisk the cream and add in the chocolate pieces and butter. Melt in a double boiler, whisking well to avoid any lumps. Strain and set aside and refrigerate. I would suggest to make this half a day in advance esp. during summer.

3. In a double boiler, melt the white chocolate and butter stick for the chocolate lava and refrigerate. You can choose to prepare this overnight or 8 hours prior of making the cake.

4. Preheat the over to 180°C and grease the cake pan and muffin tray with oil and dust some flour as well to avoid sticking to the bottom. Knock off any excess flour by tapping the tray upside down. You can also layer the muffin tray with cupcake paper holders and butter paper for the cake pan or foil paper. Just make sure if you are using foil paper to lightly oil the foil paper after neatly layering the tray. I would suggest to otherwise use a spring cake tray with butter paper.


5. In a large bowl, sift the flour, baking powder, sugar and cocoa powder and set aside.

6. In another bowl, whisk the eggs, oil,  vinegar,fruit (food) color and vanilla extract. Vinegar aids in the cake rising process.

7. Bit by bit, add the wet mix to the flour mix and whisk well. Set aside to stand for 5-10 minutes.

8. Pour the cake mix in the prepared cake tin and muffin tray and set in the oven (either one after the other or  together depending on the type of the oven you have) at 200°C. It will take the cake a max of 35-40 minutes to cook through. The muffins would take 15 minutes.


9. In the  last minutes 10 minutes of the rising process or before the cake top stiffens, add the lava chocolate in the center of the cake and return the cake tin back to the oven. For the muffins, add the lava chocolate in the last 5 minutes of the rising process or before the muffins rise fully.

10. Check with a skewer to see if the cake is cooked. The skewer must come clean. Check on the sides of the cake and the center. The center should return with white chocolate or a slight reddish-brown with white chocolate tinge. Turn off the heat and set aside to cool to room temperature.


11. Once cooled, top generously with the cooled cake topping and sprinkles if desired. This cake also tastes good if refrigerated however the lava would not be as flowing as desired.

This creation would be enjoyed by both adults and kids alike. If you have any queries/clarifications or suggestions, do add in the comments section below. Also if you decide to make this recipe creation, do write to me on gginazkitchenette@gmail.com regarding your experience. Also do not forget to add a photo(s) of your creation.


Monday, 11 March 2013

Chocolate Pancakes with Homemade Strawberry Syrup

I had made a mention in one of my last posts of a weekend recipe creation of mine which was exquisitely created for my darling daughter Izzy. Well this was it! She is a fan of strawberries and I wanted to make her feel extra special on our weekend alone together!

Since strawberries are still largely available across the country before the supremely hot summer days kick in, and I had a good batch at hand, I decided to make this one for Saturday morning. So this was also kind of our Mother- Daughter Women's Day Celebration:)!

Chocolate Pancakes with Homemade Strawberry Syrup

You need:


  • 1 cup of plain flour or all purpose flour
  • 1/2 cup of cocoa powder
  • 2 tsp of baking powder
  • 4 tbsp of sugar/honey
  • 1 egg or 1 cup of yoghurt (you can also use 1 mashed banana but I didn't as I wanted it to be all about the Chocolate and Strawberries although banana and chocolate is a good blend)
  • 1/2 tsp salt
  • 2 tbsp butter or margarine, at room temperature
  • 2 tbsp of oil
  • 1 tsp cinnamon
  • 1 cup milk or filtered water


The make
Makes 5 pancakes | Cooking Time: 15-20 minutes | Preparation Time: 5-10 minutes

1. Combine all the dry ingredients in a large bowl and set aside to rest for 5 minutes.

2. Whisk in the egg, oil and milk/water and set aside for another 5 minutes. Then whisk in the butter.
Whipped up pancake batter and chopped strawberries


3. Heat a iron skillet or non-stick skillet on high. Grease the pan with a dabbed kitchen paper towel in oil. Use the same greasing process in between making pancakes.


4. Using a ladle, pour in 1/4 cup quantity of pancake batter in the center of the skillet and spread to medium circle.


 5. Repeat till entire batter is used.  Serve hot!


Pancakes with Strawberry Syrup on the side

Homemade Strawberry Syrup

You need:

  • 10-12 strawberries
  • 4-6 tbsp of sugar
  • 110 ml of filtered water


The make:
Makes 100 ml of syrup | Preparation Time: 10 minutes | Cooking Time: 10 mins


Top view of Strawberry Syrup
1. Chop the strawberries and set aside at least 2 strawberries (chopped).


2. Add the sugar to the water and stir on a medium high flame till sugar is dissolves and starts to thicken.


3. Add the chopped strawberries and stir in for 2-3 minutes.


4. Turn the strawberry syrup to the refrigerate for 10 minutes along with the chopped strawberries set aside earlier.


Homemade Strawberry syrup
5. Top the hot pancakes with the chopped strawberries and strawberry syrup!

You can also top with whip cream, nuts, fruits or choc chips!

I assure you that your little ones would love this make...treat your kids with these pancakes and syrup as a reward or just for being themselves:)

Bon Appetit!


Friday, 28 December 2012

Sensuous Hot Chili Chocolate

With the temperatures dropping here and the ring of the New Year round the corner, I decided to finally make some Hot Chili Chocolate.  Chocolate has always been my favourite so much so I earned the nick name of being called "Chocolate" ;) . This makes for an excellent drink on a cold winter night and it is simple to make as well.  Cuddle up with your loved ones and share in the joy of CHOCOLATE! :)


You need:

  • 5 tbsp processed cocoa powder
  • 2 tablespoons sugar (not a must esp. in case of sweetened cocoa powder)
  • 1 tsp of cayenne pepper powder or 1 tsp of crushed ginger
  • 4-6 squares of bittersweet chocolate, finely chopped
  • 2 cups of milk
  • 2 strawberry, 1 small chocolate piece for garnish


The make:

Preparation Time: 10 minutes | Serves 2 adults

1. Take a pan and add the cocoa powder, sugar(optional) and 2-3 tbsp of milk. Heat and stir evenly till the mixture blends and lumps removed.
2. Boil the remaining milk with the ginger or cayenne pepper in a milk pan and add in the cocoa mix. Whisk well to blend in the cocoa mixture.
3. Remove from heat and add in the chopped chocolate and stir till the chocolate melts and set aside.
4. Reheat, stir well  and serve hot with a slice of chocolate at the edge of the glass or a slice of strawberry or if you are feeling especially adventurous coat the strawberry with melted chocolate before serving as garnish.
Enjoy this drink with loved ones on a cold, winter evening.

Tip: You may want to avoid the ginger or cayenne pepper if you are serving this to kids.

Friday, 21 December 2012

Christmas Shortbread Cookies

With a school going toddler who is completely excited by the idea of Christmas - Santa, Carols, Christmas trees, stars....cookies, cakes...and more, you know you have to be at your best in making Christmas treats. Tomorrow is Izzy's Christmas Class Party. I was always planning to bake a cake and Christmas cookies for her class and staff with or without a party. So I was glad to know today that they have a Christmas class party tomorrow.

These shortbread cookies are so super simple and I got an excellent batch, which were pre-tested by my husband and my excited toddler. I was a bit worried that I would find the cookie jar empty by the time I was done making the batches of these cookies.

Now I normally used to make these cookies as a slightly wet mix, so I have never owned a cookie cutter. With  a toddler around, like I mentioned earlier, you just have to be on your best creative behaviour. I found a handy star shaped Fisher Price block in my little one's play pen. After cleaning and drying it, it became the Christmas Star! Problem solved!

Christmas Star Shortbread Cookies


You need:

  • 250 gms of salted butter
  • 500 gms of flour
  • 125 gms of icing sugar or castor sugar
  • 125 gms of cornstarch


The make:

Preparation Time: 30 minutes | Cooking Time: 30 minutes | Makes 30-40 cookies (depending on the cookie size)

1.  Place all the ingredients in a large bowl and knead well using your fist and knuckles until the mixture holds well together. Continue kneading and folding in until the dough cracks. Tip: Unless you knead well, the dough will not hold together for the next step (rolling process)
2. Gently roll the dough evenly till it is thin enough however not wafer-thin. Tip:Make sure you maintain the same thickness for each roll-out process as some of the cookies may cook faster than the others.
3. Cut out shapes with cookie cutters of your choice and toss the extra dough back in the bowl with the remaining dough. Repeat this process till all of the dough in the bowl is used.
Cookie dough cut and ready to be baked


4. Preheat an oven to 250C for 5 minutes. Lower the heat to 180C. Place the cookies onto a butter paper or  cookie sheet  and carefully place in the oven. Bake for 8-10 minutes in batches as required. Remember that each subsequent batch would need lesser time in the oven than the first. I took the first batch in for the whole 10 minutes, the second batch took about 7 minutes and the third 5 minutes.
5. You can decorate them as desired. I planned on icing the class kids' names however the cookie's were too small for the precious little ones' names. Maybe in my next attempt, after I invest in larger cookie cutters! I did hand cut a heart for my munchkin and she was particularly pleased as she knows it was a special heart among the stars! I got a nice big thank you, hug followed by rains of kisses!

Merry Christmas darling little ones!


**New: Since my little one enjoyed these cookies so much over Christmas, I decided to bake them with one of her favourite flavours, Chocolate! I made chocolate Shortbread Cookies for her birthday and sent them to school which was again well-received! I wanted to share some pictures with you of the same. Additionally (to the above ingredients), add 100 gms of cocoa powder (sweetened is better if it is for the little ones)


Friday, 17 August 2012

Anniversary Chocolate Love Cake Surprise


I had made this Chocolate Surprise for my partner last Anniversary and he loved it to bits. He is not a very Chocolattey fan but this one definitely took a large share of his heart! Not to forget my lil' munchkin Izzy who had her face full of chocolate as she enjoyed it to bits. She like me loves chocolate. I gained a nickname of being called "Chocolate" by one of my ex-colleagues Thomas Forsch. Every time I achieved something at work he promised me a bar of chocolate, instead one fine morning he surprised me with the most moist melt in your mouth chocolate cake from one of the bakers in Sharjah, UAE.

Anniversary Love Cake


I must confess that I started my cooking and baking adventures with baking chocolate cakes. Every birthday I remember my parents used to get me chocolate cakes only as they knew I loved it. Going through family pictures, one thing that remained constant in all my birthday pictures was the assured chocolate cake and I pride in making good chocolate cakes. Its a sure way to get my heart thumping!

Ready to Surprise


I do not enjoy sugar coated icings or butter icing as much as I do the one made with bitter-sweet real chocolate. This is a simple chocolate cake guaranteed to melt-in-your-mouth! Please do not expect this cake to last long on the cake tray but I would ask you to share the cake as it is quite rich in flavour.

To make this cake,

You need:
  • 1 cup (250ml) water
  • 150g unsalted butter, cut in medium pieces and softened naturally
  • 4 tablespoons cocoa, sifted
  • 2 cup (300 g) sifted plain flour (You can also use all-purpose flour ideally but I do not have this available in India)
  • 1/2 tsp bicarbonate of soda, sifted
  • 1/2 tsp baking powder
  • 2 cups (440 g)powdered sugar or castor sugar(11/2 cups would also be ok if you do not want it too sweet)
  • 2 eggs
  • 1/2 cup (120 ml) fresh full-cream milk (sieve the cream out after boiling and cooling)
  • 1 tsp vanilla essence
  • Chocolate Cream Icing


The make:

Cooking Time: 45 minutes| Preparation Time: 30 minutes| Serves 8 adults

1. Sift the flour, cocoa, baking powder and bicarbonate of soda  and keep aside in a separate bowl (this is going to be your main mix bowl so make sure its fairly large). Leave this to rest for at 20-30 minutes. You can do this well ahead of the preparation and baking time owing to the resting time required.

2. In a separate bowl, whisk the eggs well until fluffy. Add the sugar and whisk further for another 5-10 minutes. Set aside.

3. Add the egg mixture to the flour bit by bit and mix well as you add the egg mixture. Add the softened butter to the mix and continue whisking well.  Leave the cake batter to rest for about 15 minutes. Add the milk bit by bit checking for consistency. Note: You may not need to add all of the milk.

4. Preheat the oven for about 10 minutes on a medium heat.

5. Dab a little butter on your cake tray to moisturise the cake tray (you can also used baking paper). Lower the heat to about 150C (which is normally on the lower end of the heat scale).  Bake for about 40-45 minutes or until cooked when tested with a toothpick/skewer.

(Hint: Be alert of the cooked smell of the cake and check through the oven window to see  if the cake has risen. wait a few minutes, open the oven door and check with a skewer to see if it is cooked. The skewer should come clean, i.e. no wet batter on the skewer).

6. Allow to cool in the cake tray for 5-10 minutes. Turn out onto wire racks/ clean tray to cool completely.

7 . Touch the cake top. If it has cooled completely, use a butter knife to dab the chocolate cream icing or Nutella and run the knife evenly across the sides of the cake and the top. Smoothen out any uneven layers. The kids normally love it when you top it with Gems or on the sides of the cake or shaved chocolate pieces.

The First Slice Shared

The Moist Cake Center


And there you have it your Chocolate Love Cake ready to Surprise your Love! Enjoy (I'm sure I do not have to say that;-) )
Close Up