
Foodie Extravaganza{Party}'s February 2016 event is 'Pie' or as the lovely Wendy Klik of 'A Day in the Life on the Farm' coined it as 'Bye Bye Miss American Pie'. Wendy that song has been playing in my head for a while since your event posting now :D. Thank you whole heaps Wendy for this theme. What came as a challenge in this dish was the Butter Crust that I chose to make and now I am confident of whipping up a fabulous butter crust anytime.

The first 'Wednesday' of every month, Foodie Extravaganza {Party} hosts a theme based cook-off where food bloggers come together to celebrate the food event of the month from the American National Food Holidays.

I know Wendy said that we need not constrict ourselves to American Pie and the theme title came only as a result of the song. But I wanted to challenge myself to make an All-American Pie and BLT just popped up in my head. Of course the 'L' in BLT stands for Lettuce but to introduce lettuce into a pie filling would just make it mushy. I needed something firm but similar to lettuce. Enter a passing moment at the grocers where a lady asked the vendor whether a cut of leaves were lettuce. He informed her that it was Chinese Cabbage.

Then I remembered why not Leek too. I also wanted the pie filling to reflect a breakfast meal of bacon, eggs and maybe some potatoes on the side. Egg of course came on top of the pie crust. I then introduced some cheese. In fact I decided it would be two kinds of cheese.

I have to admit I struggled with my first try of the butter pie crust but then I remembered my Christmas Shortbread cookies and well yes you probably guessed right, the second try was a breeze.

The only thing I would do next time is if I plan on Bacon or Pork or anything else as fatty as protein, then I would not go with a Butter Crust as it can be quite filling. Well that is why the serving number on this dish went up. Otherwise it would be 4-6 adults.

The Butter Pie Crust would go well with fruit or nuts or both.

Well let me not go on and on with the background story and get on to the recipe:
You need:
For the Pie crust:
For the Pie filling:
The Make:
Please take a note of the notes below before attempting to make your Pie.
For the Pie crust:
1. In a large bowl, take the flour, salt and butter cubes*(refer notes) and mash with your finger tips into the flour till combined and no dry flour left aloof in the bowl.
2. Next add the water bit by bit into the flour until well-combined and the dough formed. The water is used as a binder. Wrap in cling film and transfer to the fridge to remain cool till you prepare the table top for the next steps.
3. Prepare the counter top or your silicone baking mat by sprinkling some flour on top. Make sure if you are using your counter top to keep it clean and free off any materials. Preheat the oven at 180°C.
4. Sprinkle some flour on the pie dish as well. You can use any kind of pie dish, I used to bottom shifting, 9.5" pie crust tray that belong to Mummy. Since there is sufficient butter in the pie crust you do not need to butter your pie dish.
5. Take out the pie dough, cut in half and place one half in the center of the prepared mat or on the counter top and with a rotating motion of the fleshy part of your palm, just gentle roll on top. Return the other half of the pie dough to the fridge.
6. Next press the dough ball down and roll using a lightly floured rolling pin, making sure to turn it over each time you roll flat. Make sure to evenly roll out. Once it has reached about 8" you would need to flip it using the side of your mat. Since I used a 9.5" pie dish, I needed to roll it to almost 12 inches for the bottom crust to ensure the sides of the pie dish are covered.
7. If you find that your dough is tearing up slightly while flipping, stop and then mend and then flip over and roll till you reach your desired size. Then flour your rolling pin once more and sprinkle some flour on top the rolled pie dough. Using both hands, gently place one end of the rolled pie dough over the rolling pin and without pressing on the dough lift the dough off the mat and rest it well onto the pie dish, making sure to blanket the sides well and to go over the top edges of the pie dish. Any extra dough hanging off the pie dish can be cut off. You could use the extras to fix any holes of the top crust or can be baked on a tray with some sugar and cinnamon on top as an in-between baking treat ;) .
8. Blind bake the prepared dough for 10 minutes. Meanwhile prepare the filling of the pie.
For the Pie Filling:
8. Heat a pot and add the butter followed by the potatoes and bacon. Saute for about a minute and add in the remaining ingredients except the puree and saute well for about 5 minutes. Add the puree and cover and cook for another 5-10 minutes. Uncover and allow to cook to room temperature or until warm.
9. Next place the filling inside the prepared pie dish, toss in some pieces of cheddar and roll out the top crust of the pie. Follow the same steps as for the bottom crust and place well over the filled pie dish and seal the edges well. With the tip of your kitchen blade draw a cross on the top of the pie crust. I added a few pieces of mozzarella there.
10. Brush the beaten egg or milk on top of the pie crust, grate some mozzarella on top if desired and place into the oven at 180°C. Make sure to take your oven spill tray and place it on the rack just above the pie rack (only in case you are using an oven with only bottom heat). Bake for 1 hour to 1 hour and 20 minutes. Check to see if you have achieved a golden crust or a dark brown one in case you are using milk.
Slice and serve hot with your favourite dips/sauces. Bon Appetit!
Notes:
1. Time to bake will depend on the type of oven you have. In case you have an oven with only lower heat and no upper, this may take up to 1 hour and 20 minutes.
2. For those of you who do not have an upper heat coil in your oven, then you need the spill tray or oven tray to cover your pie dish to get an even colour on your pie crust.
3. The butter used in the recipe has to be cold, which is why once you chop the same please transfer it to the oven to remain cold.
So that is my Bacon, Lettuce and Tomato Pie or BLT Pie. This was what was for dinner last night.
Take a look at the gorgeous pies our Foodie Extravaganza Party has brought to the table today:
The first 'Wednesday' of every month, Foodie Extravaganza {Party} hosts a theme based cook-off where food bloggers come together to celebrate the food event of the month from the American National Food Holidays.

I know Wendy said that we need not constrict ourselves to American Pie and the theme title came only as a result of the song. But I wanted to challenge myself to make an All-American Pie and BLT just popped up in my head. Of course the 'L' in BLT stands for Lettuce but to introduce lettuce into a pie filling would just make it mushy. I needed something firm but similar to lettuce. Enter a passing moment at the grocers where a lady asked the vendor whether a cut of leaves were lettuce. He informed her that it was Chinese Cabbage.

Then I remembered why not Leek too. I also wanted the pie filling to reflect a breakfast meal of bacon, eggs and maybe some potatoes on the side. Egg of course came on top of the pie crust. I then introduced some cheese. In fact I decided it would be two kinds of cheese.

I have to admit I struggled with my first try of the butter pie crust but then I remembered my Christmas Shortbread cookies and well yes you probably guessed right, the second try was a breeze.

The only thing I would do next time is if I plan on Bacon or Pork or anything else as fatty as protein, then I would not go with a Butter Crust as it can be quite filling. Well that is why the serving number on this dish went up. Otherwise it would be 4-6 adults.
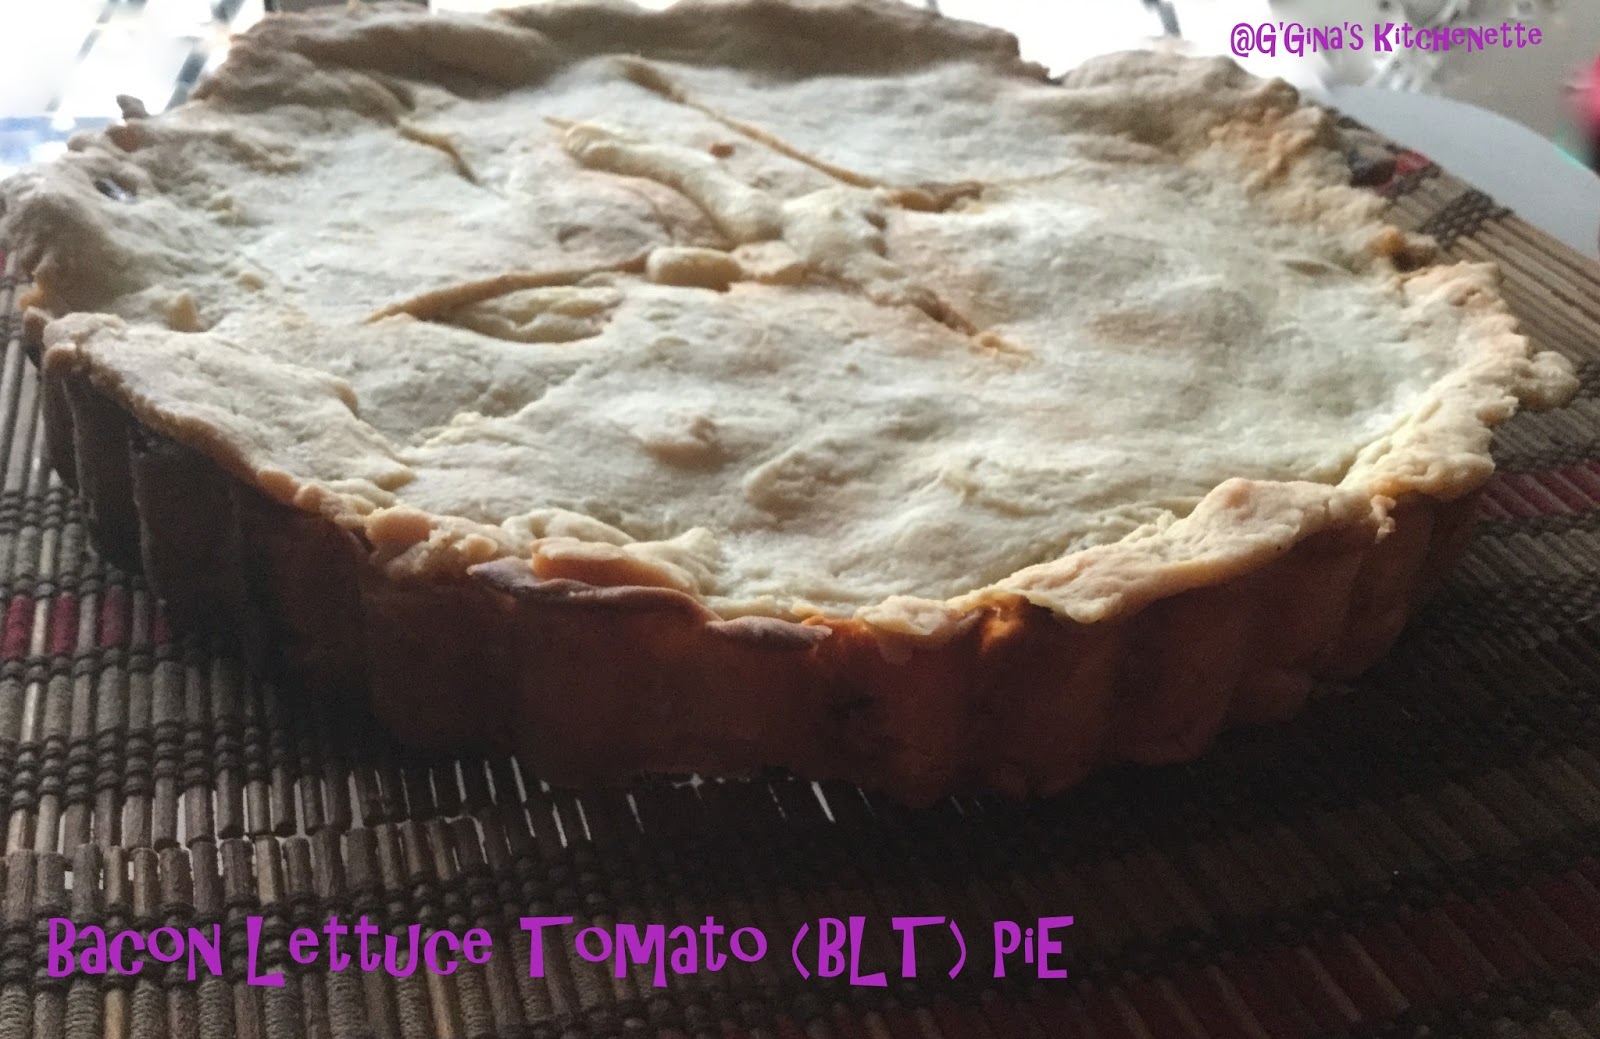
The Butter Pie Crust would go well with fruit or nuts or both.

Well let me not go on and on with the background story and get on to the recipe:
You need:
For the Pie crust:
- 21/2 cups of flour (plus additional for dusting/sprinkling)
- 16 tbsp of cold butter, chopped in cubes *(refer notes)
- 1/2 tbsp salt
- 6-7 tbsp of ice cold water
For the Pie filling:
- 1 tbsp unsalted butter
- 600 gms of bacon, diced
- 2 medium sized potatoes, skinned and chopped into cubes
- 3 large tomatoes, diced into cubes
- 1 shallot, finely diced
- 2-3 cloves of garlic, diced
- 2 bulbs of leek, diced (include the edible leaves too)
- 1 cup thick tomato puree
- 1 egg, beaten or 2 tbsp milk
- Mozzarella and Cheddar Cheese - 2 tbsp each
- A good shake of pepper
The Make:
Please take a note of the notes below before attempting to make your Pie.
For the Pie crust:
1. In a large bowl, take the flour, salt and butter cubes*(refer notes) and mash with your finger tips into the flour till combined and no dry flour left aloof in the bowl.
2. Next add the water bit by bit into the flour until well-combined and the dough formed. The water is used as a binder. Wrap in cling film and transfer to the fridge to remain cool till you prepare the table top for the next steps.
3. Prepare the counter top or your silicone baking mat by sprinkling some flour on top. Make sure if you are using your counter top to keep it clean and free off any materials. Preheat the oven at 180°C.
4. Sprinkle some flour on the pie dish as well. You can use any kind of pie dish, I used to bottom shifting, 9.5" pie crust tray that belong to Mummy. Since there is sufficient butter in the pie crust you do not need to butter your pie dish.
5. Take out the pie dough, cut in half and place one half in the center of the prepared mat or on the counter top and with a rotating motion of the fleshy part of your palm, just gentle roll on top. Return the other half of the pie dough to the fridge.
6. Next press the dough ball down and roll using a lightly floured rolling pin, making sure to turn it over each time you roll flat. Make sure to evenly roll out. Once it has reached about 8" you would need to flip it using the side of your mat. Since I used a 9.5" pie dish, I needed to roll it to almost 12 inches for the bottom crust to ensure the sides of the pie dish are covered.
7. If you find that your dough is tearing up slightly while flipping, stop and then mend and then flip over and roll till you reach your desired size. Then flour your rolling pin once more and sprinkle some flour on top the rolled pie dough. Using both hands, gently place one end of the rolled pie dough over the rolling pin and without pressing on the dough lift the dough off the mat and rest it well onto the pie dish, making sure to blanket the sides well and to go over the top edges of the pie dish. Any extra dough hanging off the pie dish can be cut off. You could use the extras to fix any holes of the top crust or can be baked on a tray with some sugar and cinnamon on top as an in-between baking treat ;) .
8. Blind bake the prepared dough for 10 minutes. Meanwhile prepare the filling of the pie.
For the Pie Filling:
8. Heat a pot and add the butter followed by the potatoes and bacon. Saute for about a minute and add in the remaining ingredients except the puree and saute well for about 5 minutes. Add the puree and cover and cook for another 5-10 minutes. Uncover and allow to cook to room temperature or until warm.
9. Next place the filling inside the prepared pie dish, toss in some pieces of cheddar and roll out the top crust of the pie. Follow the same steps as for the bottom crust and place well over the filled pie dish and seal the edges well. With the tip of your kitchen blade draw a cross on the top of the pie crust. I added a few pieces of mozzarella there.
10. Brush the beaten egg or milk on top of the pie crust, grate some mozzarella on top if desired and place into the oven at 180°C. Make sure to take your oven spill tray and place it on the rack just above the pie rack (only in case you are using an oven with only bottom heat). Bake for 1 hour to 1 hour and 20 minutes. Check to see if you have achieved a golden crust or a dark brown one in case you are using milk.
Slice and serve hot with your favourite dips/sauces. Bon Appetit!
Notes:
1. Time to bake will depend on the type of oven you have. In case you have an oven with only lower heat and no upper, this may take up to 1 hour and 20 minutes.
2. For those of you who do not have an upper heat coil in your oven, then you need the spill tray or oven tray to cover your pie dish to get an even colour on your pie crust.
3. The butter used in the recipe has to be cold, which is why once you chop the same please transfer it to the oven to remain cold.
So that is my Bacon, Lettuce and Tomato Pie or BLT Pie. This was what was for dinner last night.
- BLT Pie by Georgina of G'Gina's Kitchenette
- Cheddar Leek Potato Pie by Lauren at Sew You Think You Can Cook
- Cheeseburger Pie by Kathleen at Fearlessly Creative Mammas
- Grapefruit Pie by Rebekah at Making Miracles
- Ham and Broccoli Quiche by Wendy at A Day in the Life on the Farm
- Homegrown Blackberry Pie by Carlee of Cooking with Carlee
- No Bake Peanut Butter Pie by Lauren of From Gate to Plate
- Peaches and Cream Pie by Elaine at Cookin and Craftin
- Penne Pie by Terri at Our Good Life
- Red Velvet Pudding Pie by Teri of The Freshman Cook
- Tar Heel Pie by Tara of Tara's Multicultural Table
- The Impossible Coconut Pie by Stacy of Food Lust People Love
- Walnut Crumble-Topped Apple Tart by Caroline at Caroline's Cooking


