"This is a journey of my life since I was all of 12 yrs when I started my hand in cooking to now with displays of my learning and creations of recipes from around the world. My inspiration and role model has always been my Mum who has always created dishes from around the world and excellently well. I do not believe I would ever match to her culinary skills. I remember the times she could cook and bake almost 4-5 dishes in one go without ever letting one go under cooked or burnt! I was born and raised in Dubai, UAE and recently moved to India for family reasons. Kitchenette just means that over the decades, my kitchen has changed from that of my mum's to my uncle and aunt's, to my home in UAE and now in India. Pala't'te, describes both global cuisines ('Palatte'-diverse flavours) and pleasing diverse 'Palates'."
Showing posts with label Under 30 minutes. Show all posts

Friday, 17 June 2016

Pearl Spot Fish Pan fried in a Banana leaf (Kuttanadan Karimeen Pollichathu) #FishFridayFoodies

This month's Fish Friday Foodies' event is 'Pan or Deep Fried Fish' chosen by April of Angels Home Sweet Homestead. Thanks April for choosing this theme.


I have always wanted to make the Pearl spot in  our traditional Keralite manner. It tastes awesome and is packed with flavour. Not only that it takes very little oil/fat to make it. I tried the traditional Kuttanadan recipe. Read more about the Kuttanad region of Kerala (India) here


Friday, 18 March 2016

Malabar Trevally with Spices en Papillote #FishFridayFoodies

En papillote (French for "in parchment"), or al cartoccio in Italian, is a method of cooking in which the food is put into a folded pouch or parcel and then baked. The parcel is typically made from folded parchment paper, but other material, such as a paper bag or aluminium foil, may be used. (source:Wikepedia)


March's Fish Friday Foodies event  is 'Fish en Papillote' hosted by the lovely Karen of Karen's Kitchen stories. Thank you Karen. I chose Malabar Trevally or Malabar Kingfish which we commonly consume here.


Although I have always made Fish En Papillote in aluminium foil, I always wanted to try making it in parchment paper. Unfortunately I could not try it with parchment paper since we are on Lent, we are abstaining from Fish, Meat and Eggs. Although these days it is being said that Fish was never meant to be on the list of food items to abstain from as Fish is synonymous with a lot of events in the Holy Bible. I had made this dish before Lent. So although initially I had not committed to this event, I was pleasantly surprised to see that I had not posted this recipe yet on my blog.


There are a lot of interesting recipes today. Can't wait to see them. You can find the link of the recipes below this recipe post.  This is a simple recipe. So hope you get to try it soon.

Usually as I understand Fish En Papillote is usually done with boneless fish or shellfish like prawns but without the shells and is mostly fish in full. However, as I mentioned earlier, I prefer Fish with bone on. You can choose to fillet your fish before you make this. Since my fish was cut up when bought from the fish vendor I just cooked it all together in one big pouch.


My dad for health reasons cannot take spicy food and my little girl dislikes spicy food of any kind. The max she can take is pepper. This is why I made it two ways, one slightly spicier and the other less with just pepper. Mum taught me how to make fish for my Dad and my daughter has always loved her version of fish made especially for Dad.


Thanks to Mummy, I was making Fish En Papillote long before I knew the term. 


For this recipe, 


You need:


  • 1 kg Malabar Trevally
  • 6-8 cloves of garlic
  • 1" garlic
  • Salt to taste
  • 1 tbsp pepper
  • 1 tbsp paprika powder
  • A whole lemon, juice extracted
  • A small drizzle of olive oil
  • A little drinking water (optional)
  • 2-3 whole tomatoes, slit around it (I just made little crosses)


The Make:

Serves 3-4 adults  |  Marinating time: 1 hour | Preparation Time: 10 minutes | Baking Time: 20 minutes

1. Make a paste of the garlic and ginger using very little water. You can also use some of the olive oil to marinate the same. 

2. Marinate all of the fish with salt, lime juice, ginger-garlic paste and pepper. Divide the fish pieces as desired and add the paprika powder to the one set of fish. 
3. Place an aluminium foil (slightly longer sheet than the required quantity of fish to allow to make a pouch) over a baking tray or sheet and place the fish carefully over the aluminium foil. You can choose to have two separate pouches for each fish set (spicy and non-spicy). For want of time, I just divided them separately on the tray and placed them in the same pouch. Allow it to marinate for at least an hour. As with most marinades, remember the more time you marinate it, the better flavoured it will turn out.
3. Place the tomatoes around the fish and sprinkle some salt over it. Next drizzle some olive oil over the fish and cover the fish with the extra length of foil and loosely fold the sides of the foil on three sides to look like a little purse/pouch. Make sure to create a slit to allow the steam to escape (this is only for the foil not the parchment paper).
4. Bake for 20 minutes until nice and flaky. If you have excess stock you can make a gravy out of it or use it as a drizzle while serving.

Serve with your favourite veggies on the side or choice of rice.


Bon Appetit!


Would you like to join Fish Friday Foodies?  We post and share new seafood/fish recipes on the third Friday of the month.  To join our group please email Wendy at wendyklik1517@gmail.com.

Visit our Facebook page and Pinterest page for more wonderful fish and seafood recipe ideas.


The fabulous list of recipes from our awesome #FishFridayFoodies:


Wednesday, 2 March 2016

Kids' Special# 4 - Soft Noodles with Veggies and Poached Egg #FoodieExtravaganza


It has been a long time since the last Kids' Special. I started this tradition of sharing Kids' meals a few weeks before my Mummy passed away and frankly speaking I never wanted to restart it as it reminded me too much of her. 


When Lauren Mitchell of From Gate to Plate hosted March's  #FoodieExtravaganza event Noodles, I had no choice but to restart the Kids' Special as I had already prepped the dish and had to only post the same. And for this thank you from the bottom of my heart dear Lauren. Also special thanks for allowing me to partake in this month's Noodles event though I was a little late without which I would have probably further delayed the sharing of G'Gina's Kitchenette's Kids' meals tradition. 


I have always wanted to make noodles or pasta from scratch. Never had a chance to buy the pasta maker though (someday!! sigh!)


Although this is not Mum's Recipe per say, it reminded me a lot of how she would cook up noodles for her grand kids when we all came visiting home as all of them love noodles.


You need:

  • 1 packet of dried noodles of your choice (400 gms)
  • 1-2 eggs (optional, I used quail eggs)
  • Vegetables of your choice - chopped or diced (2 cups)
  • Salt to taste
  • Seasoning - A pinch each of turmeric, garam masala, coriander powder
  • Cup of Fresh stock or 1 stock cube
  • 1:1 ratio of Water to noodles
  • Water to boil veggies
  • 1-2 cloves of garlic shavings (optional)
  • Drizzle of oil
  • Drizzle of Soya sauce

The Make:

Serves 2 kids | Preparation Time: 5-10 minutes | Cooking Time : up to 20 minutes

1. Boil the noodles in same quantity of water (or a little less) on medium-low heat. Once the water is cleared, set aside. Boil the veggies until half cooked in another bowl. Drain and set aside.
2. Meanwhile in a wok, drizzle some oil in a wok and add the half cooked veggies and garlic shavings and saute well. 
3. Next add the stock cube, seasoning, salt to taste and saute for a minute.
4. Toss in the noodles and a drizzle of soya sauce (my kid likes it. You can skip it if you like) and saute it for a minute.
5. Serve hot with a poached egg on top. I intentionally did not swirl the water while poaching the egg as my kid likes to see the yolk. This was done with quail egg.

Foodie Extravaganza

Posting day is always the first Wednesday of each month. If you are a blogger and would like to join our group and blog along with us, come join our Facebook page Foodie Extravaganza. We would love to have you! If you're a spectator looking for delicious tid-bits check out our Foodie Extravaganza Pinterest Board! Looking for our previous parties? Check them out HERE.    

And now for the star recipes from the #FoodieExtravaganza Noodle Party goers:

One Pot Garlic Pasta by From Gate to Plate
Haluski (Fried Cabbage & Noodles) by Making Miracles
Homemade Chinese Noodles by Fearlessly Creative Mammas
Spicy Shrimp with Peanut Noodles by cookinandcraftin
Bacon and Beer Mac & Cheese by Sew You Think You Can Cook
Sopa Seca de Fideo - Spicy Mexican Noodles by Food Lust People Love
Green Bean and Squash Laksa by Caroline's Cooking
Kakaós Tészta (Hungarian Cocoa Noodles) by Tara's Multicultural Table
MiMi's Baked Ziti by Cooking With Carlee
Tortellini and Tomato Salad by The Freshman Cook
Homemade Noodles by Our Good Life
Tossed Homemade Macaroni Noodles by A Day in the Life on the Farm
Kids' Special# 4 - Soft Noodles with Veggies and Poached Egg by G'Gina's Kitchenette

Friday, 1 May 2015

Kids' Special #3 - Clear Vermicelli veggie or chicken soup with quail eggs

This is a simple but flavoursome soup that kids' would love! It is especially good as an in between snack or a start to a supper or lunch.


Normally kids' prefer noodles but since my little one does not take well to too much of maida/plain flour related ingredients on a daily basis, and does actually like vermicelli, I substituted noodles with vermicelli.


You can also use shredded chicken instead of or with the mixed vegetables.


You need:

  • 1 cup vermicelli / noodles
  • 2 quail eggs (optional), boiled
  • 1/2 cup of vegetables or (1/2 cup of shredded chicken (optional))
  • Salt to taste
  • Pinch of white pepper
  • 2 cups Stock (either veg/nonveg freshly prepared) or 1 stock cube
  • 2 tsp of butter
  • 1/4 tbsp ginger-garlic paste
  • Drizzle of oil
  • 2 cups of water + more as desired


The Make
Serves 1 child | Cooking Time: 20 minutes | Preparation Time: 10 minutes

1. The quail eggs are optional but is recommended owing to its immense number of benefits. Do check out its nutritional value here. It takes a minute to a minute and a half to boil. In fact once the water starts to boil leave it on for about 20 seconds and turn off the flame. Once the water is cooled, de-shell and set aside.

2. In a wok, heat the oil and saute the veggies  (and/or chicken) with a pinch of salt on medium heat. Cover and cook for 5 minutes. Add the butter and saute once more.

3.  Uncover and add the ginger-garlic paste and saute well for a minute. Next powder in the stock cube followed by the water or the prepared stock and bring to a boil.

4. Next add in the vermicelli and bring to a boil. Lower to medium-low and simmer for about minute.

5. Serve in a bowl and top with the quail eggs and a side of crusty bread.

Thursday, 23 April 2015

Ghee Chapattis - Indian wholewheat Flatbread topped with clarified butter

Chapattis are well-known around the world now! I even read an article in the newspaper a while ago on a debate as to which country has the ownership of this flat bread!! We all know the answer to that right? #India


I am not doing justice to the images in this blog post. I will add more photos later.


A lot of commercial mixes of Chapatti flour secretly add refined flour (maida) to add softness to the flour. It really isn't required! You can make your own multigrain flour. You can even have it milled to ensure that there is no refined white flour in the mix. A mix of whole wheat:bajra(pearl millet):oat:ragi(finger millet):psyllium husk or isabgol:soya in 2:1:1:1:0.5:0.5 proportion. You could also add Maize or Channa Dal which is a kind of a dried pulse.

You need:
  • 2 cups of whole wheat or multigrain flour ('Aata' /chapati flour)
  • 1 cup of lukewarm drinking water
  • Salt to taste
  • Ghee/clarified butter (1 tsp per chapatti)


The Make:
Makes 7-8 chappatis depending on the size | Preparation Time (including standing time): 20 minutes | Cooking Time: 15 minutes

1. In a fairly large bowl, add the lukewarm water and add in the flour and salt.
2. Knead the flour into a smooth dough. Add water if required.
3. If the dough gets too sticky, add a shake of flour taking care not too add too much or it would end up being too floury.
4. Cover the bowl and let the dough stand for 15 minutes. If you leave it longer say like an hour or more, it tends to get softer.
5. Divide the dough into 8 balls and roll out the dough using a rolling pin into a perfect or almost perfect medium sized round using some additional flour as required. It helps to keep the flour in a small ramekin or bowl on the side as you roll out the dough to help dip into the bowl in case of sticky sides.
6. Heat a pan/tawa and lower the heat on medium-low and carefully place the rolled out dough circle on the Tawa. Allow it to cook and rise which takes about  a minute to a minute and a half of each side. Flip to cook the other side. You can also take the cooked chapati and toss over the medium flame directly on both sides to give it a rustic look and flavour.
7. Add a tsp of ghee on each side and set aside in a covered chapatti casserole.

Serve hot with your favourite side dish Rajma Masala, Aloo Jeera, Methi Chicken Curry.

Thursday, 19 February 2015

Simple Penne Pasta with Mushrooms

With the Lenten season 2015 here, I believe many of you will benefit from some of these simple recipes to be shared on G'Gina's Kitchenette. Many practicing Christians abstain from non-vegetarian food to the extent of eggs and dairy being eliminated from all meals during Lent. These days a lot of people abstain from their favourite foods including chocolates or choice meals. Some even abstain from social networks, etc. While this is admirable, unfortunately I cannot abstain from social networks as most of my work is done online :)!


So for now it is still simple meals and vegetarian food. However I will share some other recipes as well to benefit my readers who are not practicing Lent.


You need:


  • 300 gms of penne pasta (I used a whole wheat variety)
  • 250 gms of Mushrooms, diced  (you can use any variety, I used smaller button mushrooms)
  • Extra virgin olive oil (EVOO)
  • Olive oil - cooking variety
  • Fresh or dried parsley (1 bunch or 2 tbsp)
  • Salt to taste
  • Paprika (optional)
  • Water to boil
  • 3-4 cloves of garlic, grated finely


The Make:
Preparation Time: 5 minutes | Cooking Time: 30 minutes| Serves 3-4 adults

1. Bring water to boil in a deep pot or wok and  once on a roll, lower the heat and pop in the pasta. Cover and cook on medium heat for 20 minutes or until al dente. Drain and set aside.
2. In the same wok, drizzle some olive oil and saute the mushrooms for 5 minutes. Pop in the grated garlic and parsley and saute for another 5 minutes. You can also add the paprika and salt at this point.
3. Add in the cooked pasta and toss well. Add in the EVOO and serve hot.

Tuesday, 10 February 2015

Singaporean Black Pepper Crab

This is a sweet and spicy variant of crabs. Blue swimmer crabs taste well with this recipe blend. However you could try using some of the other crab varieties.


With Valentine's Day around the corner, I have not made any plans as yet to bake any delicacies as health does not permit the same. But who knows! For those of you celebrating the occasion hope you have a warm and lovely Valentine's Day with your loved one and/family.


Although I have been to Singapore on more than one occasion, this recipe quite reminds me of the time I spent with two favourite people in my life my buddy Nina Silva and her then boss Anneliese Reinhold who were also my internal clients from the legal department where I worked earlier on. We shared a wonderful lunch with these scrumptious crabs being the center of the meal which is the first time I had this dish. I will always remember you both whenever I see or have this flavoursome dish (and even otherwise ;-) ) which tasted so much better when it was with you both. I'm sure your company is what made the difference!


To make these flavoursome crab dish,

You need:


  • 1 kg blue swimmer crabs, cleaned and washed well
  • 11/2 tbsp oil
  • 11/2 tbsp ginger, grated finely
  • 8 garlic cloves, grated finely
  • 2 red chilies, finely minced
  • 3 tbsp black pepper powder
  • 1/4 teaspoon ground coriander seeds
  • 3 tbsp soya sauce (*or 2 tbsp Ketjap manis which is an Indonesian sauce which is a thicker variant of soya sauce flavoured with garlic, anise, etc.. If you are using ketjap manis, then reduce sugar to 3 tbsp)
  • 3 tbsp oyster sauce (optional - some do not like the taste of oyster sauce although recommended for this recipe)
  • 4 tbsp castor sugar/finely granulated sugar
  • 2 spring onions, finely chopped
  • Drinking water
  • 1 tbsp salt


The Make:
Preparation time: 10 minutes | Cooking Time: 20-30 minutes | Serves 3-4 adults

This dish has to be served right off the wok and preferably consumed in one sitting, so put on your eating apron with a center table waste dish and enjoy this with your family/friends.

1. Add the sauces and sugar with about 3-4 tbsp of water in a small bowl, stir well and set aside.
2. Crack the legs of the crab to allow the flavour of the sauces to enter the meat well. You will regret if you do not do the same.
3. Quarter the crab and in a large wok, heat the oil over high heat.
4. Fry the prepared crab in batches until the shell turn a bright orange colour and the meat almost cooked. Set aside.
5. You can drain any excess oil from the wok and set aside. Do not chuck the oil away as it is full of crabby flavour.
6. Next add the spring onions, ginger, garlic, pepper, chilli, coriander and salt to the wok and fry for another minute.
7. Add in the sauce mixture and stir well. Bring to a rolling boil and then simmer for a few minutes.
8. Toss in the crab pieces to the wok and coat the crab pieces in the sauce mixture. Add some of the oil set aside earlier in case it seems too dry.

Serve immediately. Bon Appetit.

Monday, 2 February 2015

Easy make Dinner bread rolls

In speaking with a good friend of mine Kavisha Pinto, she mentioned how easy it is to make dinner rolls. I attempted this make over Christmas when the hubby was late coming home from work for Christmas Eve. I was too busy slaving in the kitchen to step out to buy rolls and I'm glad it worked out that way or else I would have delayed my attempt to make this super easy rolls.


What you need:


  • 11/2 cup wheat flour
  • 1/2 cup plain flour
  • 1 tsp baking powder
  • 1 cup milk
  • 4 tbsp of mayonnaise
  • Pinch of salt (optional)


The Make:
Preparation time: 5 mins | Baking Time: 15-20 minutes | Makes 10 medium sized rolls

1. Preheat the oven to 180°C. You can use a muffin tray if you are concerned about the shape or what I did was randomly divide the dough to 10 different parts and place it on a butter paper on a normal bake tray.

2. In a large bowl, sift in the flour and baking powder. Then add the milk and mayonnaise and stir in well.

3. Add the pinch of salt and mix once more.

4. Bake for 15 to 20 minutes in the preheated oven until browned or nicely puffed up.

Serve hot. Your family is sure to love this esp your little ones :)


Friday, 23 January 2015

Lemon Rice with Paneer

Lemon Rice has always been one of my favourites since childhood. We had a live-in maid growing up and her name is 'Aleyamma'. She often made lemon rice. Though I never liked rice much, a heap full of lemon rice always brought a smile to my face and she made it sooo well. She was quite young so was more like a friend to us. She never hesitated making lemon rice for me whenever I asked as I was such a poor eater back then. I guess I always loved the tangy flavour of the rice and anything salted or tangy found its way in my good books back then.


Ever since I got married, my husband who has always followed all the Orthodox Christian lenten practices, had inspired me to follow the same. So that is 50 days of lent before Easter, 14 days in August before the Feast of Assumption of Our Blessed Virgin Mary, the 7 days before Mama Mary's birthday in September and the 24 days before Christmas.


I wanted to incorporate some protein in the Lemon Rice itself as I was not much in the mood for cooking. I had made some paneer which was in the freezer. So eureka moment I just thought of combining the two.


This is a super simple recipe so I recommend this for a lazy last day of the week or even a busy mid week meal.


You need:


  • 2 cups of  Cooked long grain or Basmati Rice
  • 1 cup of Paneer, cut into bite size or small cubes as preferred
  • A sprig of  Curry leaves 
  • 1/2 tsp Mustard seeds
  • 2 whole dried Kashmiri Red Chilies, hand torn into pieces ( I left it whole as my toddler is anti-spice eater)
  • 1 tsp grated Ginger
  • 1 clove of crushed Garlic (optional)
  • 1/2 tsp Turmeric powder
  • 2 tbsp Lemon juice
  • 1/2 tsp Urad dal (split Black Lentils)
  • 1 tsp Chana dal (split Bengal Gram)
  • Salt to taste
  • 1.5 tbsp Oil
  • Mint leaves, minced (optional)
  • Yoghurt (optional)


**(If you look at the minimal background carefully you can see my little one's angry birds' drinking glass! She was all ready to have her yellow rice. She loved it and her expressions reminded me of mine when I was as young as she was! Smiling from ear to ear ;-) )


The Make
Preparation time: 5 minutes | Cooking time: 15-20 minutes (includes rice cooking time) | Serves : 4 adults

1. In a flat non-stick pan, drizzle and heat some oil. Add the paneer pieces. Pinch and spread some salt over the paneer cubes. Fry until lightly browned on both side.
2. Heat the oil in a large wok or non-stick pan and splutter the mustard seeds.
3.. Next add the curry leaves, followed by the Urad dal, Chana dal and saute well for a minute on medium-low heat.
4. Next add the crushed garlic, ginger, red chilies and saute for a minute.
5. Add the turmeric powder and slowly fold in the rice, taking care not to mash the rice on medium heat for about 2 minutes. Continue tossing.
6. Add the prepared paneer cubes and fold in and leave on heat for a minute folding well.
7. Add the salt, lemon juice and fold occasionally for another minute on medium-low heat.

Serve hot with a cup of yoghurt with some mint leaves on top on the side.

Sunday, 26 January 2014

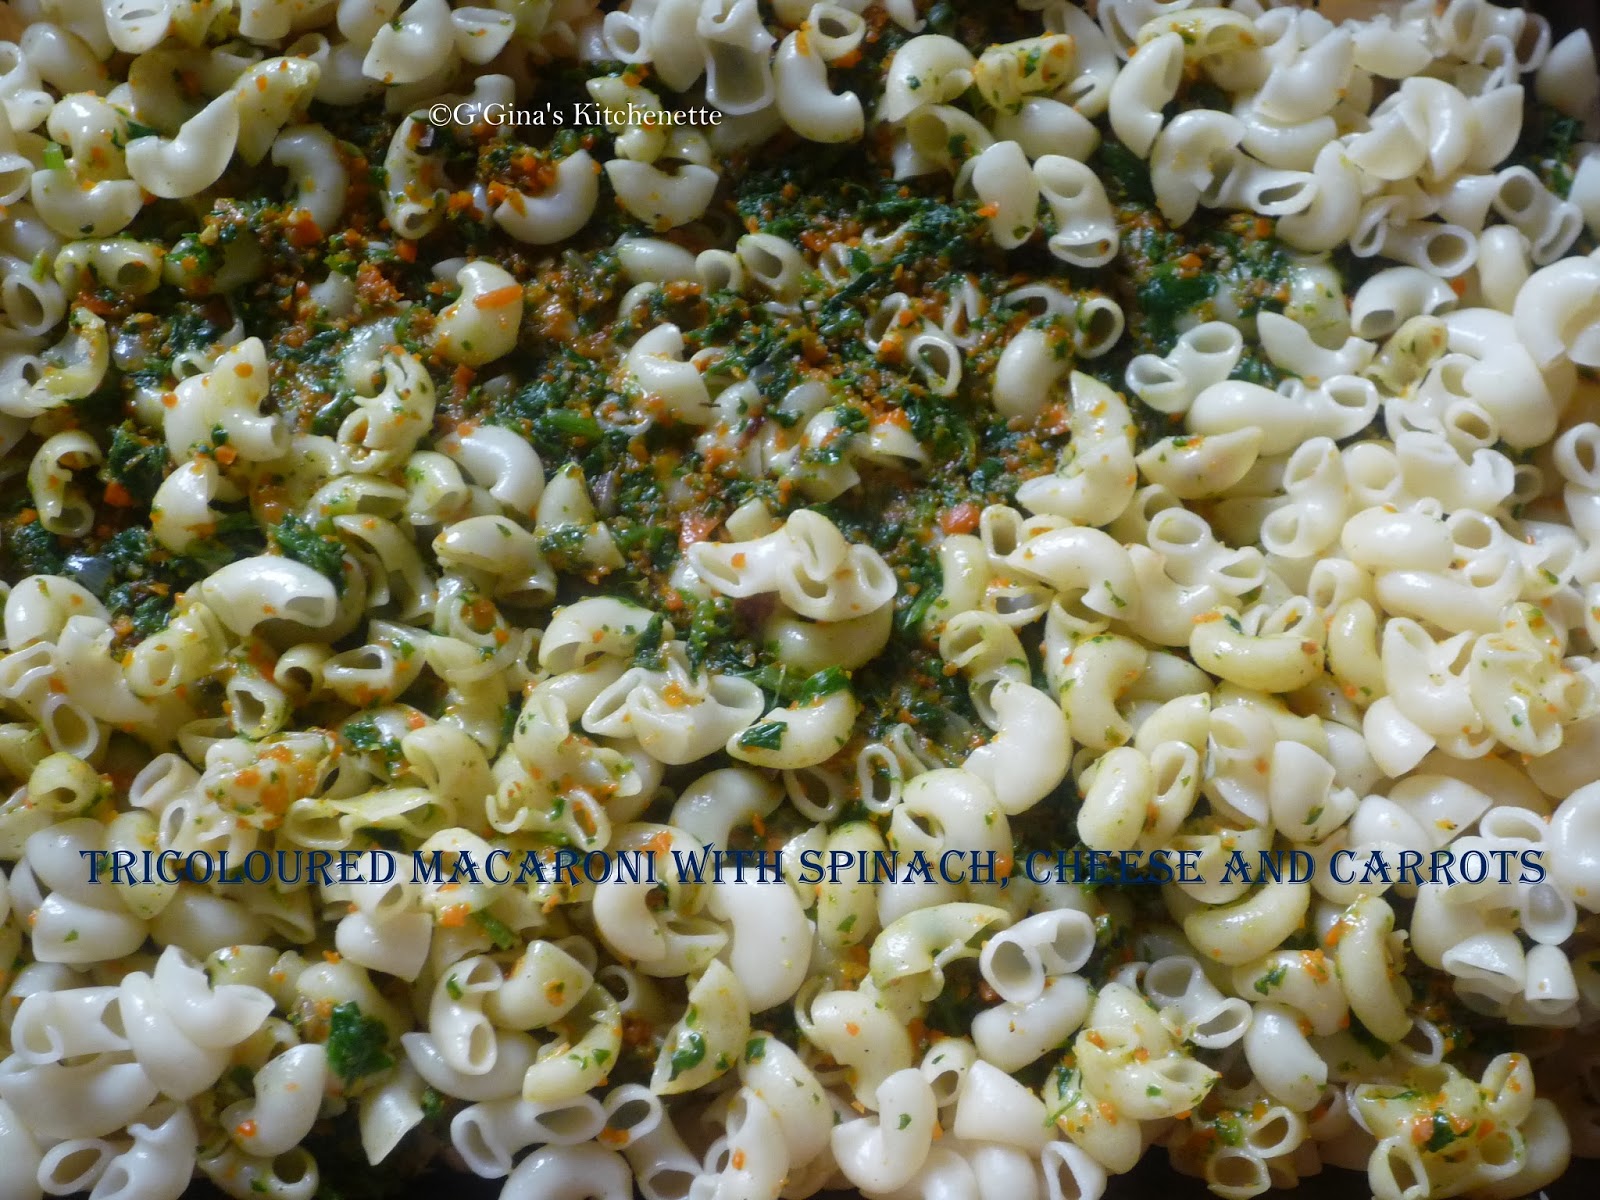
Tri-coloured Macaroni - Cheesy Baked Macaroni with Spinach and Carrots - An Indian Republic Day special

I was contemplating on whether to post this recipe so late in the day and it struck me that some of the readers from across the globe could still be beginning their day. I had a very long weekend with the family as it was my munchkin Isabelle's birthday on the 25th. Actually her birthday officially is on 25th  as per UAE time as she was born in the UAE. But as per Indian time she was born on 26th so you can say she is a Republic Day baby :)


I have been awfully busy, what with the three celebrations my darling had for her 4th birthday! I am glad to see she had a wonderful time with her friends. I too made some new friends as a result.


I know Macaroni is not a very Indian trend but all the main ingredients for this recipe were 'Made in India' and it reflects the colour of our Indian flag (Saffron, White, Green) so I am truly happy that what was a coincidental make actually turned out to be right in time for our Republic Day celebrations! Of course I would have loved if I could I have incorporated the Navy Blue Chakra colour as well but I think I will leave that for next time. Doing it this time amidst the birthday rush would have been a bit too ambitious! This is what is for dinner tonight folks, so I hope you enjoy making this simple Tri-coloured (and healthy) pasta.


You need:


  • 500 gms macaroni/pasta of your choice
  • 2 cups of grated cheese of your choice (you can opt for the low fat version)
  • 4 cups of grated carrots
  • 4 cups of finely diced spinach
  • 4 cloves of grated garlic
  • 1 small shallot, finely diced
  • Pepper to taste
  • Pinch of thyme
  • Pinch of dried Parsley leaves (you can use the fresh version)
  • Water to boil
  • Olive oil
  • Extra virgin olive oil  (EVOO)for drizzling (optional)


The Make:
Serves 7 adults | Preparation Time: 10 minutes | Cooking Time: 20 minutes

1. In a large pot of boiling water, add the macaroni and some salt. Lower the flame and allow to cook over the next 5 minutes. Stir occasionally to evenly cook. Make sure the pot is sufficiently large to allow the macaroni to cook and avoid breaking or sticking together.
2. Meanwhile, heat the oil in a deep-bottomed wok and saute the shallots until lightly brown.
3. Add the garlic, carrots, spinach, thyme and parsley, pepper and a pinch of salt and cover and cook on medium-low heat.
4.  Next in a Pyrex oven resistant baking dish, layer the macaroni, followed by a layer of grated cheese and the cooked veggies and then another layer of cheese and repeat.
5. Place the dish in the oven at 150°C and bake for 5-10 minutes. Leave in the oven until serving time. Drizzle some EVOO over the macaroni before serving.

Serve hot! Happy Republic Day dear citizens of India!

*Note: Non-vegetarians you can add some cooked mince to this dish with the veggies if desired. I didn't as I had vegetarian guests and also I wanted it to look similar to the colours of our Indian flag :)


Friday, 17 January 2014

My Chocolate Souffle - Happy New Year 2014

Happy New Year 2014 my dearest readers, family and friends! I started this New Year with three letters of the alphabet 'Y.E.S'! This is the year of Good Tidings and all Good News! So for my first recipe of the New Year, I wanted to begin with something deliciously sweet. Incidentally, it also something borrowed (from almost a decade ago) and a rather simple make!


This recipe creation is one dear to my heart. It reminds me of a time when I was with my family in Dubai. This was before I was married and was staying with my parents, sisters and bros-in-law. My eldest sis was expecting her first bundle of joy then! My BILs used to tease me with the name souffle (sou-fly, etc.) I had made 'my chocolate souffle' all too often and it was a welcome dessert at home. It was a sure way to get to the heart! No wonder I remember this recipe so fondly!

You can make this recipe with cocoa or chocolate. You can also choose to use the dark-bitter sweet chocolate, white chocolate or regular cooking chocolate. I had used cocoa, a decade ago when I used to make the souffle often. This time I tried it with cooking chocolate.


Now for the souffle, it would be advisable to use ramekins however if you do not have ramekins available, your options could range between sturdy coffee cups, thick glass bowls, steel bowls or even orange peels as pointed out by my foodie group friend Sanaa.


You need:

  •  500 gms butter
  • 150 ml milk
  • 75 gms castor sugar/ brown sugar
  • 25 gms cocoa or 20 gms of cooking chocolate
  • 100 gms plain flour and 1/2 tsp of baking powder or 100 gms of all-purpose flour
  • 3 eggs, separate whites and yolks
  • Extra castor sugar for dusting
  • Water for cooking souffle and melting chocolate


The Make:
Makes 4 standard size ramekins | Preparation Time: 5 minutes | Cooking Time: 20-25 mins

1. Butter the ramekins well on all corner even the rim of the ramekin and set aside.
2. Melt the butter, milk, sugar and cocoa or chocolate in a double boiler.
3. Once melted, turn off the flame and set aside.
4. Add in the sifted flour in the melted chocolate mix and whisk well.
5. Whisk in the egg yolks and mix well.
6. Next add in the egg whites and whisk well till evenly blended.

For the cooking process, you can do this two ways, either on stove top or in the oven. In both cases, you need to place the ramekins in a deep-bottomed pot with a lid. Make sure to add enough water to half cover the ramekins from the base.

7. Pour the whisked batter into the prepared ramekins up to 3/4th of each of the ramekins allowing room for the souffle to expand. Tap the bottom of each ramekin on the table top to ensure the batter evenly sits in the ramekin.
8. Place the ramekins carefully in the prepared pot on a medium-low flame. Cover and cook for 20 minutes. If you are using the oven, preheat the oven to 180°C and place the deep-bottomed pot in the center of the oven and allow to cook for 15-20 minutes.
9. The souffle would have risen over the ramekin at least to 2/3rd its original height and would jiggle a bit but the top would be set.

I personally love having this souffle nice and warm but you can also have it at room temperature or cool as has been enjoyed by a few friends of mine.

Hope you enjoy making and serving this souffle. I call this 'My Chocolate Souffle' as I have experimented with this souffle so much over the years that it has become 'mine' :)

With Valentine's Day in less than a month you might want to try experimenting with/practicing this recipe creation ;) This recipe as I mentioned earlier is a sure way to one's heart :) You can  serve the souffle by making a small dip in the center of the souffle and adding a spoon of ice cream or cream or grated white chocolate or even melted cheese.

Bon Appetit!

Tuesday, 31 December 2013

Dark chocolate fudge brownies - Christmas/New Year Recipe

This recipe is my dear friend Sheritha Ravi-Neeraj's creation. I must say I enjoyed making these brownies and the taste is impeccable. My daughter Izzy could hardly contain her joy to try them out as soon as it came out of the oven. Sheri always made the best brownies I have ever had!


I made this batch of brownies for Izzy's school Christmas party. She has been excited about Christmas since the last 6 months. Probably since her birthday is exactly a month after Christmas, she was involved in her mama's Christmas preps even before she arrived in the world! :)


These brownies are special because not only are they fudgy when cooled, if you cut into them right away, it actually gives the effect of chocolate lava cake. The surface is nice and crispy as well.


This is an amazingly simple recipe as well. Hats off to you Sheritha. Most of the work goes into the resting time which is really no work at all for you! So if you are thinking of making these brownies for New Year's, I would say go for it as there is hardly any work needed to make these delicious brownie bites and your family and guests are sure to love it.


I doubled the quantity below as I planned on sharing some of these brownies with my friend Sireesha who requested my first ever cake order. Her son loved the Chocolate Cake I made him and expressed his interest in brownies/choco lava cake. So I think these brownies would be perfect for them. I am waiting for him to try these brownies.


You need:

  • 200 gms Dark cooking chocolate
  • 200 gms Butter
  • 3 Eggs
  • 50 gms plain flour
  • 350 gms Brown sugar
The Make:
Preparation Time: 10 minutes | Cooking Time: 20 minutes | Yield : one 9"X8"
Adapted from Sheritha Ravi-Neeraj's recipe

1. In a double boiler, melt the butter and chocolate.
2. Beat eggs separately, add the sugar and whisk well.
3. Add the choco-butter mixture to the egg mixture and blend thoroughly.
4. Next add the flour bit by bit and whisk well. You may need to fold in the flour to the mixture and stir briskly with a wooden spoon before you whisk with a beater as the flour may spray all over.
5. Prepare a cake tray of 9" X 8" and grease well on all sides. Preheat the oven to 180°C.
6. Pour the batter in the prepared cake tin and bake for 20 minutes at 180°C.
7. When you see the top surface of the batter nice and crusty and feel the center less gooey and more fudgey (not fully cooked), turn off the flame and allow to cool down for at least 10 minutes.
8. Once cooled, cut into equal squares. The center of each slice would be fudgy and still warm.

Hope you enjoy making these lovely fudgy brownies. Happy New Year 2014 everyone!

Hope you have enjoyed the 2013 ride with G'Gina's Kitchenette. I would like thank all my loyal readers who esp. helped to promote not only the G'Gina's Kitchenette blog site but also the Facebook and Twitter pages. I hope to see you all back here in 2014. Wish your family and you a wonderful year filled with sweet surprises ahead! God Bless!

Friday, 20 December 2013

Fried Rice - Mummy's recipe

As I mentioned in the Duck roast post, this Fried Rice would be an excellent accompaniment to the Duck Roast. Not only is this a simple to make accompaniment, it is also goes well with the Duck Roast Gravy! I used to always resign myself to the fact that rice was something I was never good at making esp. Fried Rice, Biriyani, etc. Well not until I followed mum's instructions to the 'T' and also had a televised encounter with Jamie Oliver :) So all it takes is good listening (and might I add obeying) skills to get it right (after a few tries).


This one is mum's recipe so it turned out pretty fab (Thank God as I had guests to feed).

To make this simple Fried rice,

You need:


  • 3 coffee mugs (about 600 gms) basmati (long grained) rice 
  • Salt to taste
  • 1/2 tsp cardamom powder
  • 1 large onion, diced finely
  • 1" ginger, diced finely or ground
  • 1" cinnamon stick
  • Veggies of your choice - carrots, green peas, beans, etc., diced finely
  • 6-7 cups of drinking water
  • 1-2 tbsp of cooking oil
  • 1 tbsp of ghee or clarified butter (optional)
  • Drizzle of oil (optional)


Method:

Serves 7 adults | Cooking Time: 15 minutes | Preparation Time: 15 minutes (to 1 hour)

1. Clean the rice and then soak for at least for at least 15 minutes to 1 hour. The reason for this is that the more you soak it, the lesser water would be required to be added during the cooking process which means lesser possibilities of turning up with a less than fluffed rice.
2. Boil 6 cups of water with salt and cardamom powder and a drizzle of oil (optional) to avoid the rice from sticking (I did not add any oil at this stage and it turned out fine) in a non-stick pot.
3. When the water comes to a rolling boil, lower the heat and take out a palm full of the soaked rice bit by bit, add it to the boiled water and discard the soaked water. Cover and cook until the rice comes to a boil. Turn off the flame and leave covered.
4. Heat the oil in a wok/non-stick pot and toss in the onions.
5. Saute the onions with a pinch or less of salt until translucent and then add the ginger and saute for a minute.
6. Toss in the cinnamon stick and saute for another minute.
7. Next add in the veggies and saute for a few minutes (with ghee - optional) until translucent.
8. Transfer the sauteed veggies to the half cooked rice and add another cup of water if required. Cover and cook for about 15 minutes on medium flame*.
9. Fluff the rice with a fork before serving. Serve hot with your favourite dish or Duck Roast.


*Tip: Medium flame as it would get too stodgy and take more time on low flame.

These pictures are again from a time before my blogging adventure began. I will replace them once I make this dish again. Just had to share the recipe as its only 4 days to go to Christmas :) 
Merry Christmas all!

Tuesday, 12 November 2013

Pazham Bonda - Fried Mashed Banana balls

This is one from my mum's kitchen again. A very simple to make tasty tea-time snack! There are so many variants of Bonda but this one by far strides well with both kids and adults alike. This also makes for a good on-the-go snack and can be made in various sizes as well. It has a texture very similar to that of a doughnut.


Normally bonda is made with plain flour (maida) only however as  I mentioned in my earlier posts and profile as well, Mum's kitchen has always adopted healthier options. This variant is made with a combination of wheat flour and plain flour. I would suggest you make this at home rather than buying it from a restaurant as it is simple to make and you know how sweet to make it and how much and what type of oil to use.


You need:


  • 2 cups of Wheat flour
  • 1 cup of Plain flour (maida)
  • 6-8 Bananas, mashed
  • Jaggery/Sugar/Brown sugar/Cane sugar to taste
  • 1-2 cups drinking water
  • A pinch of baking powder
  • Cooking oil - to deep fry


The Make:
Preparation Time: 3-4 hours | Cooking Time: Under 30 minutes | Makes 8-10 medium sized balls

1. Combine all the ingredients above into a dough.

2. Set aside to rest for about 3-4 hours. You can leave it for longer if you have the time as well. This batch was rested for at least 6 hours.

3. Once rested, divide the dough and roll it into tennis sized balls. You can make them smaller if you like as well.

4. Heat a large/deep-bottomed wok with the oil for up to 2 minutes.

5. Lower the flame and place the rolled balls carefully into the oil and deep fry till golden brown.

6. Drain and place the bonda on a clean kitchen towel.

7. Serve hot with tea or coffee.

Bon Appetit!

Wednesday, 7 August 2013

Double Chocolate Brownies - The ultimate chocolate brownie recipe..

We have been celebrating quite a few birthdays since July, starting with my hubby Anup's to my Dad's and mine which was just 2 days ago. I love baking and most esp. for my loved ones. Incidentally for those of you who do not know me, I entered the kitchen through baking. Started with crash and burns and messing up my mum's cake tins :D I was known as the Dessert Queen for a long time as my explorations were limited to desserts. There were these almost two whole years I never touched a cake mixer or had anything to do with desserts. I kind of abandoned making them (used to still eat them though ;) ). Well that's a long story that needs another blog post.

These were special brownies and I sent them over to Izzy's CLO at school as she loved my Anniversary Love Cake surprise pics that is on my blog. She loved these brownies. In fact her message read, "It is really yummy, thanks a lot... U r a gr8 cook...Thanks once again". Rhea you are most welcome. I love baking for friends and loved ones so will do it again :) just be ready to try them out and share your feedback :)

So dear readers, if you follow these recipe details to the 'T', you will not go wrong. I know as I have experimented with variations of chocolate, butter and eggs. This post is dedicated to my dear friend 'Vidhya Venkatachalam' who has been asking me to post these brownies for a while now. I used to make these brownies quite often when I stayed with Mom in Dubai through school years and thereon. It was really a sweet surprise to hear from you. Miss you lots g-friend!


It will be sometime before I can bring you more of my recipe creations as I am going on a short break soon. Until then, I have a request. Please do visit G'Gina's Kitchenette Indiblogger Awards 2013 nomination page and click on 'Comment'. You comments are not only counted as a valuable vote but also will determine the nature/authenticity of my food blog by the jury in deciding if I win! Please visit today if you can. It takes only a minute and only requires that you log into your Facebook page. Thanks heaps in advance and hope you all enjoy a wonderful Eid that is soon to arrive. Eid Mubarak!


You need:

  • 1/2 cup flour
  • 1/2 tsp baking powder
  • 2 eggs
  • 1/4 cup milk
  • 1 tsp vanilla
  • 2 tbsp of unsweetened cocoa powder
  • 4 squares (1" per sqaure) of unsweetened baking chocolate
  • 1/4 cup butter, softened at room temperature
  • 1 cup sugar
  • Pinch of salt (not required if you are using salted butter)
  • 1/4 cup of chopped walnuts


The Make:

Preparation Time: 10 minutes | Cooking Time: 25 minutes | Serves 4

1. Preheat the oven to 210°C.

2. Melt the butter and the chocolate either in a double boiler on the stove top, whisking intermittently or in the microwave at the 30 minutes increments and stir at each increment up to a minute. Give it one last whisk and set aside.

3. Mix the dry ingredients. Place the flour, sugar, baking powder and salt in a mixing bowl. Using a whisk, toss the ingredients well until they are fully incorporated.

4. Add in all the the wet ingredients except the milk and eggs and mix well. Next add in separately whisked eggs and give it one more swirl.

5. Next pour in the chocolate and butter mixture, milk and eggs and stir the mixture together with a ladle until the batter mix is perfectly smooth and lump free.

6. Line the cake tin with parchment paper or butter paper to avoid the brownies from sticking and for a finer finish.


7. Pour the batter into the baking pan. Give the tin a tap on the kitchen top to ensure that the batter is even across the tin. Smoothen the top with the back of a ladle if required.

8. Turn the prepared cake tin to the preheated oven and turn down the temperature to 180°C.

9. Bake the batter for about 20-25 minutes. Test with a skewer or toothpick and ensure it comes clean when inserted into the center of the cake tin.

10. Allow it too cool to room temperature before cutting in. Try to cut the brownies in even squares each.


I still have not purchased my new cake tins and made this one which was given to me by Anup's cousin's wife Anu Abraham. Thanks a lot sis :) The cake tin is round and I could not cut all the pieces to even squares each owing to the shape.


Hope you all enjoy this recipe. It's simple to make and you can have it ready in under 30 minutes.

Bon Appetit! Eid Mubarak once again to all my dear readers!

Please do visit G'Gina's Kitchenette Indiblogger Awards 2013 nomination page and click on 'Comment'. Thanks whole heaps in advance!

Thursday, 1 August 2013

Hummus (Chick Peas dip)

I made Hummus from scratch after I got homesick one day. Well I decided to cook an Arabic meal. Have yet to try Arabic kebabs but I went for the roast chicken as option. This is the first part in my rustic Arabic meal. Anup's cousin and family were visiting Hyderabad so I thought what best than to serve them something from my hometown. For those of you who do not know me, no I am not Arab - very much Indian but I was born, raised and spent a good chunk of my years in Dubai, UAE. I miss home a lot...you cannot imagine! But before I get down and feel blue again (not that this weather is helping either), let me get this recipe across to you :)


Hummus is a very healthy dip unlike most of your dressings and dips you get out of a jar. If used with the right amount of EVOO, it should prove to be healthy. It is rather simple to make as well.


You need:

  • 2 cups of dry chick peas (cleaned and soaked overnight with a pinch of soda bicarbonate (optional) )
  • 1/2 cup of sesame seed paste (Tahini)
  • 3-4 medium sized garlic cloves, crushed to a paste
  • 1/4 cup lemon juice
  • Salt and paprika/smoked paprika powder to taste
  • 2-3 tbsp of EVOO (Extra virgin olive oil) or Olive oil
  • 4 cups of drinking water
  • 1-2 tbsp Parsley leaves, chopped finely (optional)
  • Chopped olives - for garnishing (optional)


The Make

Preparation Time: Overnight + 10 minutes | Cooking Time: 15 minutes | Serves 4 adults

1. Drain the chickpeas and rinse well. Cook the chickpeas in water either in a covered pot or pressure cooker ( 2 whistles on high and 1 on low).
2. Drain most of the water used for cooking the chickpeas with a tad reserved for the grinding process to follow.
3. Reserve a few of the chickpeas for garnishing. Grind the chickpeas in either a food processor or blender until it forms a smooth paste (no lumps, else redo in batches).
4. Add the remaining ingredients and give it one last blend. Take all of the paste onto the serving plate.
5. Mix in the lemon juice and drizzle olive oil just before serving. If you add the lemon juice and olive oil prior the hummus will gain a bitter taste.


6. Garnish with chopped olives, parsley leaves (optional), reserved chick peas and a pinch of paprika.
7. Serve with warm pita bread / kuboos (Arabic flatbread) or manakish.


Hope you enjoy making and most importantly dipping into the hummus. For those of you that have not liked my Facebook page yet, I would like to inform you that G'Gina's Kitchenette has been nominated for the Indibloggers Awards 2013 in the food category:-). Please do visit the G'Gina's Kitchenette's Indibloggers Awards 2013 nomination page to vote by clicking on 'Recommend' and don't forget to leave a 'Comment' on what you like about G'Gina's Kitchenette and the recipe creations. G'Gina's Kitchenette is counting on your valuable vote and comments. This requires a facebook login by the way :-) Thanks whole heaps in advance.