"This is a journey of my life since I was all of 12 yrs when I started my hand in cooking to now with displays of my learning and creations of recipes from around the world. My inspiration and role model has always been my Mum who has always created dishes from around the world and excellently well. I do not believe I would ever match to her culinary skills. I remember the times she could cook and bake almost 4-5 dishes in one go without ever letting one go under cooked or burnt! I was born and raised in Dubai, UAE and recently moved to India for family reasons. Kitchenette just means that over the decades, my kitchen has changed from that of my mum's to my uncle and aunt's, to my home in UAE and now in India. Pala't'te, describes both global cuisines ('Palatte'-diverse flavours) and pleasing diverse 'Palates'."
Showing posts with label Festive. Show all posts

Thursday, 26 November 2015

Jamie Oliver's Best Eggnog in the World - The Ultimate Eggnog

Aha you must think that I am a die hard fan of Jamie Oliver. Well kinda. I dig his recipes for sure and especially his simple recipes to make awesome, delicious dishes which you can make in a matter of minutes and still look like you have slaved away in the kitchen.


So here goes the eggnog recipe from Jamie's Food team which is claimed and now I confirm to be the best eggnog in the world. I made two versions a virgin one for my little one and the full version. This I did last Christmas 2014. So for those of you who have been following G'Gina's Kitchenette's Facebook page or our Twitter page, the chapter must slowly be unfolding as to what I meant last Christmas by saying this :
"It gets tough to cook Christmas Eve Dinner, Christmas Breakfast and Lunch!! This year got special with Jamie Oliver taking over the kitchen! Thanks Jamie! You Rock! Merry Christmas all from G'Gina's Kitchenette!"

The author from Jamie's Food team who wrote this recipe, Meredith Steele did teach me something new about eggnog. She mentioned how the name 'eggnog' was acquired from a 14th century English drink called posset. Posset was a drink of curdled hot milk with ale and over sometime eggs were added to the concoction.


This preparation of this creamy, sweet drink starts with infusing cream with milk and cinnamon, nutmeg and vanilla beans. It is the warm infused milk which slowly streams into the beaten eggs and sugar. Then your rum or bourbon is what lifts its spirits. It is then refrigerated before the fluffy egg whites join the party of the eggnog for that face uplift. I however separated a portion of the eggnog from the main jug to serve to my princess later. I refrigerated hers separately and then added a portion of the fluffy egg whites to her serving.


Thankfully my parents rear poultry so my chicken eggs were fresh from their home farm.


This was my first try at making eggnog. Mummy used to serve a mean fruit punch/ cocktail punch. Never tasted her eggnog though.


You need:

  • 3 cups or 700 ml of whole milk
  • 1 cup or 240 ml of heavy or double cream (I used refrigerated Amul cream)
  • 3 cinnamon sticks
  • 1 vanilla bean pod, split and seeds removed
  • 1 tsp freshly grated nutmeg (set aside some additional for garnish - about a tsp)
  • 5 eggs, separated (I used our farm eggs)
  • 2/3 cup of granulated sugar
  • 3/4 cup of bourbon or Dark rum


The Make:
 Serves 8 | Preparation time: 10 minutes | Resting Time: overnight-3days

1. In a saucepan, combine milk, cream, cinnamon, vanilla bean, vanilla seeds and nutmeg. Bring it to a boil on medium heat.

2. Once it reaches a boil, remove from the heat and allow it to steep.
3. In a large bowl, whisk the egg yolks and sugar until combined and thick strands are formed when the whisk is lifted.
4. Next whisk in the milk and continue to mix until smooth and well combined.
5. Add the bourbon or rum and mix. Refrigerate overnight or up to 3 days.
6. Before serving, whisk the egg whites in a large bowl until soft peaks are formed. Then gently fold into the eggnog until combined.
7. Garnish with nutmeg and serve cold.

Happy Holidays all! Seasons Greetings from G'Gina's Kitchenette!

Wednesday, 7 October 2015

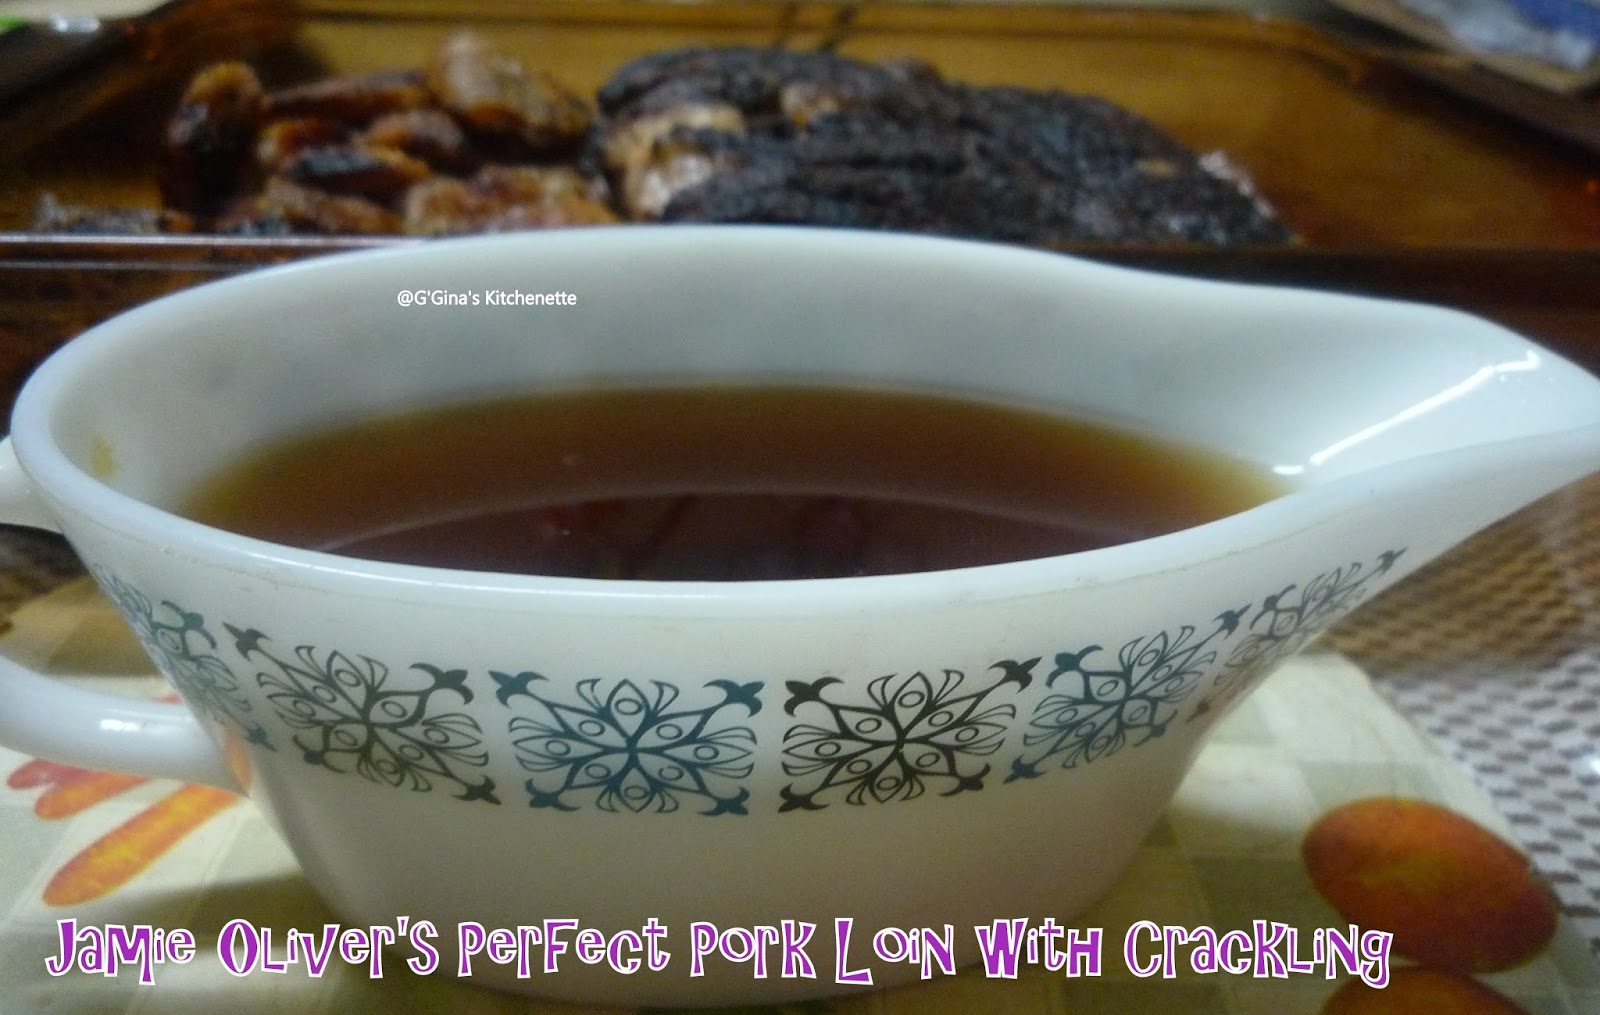
Jamie Oliver's Perfect Pork Loin with Crackling #FoodieExtravaganza

Ah this was a long wait. I made this for Christmas 2014 and its taken 10 months to write this post. I remembered the cook took a fairly long time too as I started late in the morning after church and a hearty breakfast after our fully vegetarian pre-Christmas lent of 24 days. Also I had a couple of eggnog breaks as well in between ;). Still remember how mum was kinda' scolding me over the phone for having started the cook late. Izzy and Anup were happy campers though as they had a ball of a time and over this meal as well. Well it sure was worth the wait! Thanks Jamie for making our Christmas 2014 a special one. He was practically there for the cook as I had to follow his online video to make this one. So yes this recipe is all him!


Mum has a large part to play in my courage to make dishes so hearty and large as these. Don't get me wrong it is not a difficult dish at all to plate up. Just that I wouldn't have the nerve had I not seen her make such large and wonderful festive meals. Love you Mum! You will always be at my side while I cook/bake.


I decided to post this recipe to honour Foodie Extravaganza{Party}'s October event 'Pork'. This is the first event I have joined of Foodie Extravaganza. The first 'Wednesday' of every month, Foodie Extravaganza {Party} hosts a theme based cook-off where food bloggers come together to celebrate the food event of the month from the American National Food Holidays. October's Foodie Extravaganza Pork Party was hosted by the lovely Lauren Mitchell of the blog 'From Gate to Plate'. 


Jamie is right, this is the most perfect pork recipe and is full of flavour as he promised! I did do a twist on his recipe of 'Oozy Beans and Agretti' side that accompanied this pork. That recipe I will share soon enough (hopefully not 10 months from now ;) )!


I have altered the recipe quantities based on the weight of the pork loin that I got from my butcher. Yes and I did get the fat separated from the meat of the loin at the butcher's place. If you do not have that luxury, then do follow Jamie's video here where he displays quite simply how to do the slice off.


You need:
  • 2 kgs pork loin, fat separated
  • 2-3 sprigs each of rosemary and thyme, chopped
  • Salt and Pepper to taste
  • Drizzle of EVOO (Extra virgin olive oil)
  • Half a bottle of balsamic vinegar (about 250 ml)
  • 10-12 cloves of garlic with skin on, smashed


The Make
Serves 12-15 people | Roasting Time: 60-70 minutes | Preparation and Resting Time: 15-20 minutes

Source: Jamie Oliver

1. First score the white side of the fat strip of the loin meat. I did a criss-cross scoring.
2. Rub the skin and meat with the chopped rosemary and thyme leaves along with salt and pepper all around.
3. Use a little EVOO to ensure that the leaves stick to the meat and fat all around.
4. Score the crackling skin with a sharp cooking blade or if you have a sharp pointy kitchen knife you could use the same. Use the tip to form the scores.
5. Put the skin fat side down first on a medium heated non-stick pan and hold for a minute until lightly browned.
6. Using tongs, take out the skin out carefully, and next place the skin side down of the pork meat and lightly brown for a minute . Then turn it over and caramelise the other side as well for about 2 minutes on medium-low heat.
7. Drizzle half a bottle of balsamic vinegar over the caramelising pork meat. Turn it over to coat the meat and then transfer it to a oven-friendly tray and pour all the balsamic vinegar over the top of the pork.
8. Place the garlic cloves into the tray all around.
9. Move the tray to an oven of 180°C . If you have a dual heating oven (top and bottom), you can place the skin on a grill sliding tray on top of the pork tray so all the juices would drip on top of the pork meat keeping it moist all through the cook. If not, you can do what I did and grill the skin separately in another compartment with a spill tray to hold the juices and intermittently using a ladle pour over the cooking pork in the pork tray. This would help create an amazing, simple gravy.
10. Roast over 60-70 minutes, intermittently turning the meat and the skin.
11. Take off the heat Rest the pork in the pork tray with all the juices for 10 minutes. Then take out the pork with a tong or a large fork and place on your serving tray.
12. Pour out the juices from the tray into a jug. You can then see the fat separated atop the jug. You can then take a ladle and scoop up the fat (even if a little gravy comes with it, that's ok) into a storing jar and refrigerate which can be used as a flavoursome stock later on.
13. Sieve out the juices from the jug, making sure to squeeze the garlic cloves to ensure its flavour comes through. This forms your gravy.
14. Serve your pork meat as a whole  or sliced with cracking strips at the side (the earlier scores will help you cut it through) and with some of Jamie's Oozy beans with Agretti  or my take of Jamie's recipe of beans (recipe to follow later). Pour over some of that amazing gravy.

And as Jamie said you are sure to hear of this make for years to come!

Bon Appetit!

Some delicious recipes from our fabulous Foodie Extravaganza members:

Thursday, 27 December 2012

Post Christmas Turkey Soup - A Boxing Day Special

Hope you all had or are having a good Boxing Day. Boxing Day is traditionally the day after Christmas when those in service roles at home or work were given gifts, money, etc. The origins of the name is still uncertain. This day is also a public holiday in most Western countries. The recipe I have for you was also made last year after our Turkey meal for Christmas. It is a simple recipe made of the turkey carcass, some of the turkey meat and some veggies. I must say it is quite filling in itself.


Remove the usable meat from the turkey carcass which you can use to make nice, delicious turkey sandwiches (with some of the turkey drippings that were not used for the gravy) for the morning after Christmas. You can also use some of the turkey meat for this soup and make the stock right after the Christmas meal.


You need:

  • Turkey carcass, skin
  • Leftover turkey meat, giblets and drippings
  • 1 large shallot
  • 5-6 cloves of garlic
  • 1" crushed ginger
  • Water as required
  • 4 carrots, diced
  • 2-3 strands of fresh or dried thyme
  • 1 bay leaf
  • 1-2 Celery
  • 1-2 bunches of parsley, diced
  • Crushed Peppercorns to taste
  • 2 diced tomatoes
  • 200 gms of diced button mushrooms
  • 1 onion diced
  • Noodles/Rice - optional
  • Mashed potatoes - optional
  • Salt and Pepper to taste
  • Dash of tobasco or hot chili sauce


The make:

Preparation Time: 20 minutes | Cooking time: 60 minutes | Servings depend on quantity of unused turkey

1. Break up the leftover bones in a large, deep bottomed pot along with some of the turkey skin and cover it with water by about an inch. Some of the drippings that were not used for the gravy and the unused giblets can also be added to the pot. Add a diced shallot, some garlic, 2 carrots, parsley, bay leaf, celery tops and the peppercorns.

2. Bring the contents in the pot to a boil on high temperature. Lower the heat to low-medium . Skim off any fatty residue that arise on the surface.

3. Add salt and pepper to taste. Remember the turkey and drippings may contain sufficient salt so take care on adding more salt to the mix.
4. You can either continue to cook the soup over a medium or low flame for about an hour or turn to an oven of about 150C for about an hour. You can later take off any residual foamy contents from the surface.
5. Next strain the contents through a fine, mesh sieve.
6. Return the strained stock to the deep bottomed pot  and add your choice of veggies - carrots, onions, mushrooms, celery, parsley, sage and/ or thyme on a medium-low heat and cook the veggies.
7. Once the veggies are cooked, add the tomatoes and you can add noodles, pasta or some cooked rice. You can now add the turkey meat. Top with some salt and pepper or a dash of tobasco or hot chili sauce for an extra kick.

Enjoy with some crusty bread or a simple green salad!

Monday, 24 December 2012

Mummy's Special Christmas Cake

I would like to wish my eldest sister a very Happy Birthday today! Without you sis, this life would not be the same! Thank you for being such a wonderful big sis! I love you and can't wait to see you home soon (just a few more days...yaay)!


This is one cake that featured in all our Christmas-es to date. The last two years have been different as I was the one baking as per Mum's instructions over the phone. Simple to make and  has one pre-baking task, which is soaking the nuts and raisins . The earlier you do it the better.


This year I did not use only the cashew nuts and included raisins and soaked them way in advance in October. So there is a slight difference but the rest is just the same.


Christmas 2012

I have not eaten a whole slice as we are on pre-Christmas lent. So I cannot tell you how it tastes but textural there is a very slight difference from Christmas cake 2011 and 2012.


Mum used to make this cake for our family and relatives and this cake has been tasted and feasted by many as she used to pack them up and send it to us when we were studying away from home.


This year I have staged the Christmas meals (unlike last year...whew!) since the last few days however I still have a lot to do before I am done with final touches, as I am sure you do to, so I will get right to it.


You need:

  • 500 gms of cashew nuts
  • 250 gms of raisins (optional - mum used to soak cashews only)
  • 700 ml of brandy or rum (* instead of alcohol)
  • Zest of 1 orange (optional)
  • 1 tsp of nutmeg 
  • 1 kg flour
  • 1 kg castor sugar or powdered sugar
  • 500 gms of butter, room temperature
  • 12-14 eggs
  • 2 tbsp of extra flour**
  • 2 tsp baking powder
  • 1 cup of sugar (burnt sugar process. Please check Ginger Wine)


The make:

Preparation time: 1-2 months for soaking the nuts, 1 hour pre-baking time | Baking Time: 2 hrs, 10 minutes

1. Soaking the nuts: This is normally done at least a month in advance. Soak the whole cashews 1-2 months in advance with brandy or rum in a tightly sealed jar.Remember the level of the alcohol dips as the cashew nuts absorbs the alcohol and increases in size. So top up by add the alcohol in stages. I added first 175ml, followed by another 175ml and them 350 ml. *Tip:If you do not want to use alcohol, you can also just soak the nuts a few days in advance in cranberry or grape juice and store in a cool, dry place.You can add the raisins if using during the mixing process or after chopping cashew nuts. Chop the cashew nuts, add the raisins to it and set aside.
2. Preheat the oven to 250C. Grease the cake tray(s) with butter on all sides. If your cake trays are a little old, then I would suggest using a foil and then greasing the foil before lining the cake tray. I did that with one of my cake trays that had a few scratches or you can just use butter paper. Now I cannot tell you how many cake trays each of you would need. However what I can tell you is that it would fit approximately two 9" * 10" * 2" cake trays.

Ready to go into the oven
3. Add the flour, baking powder and sugar and fold in with a spoon. Allow it to stand for at least 20 minutes.
4. Whisk the eggs in a large deep-bottomed bowl until fluffy. Add the butter and blend well.
5. Slowly add the flour mixture one ladle at a time to the egg-butter mixture until cake consistency is achieved. Add the nutmeg and/or the optional orange zest. I have never used this so far as Mum does not include the orange zest.
6. Next add the chopped cashews and raisins with the residual alcohol. Now with the ladle just mix in the the cashews and raisins. No need to beat the mixture at this stage. Add the burnt sugar. If the mixture seems to be slightly watery its either that you have not mixed the nuts, raisins and alcohol enough or that the mixture has thinned due to the alcohol quantity, in which case dust the top of the mixing bowl with the extra flour** and mix again with a spoon (although this is not advisable so try not to add all of the residual alcohol if over a few tablespoons).
7.  Allow the mixture to stand for another 20 minutes before pouring into the cake tray(s). Pour the mixture halfway of  the cake tray leaving room for the cake to rise.
8. Lower the oven heat to 170C and slowly place the cake tray. The first cake tray may take a tad longer than the subsequent ones by 10 minutes. Check in 30 minutes, if the cake has risen to a full. Then open the oven and using a fork or skewer, check if the cake has cooked. If cooked, the fork would come clean. The first cake tray may take between 40-45 depending on the size of the cake tray. Repeat until all of the batter is used.

This cake will go well with the Ginger wine recipe I posted recently. Enjoy!

I assure you this cake is one to be served during Christmas week and I sincerely apologise for the delay in posting this recipe. Hope you try it anyways or next year is always there. Over the next few weeks I will be away but will find time to post you more treats of the Christmas week that you can try over the New Year. Merry Christmas and Happy New Year 2013 from our family to yours.