"This is a journey of my life since I was all of 12 yrs when I started my hand in cooking to now with displays of my learning and creations of recipes from around the world. My inspiration and role model has always been my Mum who has always created dishes from around the world and excellently well. I do not believe I would ever match to her culinary skills. I remember the times she could cook and bake almost 4-5 dishes in one go without ever letting one go under cooked or burnt! I was born and raised in Dubai, UAE and recently moved to India for family reasons. Kitchenette just means that over the decades, my kitchen has changed from that of my mum's to my uncle and aunt's, to my home in UAE and now in India. Pala't'te, describes both global cuisines ('Palatte'-diverse flavours) and pleasing diverse 'Palates'."

Tuesday 26 June 2012

Oven BBQ Chicken

This was a dish I first made all of 18 yrs ago and was a hit at home then. I am glad to see both 'A' and Izzy love it as much if not more. We even fought over a share of it. I especially loved Izzy's reaction to the chicken..."Mama...(slurp) yummmie"...even as it was being barbecued.

BBQ Chicken served up!

You need:

  • 1 kg of boneless or boned chicken cut into small cubes or medium pieces
  • 1 tbsp cayenne powder or paprika powder
  • 1/2 tbsp salt
  • 2 cloves crushed garlic (optional)
  • 1 sprig of cilantro or coriander leaves finely diced (optional)
  • The BBQ Sauce


The Make:

Cooking time: 45 minutes | Preparation Time: 10 minutes | Serves 4-6 adults
  • Marinate the cleaned and cut pieces of chicken in salt, pepper and garlic for about an hour or more.

Marinated chicken laid on foiled tray
  • For the BBQ sauce, click here
  • Heat the oven for about 10 minutes on high (245°C).
  • First layer of sauce added
  • Line a flat baking tray (I use the one that comes with the oven) with foil and drizzle some EVOO.
  • Lower the heat to medium and place the marinated chicken and add 1/4 of the sauce on the foiled tray in the oven.
  • After about 20 minutes, turn the chicken on the other side and add another 1/4 of the sauce. Add the last 1/4 in the last 10 minutes of the 40-45 minutes.
  • Take a butter knife and check if the chicken is cooked by trying to cut through one of the pieces. Turn off the flame and allow to cool for about 10 minutes in the oven.
  • Take out the chicken pieces in a serving bowl and garnish with the onion rings and cilantro (optional).


BBQ Chicken


BBQ Chicken

Homemade Barbecue Sauce

This was a sauce that was first made with my BBQ Chicken almost 18 years ago. It was a hit then and I am glad to say it is even now!
BBQ Sauce


You need:
  • 1 large shallot or white onion finely diced (I diced 3/4 of the shallot and the rest into thin rings)
  • 1 tbsp cayenne pepper powder
  • 1/2 tbsp black pepper or crushed pepper corns
  • 2 tbsp Worcestershire sauce
  • 1.5 tbsp mustard or Homemade Mustard
  • 2 tbsp light brown sugar or cane sugar
  • 4 cloves crushed garlic (optional)
  • 2 tbsp EVOO
  • 1 glass of lukewarm water
  • 1/4 cup white wine vinegar or distilled vinegar
  • 1/2 tbsp salt
  • Juice of 1 lemon
  • 1/2 cup of ketchup or Homemade tomato paste

The Make:

Cooking time: 10 minutes | Preparation Time: 10 minutes| Compliments 1 kg chicken

  • Heat a skillet and add the EVOO and warm the oil.
  • Add the diced shallots and saute till translucent.
  • Next add the vinegar, sugar, salt, garlic, mustard, lemon juice, cayenne pepper and water. Stir well. Bring to a boil and simmer on low heat for 10 minutes (uncovered), stirring occasionally.


BBQ Sauce in the making


  • Add the tomato paste and Worcestershire sauce. Let it warm. Cover and set aside to cool.

    BBQ Sauce over Chicken
  • You can make this a day in advance (refrigerate).

Homemade Mustard Sauce

Most of you would wonder why would you ever need to make mustard at home when you can get an American Garden or Dijon Mustard from the store. Well there are places where you do not get Mustard  or have to pay an "import" price for the same. Most importantly, when you make mustard at home, you can add your own preferred flavours to it. There are two reasons why I would make mustard or mayonnaise at home. There used to be a time when the store bought mayonnaise would cause me a headache until my stay in Mangalore, Karnataka, India where I attended college. Back then, I tasted homemade mayonnaise for the first time which I actually liked and I found the same with my mustard experience. And you can actually add your own preferred ingredients such as garlic, horseradish, onions, curry powder, carraway seeds/cumin seeds. I wanted to make my own as I had to make my famous BBQ Chicken in the next 2 weeks which was loved by both 'A' and Izzy. In fact we actually fought over the share of chicken. For those of you in India, more specifically Hyderabad, I have listed where I got some of my ingredients. There is no cooking involved in this process! Just blending adn whipping. This is how I made my mustard 3 weeks ago:
G'Gina's Kitchenette- Home made Mustard

You need:
Yellow and Black Mustard Seeds
Ingredients used


My lil one trying to reach out
  •  4 tbsp of white or yellow mustard seeds (I used the yellow one - Yellow Rai is the Indian name and is widely available)
  • 2.5 tbsp black mustard seeds
  • 4 tbsp of cane sugar or light brown sugar (I used the Tate & Lyle version that I got from Godrej's Nature Basket)
  • 1 tsp of turmeric powder or fresh tumeric root
  • 1 tsp of dried herbs of your choice ( I used Herbes de Provence -  I got it from Q-Mart. You can also get it from Godrej's Nature's Basket)
  • 1 tsp salt
  • 3/4 cups of white wine vinegar or dry white wine (Again I got the white wine vinegar from Q-Mart)
  • 2 tsp of crushed garlic
  • 1 tsp Paprika

Additional/alternate ingredients as per choice: Onion, Garlic, Horseradish, Tarragon, Cayenne Pepper or Paprika, Dried Basil, Dried Parsley Dried Celery or Thyme,Curry Powder, Beer or Cider or Sherry Vinegar
Note: Do not add all the alternate ingredients in one batch itself. These are just some of the options. You can add your own preferred one(s).


Tools required:

  • A sterilised glass jar or any other sterilised bottle. If you are using plastic jar or squeeze tubes like I did, then ensure it is cleaned well with soap and water and air dried. You can also wash it again with luke warm water and air dry it.
  • Mortar and pestle or grinder/food processor - I used my grain grinder
  • Sterilised funnel
  • Wooden spoon
  • Whipping the mustard
  • Thin wired whisk
The Make:


Preparation Time: 40 minutes | Makes 75ml
  • Once the bottle is sterilised and left to air dry, grind the mustard seeds, salt, brown sugar,turmeric and herbs either with the mortar and pestle or your grain grinder to a powder.
  • Take out the ground ingredients into a bowl and add the white wine vinegar whipping part-by-part (this is where a food processor comes handy as you can actually slowly pour it through the opening of the processor) to a coarse pasty form.
  • Let it stand for about 20-30 minutes
  • Transfer the contents to your sterilised jar or squeeze tube (through the sterilised funnel) and store for about 2 weeks in a cool, dry and dark spot.
  • White wine vinegar and whipped up mustard
  • Note: Refrigerate once open. It will last for many months if stored properly.
Try various flavours of your choice in other batches. You can use some of the alternate ingredients suggested or your own. Hope you enjoy your own homemade mustard!


Tuesday 19 June 2012

Homemade Chilli Pickle

I have learnt how to make any kind of pickle from my darling mum. I have always loved pickles. I used to have it plain on bread or toast in my younger days. Now my poor tummy cannot take it like that although I do try at times:) Pickles go with everything rice, biriyani, flatbreads, etc.

This one was inspired from the fact that I had one too many bundles of chilies. I allowed it to air dry for a couple of days and then made this. Sorry I was too busy watching Masterchef Australia Season 4 that I forgot to take pictures of the process but I do have the after bottled pictures.

Chili Pickle


You need:

  • 150 gms of fresh chilies (I had the mix of green and red versions in the same pack)
  • 1 tbsp of mustard
  • 1 sprig of curry leaves
  • 4 tbsp of mustard oil
  • 4 tbsp of Pickle powder
  • 1 tbsp of Kashmiri Chili Powder
  • 1 tbsp of Dosa-Idli Powder
  • 1 tbsp salt
  • 2 tbsp of vinegar
  • Additional 2 tbsp of mustard oil


The make:


Preparation Time: 5 mins| Cooking Time:10 minutes


  • Heat the oil in a large skillet and splutter the mustard seeds.
  • Add the curry leaves and on a medium flame, add the pickle powder and dosa-idli powder and toss for about 5 minutes or until cooked.
  • Add the vinegar and salt and mix well for another 5 minutes. Lower the heat and add the additional mustard oil. Allow to cool.
  • Bottle and refrigerate after 2-3 days or once used. 

Pickle powder

You can get a store bought version but why not make one to suit your taste. Let me know how yours goes!
Pickle powder
You need:

  • 12 Dried Red Chilis
  • 1 tsp Mustard seeds(yellow or white)
  • 1 tsp Turmeric powder
  • 2 tsp Fenugreek seeds
  • 1/2 tsp Asafoetida
  • 2-3 tbsp Mustard oil


The make

Cooking Time: 2 minutes| Preparation Time: 2 minutes

  • Dry roast the dried Red Chilis, Mustard seeds, Turmeric powder, Fenugreek seeds and Asafoetida for about 1-2 minutes.
  • Grind the dry roast with Mustard oil.
  • Bottle in a clean, dry jar and keep it in a dark, cool place.

Dosa-Idli Poddi - Chutney (Rice pancake or Steamed Rice cake Powdered - Chutney)

This one is dedicated to my uncle Joy (Joychayan, Mum's eldest bro) who is no more. God rest his soul! He used to have a handy bottle of this every time we visited him in Abu dhabi. Really easy to make and a good combo with Dosa or Idli.

Dosa-Idli Poddi - Chutney
You need:

4-5 dried red chilies
4 tbsp of urad dal (split black gram - when split it is white in color)
1/2 tbsp salt
4-5 pepper corns
1-2 tbsp of EVOO or olive oil

The make:

Preparation time: 2 minutes| Cooking Time: 2 minutes


  • Dry roast all the ingredients except the EVOO for about a minute till the urad dal is lightly brown.
  • Grind the dry roast to a fine powder. Bottle in a clean, dry jar and store in a cool, dry place.
  • When using the powder, add a tbsp of the grounded powder with some EVOO or Olive oil.

Monday 18 June 2012

Baked French Toast with Pumpkin and Fenugreek leaves

In an attempt to maintain Breakfast as the most healthiest meal of the day, this dish was whipped up for breakfast this morning. Fenugreek as I have mentioned in many of my posts has several health benefits, some of which I have mentioned in the Health Tips blog section. You can use any fruit you like. Pumpkin is an excellent source of protein and it is important to load on more protein vs. carbs for breakfast. I used wholewheat brown bread. You can also substitute with multigrain bread. Alternatively, you can also top with walnuts, raisins or almonds. 

There is no rocket science to making French toast so I was thinking twice on whether I should post such a simple recipe. This was the first time I attempted to bake French Toast Vs.fry it on a pan with butter as base. I must admit it was not easy initially as I tried to place the dipped bread on tin foil with butter base but it stuck on and was not possible to flip over. I had to manually take it off the foil and/or flip over with the foil on. I then remembered of a similar situation I had with making bread in the oven. I placed the next batch straight on the baking tray that came with the oven and lightly dabbed some EVOO before placing it on the tray.

French Toast with Pumpkin and Fenugreek leaves


You need:

  • 4 egg whites or 2 full eggs
  • 6 slices of wholewheat brown bread or multigrain brown bread
  • 1/2 cup milk
  • 3-4 tbsp of wild honey *we got some on A's visit to Munnar
  • Drizzle(s) of EVOO (Extravegine Olive oil)
  • Powdered Cinnamon - 1" stick
  • 1 sprig of Fenugreek leaves - diced finely
  • 1 cup of ripened or half-ripened Pumpkin diced small
  • 1/2 cup grated cheese (optional)


The make:

Cooking Time:15 minutes|Preparation Time: 10 minutes|Serves 2


1. Whisk the eggs whites until nice and fluffy in a bowl. Try and use a hand whisk with thin metal wires.


Whisked ingredients


 2. Add honey,milk, fenugreek leaves and powdered cinnamon. Beat well.
 3. Next add the diced pumpkin and whisk well.
 4. You can refrigerate this blend overnight or make a fresh just before baking.
 5.  Pour the contents into a wider bowl/deep bottomed  wide plate.


Contents poured into a wider bowl for dipping


6. Prepare the baking tray by brushing some EVOO on the surface.
7. Dip the bread one at a time and place it carefully on the baking tray. Take care not to over soak the bread and cause breaking.
8.  Do this for each of the bread slices. Do not crowd the baking tray. Make it in batches if required.
9. Heat the oven on high for 5 minutes and then lower the flame to medium.
10. Place the tray on the lower level. It takes about 4-5 minutes for the first batch on each side and about 2-3 minutes for the 2nd batch in each side.
11. Serve as it is or with an extra dash of powdered cinnamon or sugar-free powdered sugar or toasted walnuts or almonds or extra fruits like chopped strawberries or blue berries. You can also add grated cheese on top. Kids would love it with grated cheese. (For the melted effect, you could add the cheese 1/2 a minute before taking it out of the oven)


Ready to Eat!


This was what was for breakfast folks! Enjoy your healthy and savoury breakfast! Bon Appetit...

Friday 15 June 2012

Manakish (Levantine Flatbread) or Pies with Za'atar

Manakish (pron.) Manaeesh is a flatbread such as pita bread made with yeast. It can be had as a wrap topped with variations such as Za'atar, Minced lamb, Cheese(such as Akawieh-a white brine cheese or Kashkawan), Chili or Spinach. I used to have a lot of the Cheese Manakish when I was carrying my little one Izzy.

Za'atar Manakish

There are various ways to make this dough but in essence it does not vary much from the Pita bread.

To make the Manakish dough or Pie dough,

You need:
Active dry yeast with sugar
  • 2 tbsp of dry active yeast or 1 packet of dry yeast
  • 21/2 cups of fine flour or unbleached all purpose flour or whole wheat flour *In India we do not easily get the all-purpose flour
  • Additional 1/2 cup of flour for the kneading process
  • 1-2 cups of lukewarm water
  • 1 tsp sugar
  • 1 tsp salt
  • 3-4 tbsp olive oil
  • Chopped olives (optional)
* My mum adds eggs, but I will use that when I make my Pizza dough just as she does!

The make:

Cooking Time: 20 minutes| Preparation Time: 1 hr, 10 minutes|Makes 6 Manakish, 4 medium pies


The dough: 

Note: This dough can be used to make the Manakish wrap, pies and even Pita bread (just remember it takes 2 hrs more for the Pita bread to rest)

  •  Whisk together the yeast, 1/4 cup of lukewarm water, sugar and 1 tbsp of the flour and let it rest for 10 minutes. It should have a foamy creamy texture however if it does not then your yeast has gone bad, so restart with new yeast. 
  • Add 1 tbsp of olive oil to it the mix.
  • Next take a bowl with the flour and salt and mix well. 
  • Pour the yeast mix into a large bowl and slow keep adding the flour mix one cup at a time and knead well. You will find the mixture to be a bit stickier than the normal Italian pizza dough but that is fine.
  • On the oiled bowl
  • Coat a clean bowl with a dab of olive oil and move the dough to the bowl, cover with a plastic wrap/cling film and allow it to rest and rise for about an hour and a half.

Dough ready to be wrapped


Za'atar topping:

Since I recently made the Za'atar spice blend, I decided to use the same.
  • Take 4 tbsp of Za'atar in a bowl with 2-3 tbsp of EVOO and  mix well.
  • Set aside

Manakish:
    On dusted work top
  • Dust some flour lightly on a wooden base or your clean worktop. Next take the dough onto the dusted base and knead it well, it may still be slightly sticky as you are kneading (dust flour as require but do not overdo). Divide the dough mix as required and roll out into your preferred size. Roll out the Manakish into a perfect or almost perfect round. I used my Chapati board(Indian Flatbread board and used its size as a natural measure).
Dusted worktop


Note: If you are making Pies, you need the dough rolled out to be thicker and smaller probably enough to cover the center of the board only, you can make it as small as you need for the pie as mini pies as well, just make sure it is thick. In fact you would not need to roll it using a rolling pin, just make it  into a small ball, hand mould it to the size you require and use the palm of your hand to flatten.
Rolling out the dough

Kneading one more time


Top with Za'atar mix

  • Top with the Za'atar mix and place it in your oven on its base or a tray. Use the lower rack in case you have different levels. I placed mine on the base directly and kept the flame at medium. It literally takes not more than 2 minutes to cook. In case your oven does light on top, then pop it into the microwave for a minute on grill/bake. The settings on each oven is different so try it for one Manakish and see how it works for you.
In the oven


  • Top with chopped olives if you like.
  • After the manakish is cooked, you can fold it into a wrap (you can use parchment paper to cover and pack it as an evening snack for your loved one) . 
Just out of the oven

Side profile

Close up

Traditionally the oven is brick based and the bread is placed close to the fire. It literally takes one minute.
Normally the ones with lamb mince as a topping is usually made with diced tomatoes and vegetable oil and served with pickles or ground pepper and labneh or yoghurt. It is normally quite heavy and can be had as a  lunch or dinner meal.

Za'atar Manakish served up
I also tried the Za'atar topping on a Mediterranean bread I bought from Q-Mart. It had sundried tomatoes, herb onion, Pizza Sauce and the usual wheat flour, sugar, salt, etc.
Za'atar on Mediterranean bread
Hope you enjoy this as a snack, breakfast or meal! If using the mince meat (Lahem) option or for vegetarians egg plant or zucchini as toppings, it could be had as a meal on its own or with some Hummus and Fattoush on the side. Incidently the Mince Meat Manakish is called Lahem Bajeen in Arabic which is ground fillet mignon on flatbread. The Lebanese version is quite savoury where the meat is cooked with tomatoes and shallots. Try with with the variants of toppings. Bon Appetit...

Za'atar ( A Middle Eastern Spice Blend)

Born and raised in the UAE (United Arab Emirates), I have gorged on several Arabic and Mediterranean dishes. Some of my friends have been asking me to post recipes of Arabic cuisine and this is my first post of Arab cuisine.

Za'atar is a herb which is a blend of several flavoursome spices. Since I am now in India, it took us a while to go around town to pick up these spices, luckily not in vain. I finally reach the Godrej's Nature Basket in Hyderabad where I actually found the Za'atar spice blend. However as I learnt while living in Dubai, there are different proportions of blending these spices across the Levantine region specific to Lebanon, Syria, Jordan and Palestine to make Za'atar. The result is that the flavour is slightly varied. My personal favourite is the Lebanese version. I decided to make my own Za'atar as I was unsure of the consistency of the packaged Za'atar at the store. The store also had all the herbs required to make Za'atar although I picked some of mine from Q-Mart that I visited the day before.

Za'atar can be topped on meats, rice , veggies and most importantly breads like Manakish (made of wholewheat or fine flour dough similar to Pita bread) or on Pies (thicker and smaller rounds). Again I prefer the Manakish wrap over pies. You can use the same dough mix. The difference lies in the rolling of the dough. To make Za'atar -

You need:
1/2 cup dried sumac *dried lemon peel can be used if unavailable
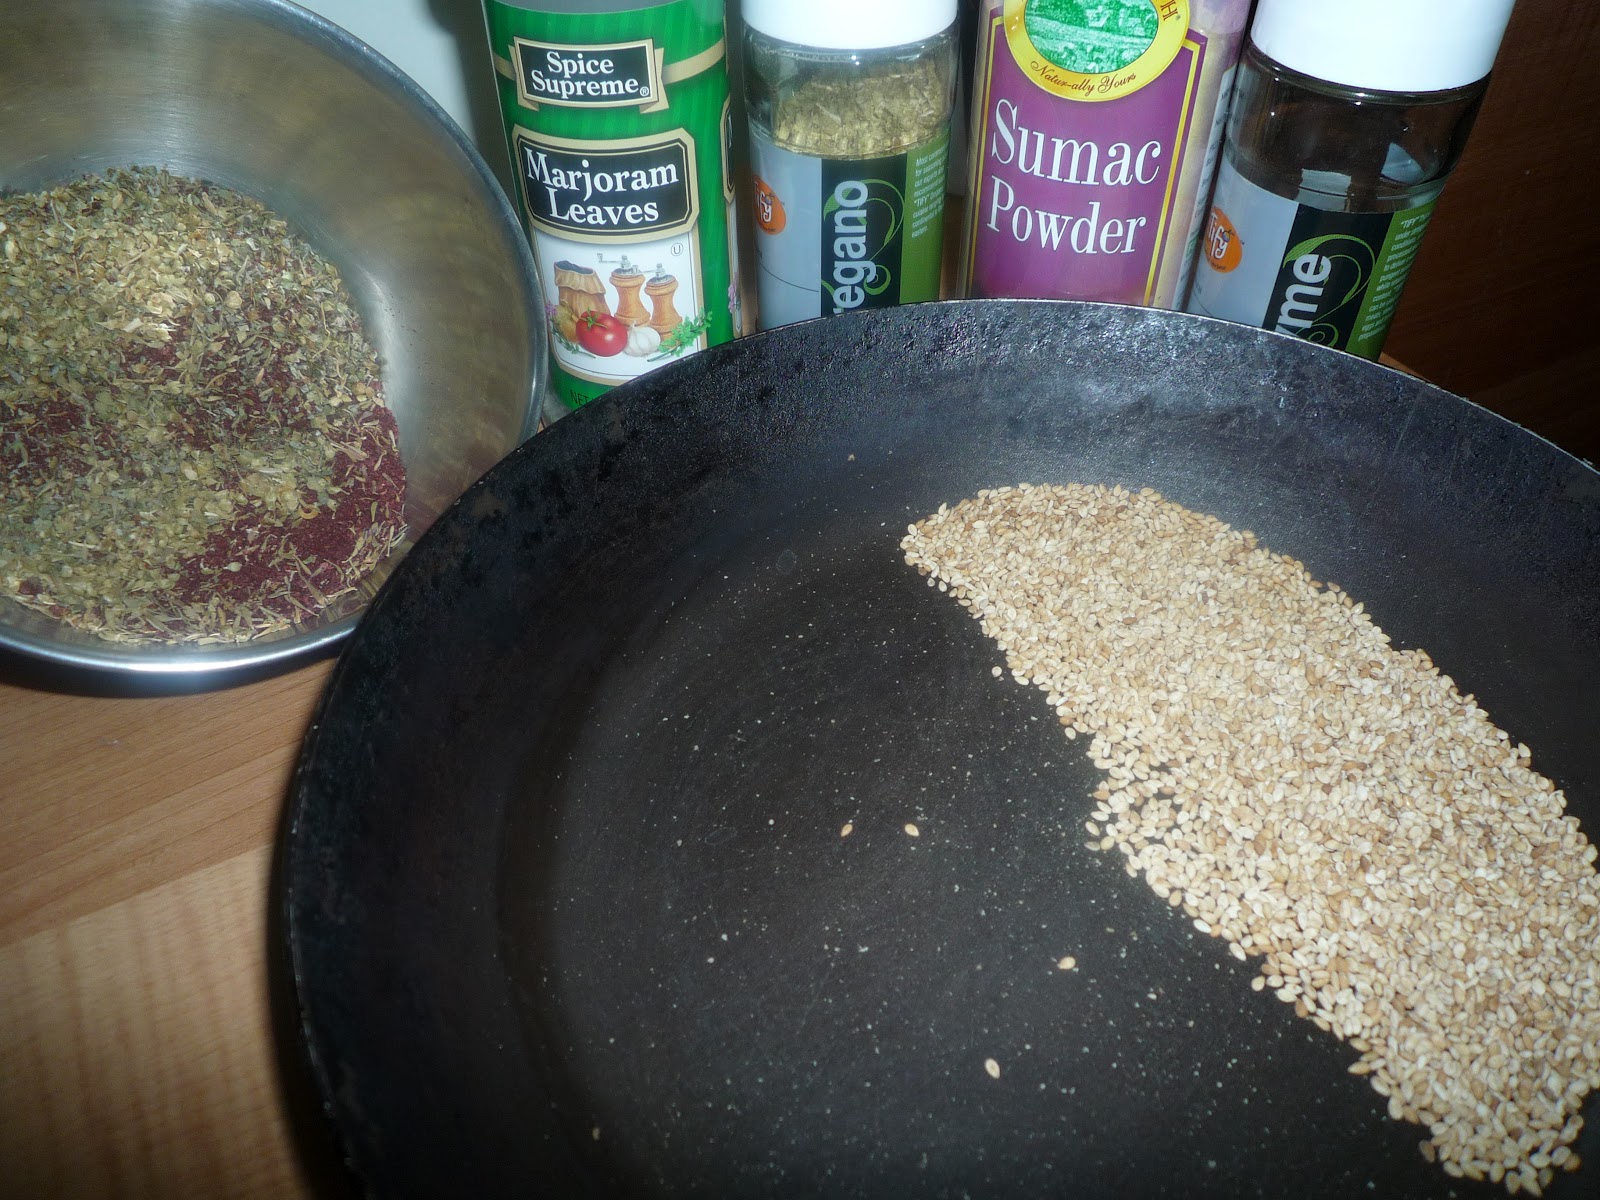
The ingredients
4 tbsp dried thyme
2 tbsp toasted sesame seeds
4 tbsp dried marjoram (a version of oregano however varied)
4 tbsp dried oregano
2 tsp of kosher salt/coarse salt

*Note: I tried making Za'atar with the above quantities of sumac, thyme and sesame seeds. However, the next time, I plan on using equal quantities of sumac,and thyme or may be more thyme and lesser quantity of sumac than thyme and at least 1/2 cup of sesame seeds which I felt was lacking in my blend.

Method:


Preparation Time: 10 minutes| Makes 3/4 of a small jar/bottle
  • If you do not have ready made roasted sesame seeds, you can dry roast it in a skillet (do not burn). Alternatively, you can also place it on a baking tray and toast it. However I find it takes lesser time to dry roast the sesame seeds and I can control the roasting process. It took me all of 2 minutes on a medium flame to do this.
Sesame seeds just landed on my skillet

Roasted Sesame Seeds
  • Semi-grind the roasted sesame seeds with the remaining ingredients
  • Store in a sterile, air tight jar or bottle and keep in a dry, cool and dark place. You can also store it in a zip-lock bag. 
If stored properly, this blend would last at least 3 months.

Za'atar 
 *Note: as you can see from the mix above, the sumac was overpowering the blend, however I wanted to have the Lebanese mixture, so next time I will increase thyme and reduce the sumac quantity. Also I will add more sesame seeds.

Za'atar all bottled up ready to rest
When using the Za'atar on bread, take the required quantity of Za'atar and add olive oil, mix well and top on your favourite bread!

Thursday 14 June 2012

'Beef Fry in Roasted Coconut Gratings' - A Twist of Beef Ularthiyadu/Olathiyadu (Beef Dry Fry/Beef Roast with Fried Sliced Coconut) and Beef Varathuarichadu (Beef in Fried coconut gratings)

Ok this dish was inspired by the fact that I had only grated coconut but wanted to have Beef Dry Fry and not in a thick gravy. I also wanted to extend both the traditional Beef Fry and Beef in Fried Coconut Gratings to a new level. I call it 'Beef Fry in Roasted Coconut gratings'. The result: It was good! Amen to that!

Beef Fry in Roasted Coconut gratings


You need:

  • Beef: 1/2 kg
  • Coconut gratings: 1/2 cup
  • Ginger-garlic: crush and dice 1" ginger and 5-6 cloves of garlic
  • Onion: 1 medium sized or 4-6 shallots (small onions) diced
  • Pepper powder: 1/2 tbsp
  • Chili Powder (Kashmiri): 1 tbsp
  • Curry leaves: 1 sprig
  • Coriander Powder: 1/2 tbsp
  • Tumeric Powder:1/2 tsp
  • Meat Masala or Garam Masala: 1 tbsp
  • Mustard seeds: 1 tsp
  • Coconut oil or Cooking oil: 1 tbsp
  • Cilantro/Coriander leaves - 1 sprig finely diced (optional)
  • Vinegar: 1 tbsp
  • Salt to taste
The make:

Cooking Time: 40 minutes| Preparation Time: 15 minutes| Serves 4 adults


Beef Fry in Roasted Coconut gratings
  • Cook the cleaned beef with half the ginger-garlic, pepper powder, turmeric powder, meat masala/garam masala (you can also had 1/2 tbsp of meat masala and 1/2 tbsp of garam masala)  and salt in a pressure cooker. Add water to cover, slightly above the beef. This should take about 30 minutes. Once it is done, strain the soupy water (reserve it for stock  and store in a glass jar and refrigerate).
  • While that is going on, almost 10 minutes to completion, heat a large skillet or clay pot and add the coconut gratings and half the curry leaves. Allow to slightly brown (not burn). Set aside.
  • Add oil to the same skillet, splutter the mustard seeds and toss the remaining curry leaves. Add the diced onions/shallots, follow with the remaining ginger-garlic and allow to become slightly brown.
  • Add the Chili Powder, Coriander Powder and vinegar, mix well on a medium flame. Cover and allow the spices to cook for about 2-3 minutes.
  • Uncover and add the cooked beef with about 1/3 cup of the reserved stock and mix well. Cover and allow blending for about 5 minutes. 
  • Next add the roasted coconut and curry leaves. Mix well and allow blending for another 5 minutes or until dry (no gravy)
  • Turn off the flame and garnish with diced coriander leaves on top. Serve with rice or flatbread of your choice. If you allow some gravy (using the reserved stock), then this dish would also go well with Appam.


Wednesday 13 June 2012

French Mackerel Fish in Sweet and Savoury Cranberry sauce

This is an old recipe from one of my handwritten recipe books. I am not sure of the origin - it could be from a 'Weekend' or 'Friday' magazine or from my cousin's recipe collection. I learnt a lot of international cuisines growing up in 'Cosmopolitan' Dubai. Back then I had many a opportunity to learn a lot of new recipes and most of it was first tried and tested (almost always right) by Mum.
French Mackerel served up


This is a very savory fish recipe and the thyme lends such an excellent flavour and fragrance as well. It is best made with fillet of mackerel (as otherwise mackerel has a lot of bones and it could be a pain to eat with this savory base). I tried this out with the bone-on this time and also this is best had as a full fish rather than cut however this time I had my fish clean and cut at the seller's place itself before I decided to make this one.Also I used the Indian Mackerel variety as I did not have a choice! Cranberries and Red currants are not readily available here. I tried even in the import shops but in vain. I had a choice to use Red Grapes but it is not in season now, so I chose the packaged cranberry juice version.


Indian Mackerel

You need:
    Diced white onions, thyme sprigs
  • 2 medium sized mackerel  in full or mackerel fillets
  • 4-6 cloves of garlic
  • 1 medium sized white onion diced
  • 1 tbsp unsalted butter (or if you are using the salted butter, then take care whilst adding salt separately)
  • 1 sprig thyme
  • Salt to taste
  • 1/2 tbsp ground black pepper
  • 1/3 cup of dry white wine or white wine vinegar (I used homemade white wine - recipe to follow:) )
  • 1 cup of cranberry (freshly juiced or packaged. In case of packaged sweet version, do not add sugar as below). (Other options: You can also use red currant or red grape)
  • White wine(L), Cranberry juice(R)
  • 1/2 tbsp of powdered or castor sugar


Thyme Sprigs


The make:

Cooking Time:20 minutes| Preparation Time: 20 minutes| Serves 2 adults
    Onion and garlic in butter

  • Clean the fish and/or fillet as required.
  • Place the fish on a baking tray or pan ( I used my iron skillet - taking care to use oven mitts as the handle will heat in the oven)
  • Take the juice of the cranberries and strain or packaged version and set aside.
  • Crush the garlic and dice finely. Next, add the diced onions and garlic to the butter in a heated skillet until translucent (Do not brown). Do this on a low flame and allow to blend for about 5-10 minutes only.
  • Mackerels before going into the oven
  • Next add the juice, sugar(only if the juice is freshly juiced and not for sweetened packaged version), wine/wine vinegar, salt(only if butter is unsalted) and pepper to the skillet. Allow it to warm not boil. Turn off the flame.

  • Pour the liquid over the prepared mackerel in the baking tray/pan and top with the fresh thyme sprig. 
  • Place it in a hot oven (heated on high flame). Lower the heat to medium and allow to cook for about 10-15 minutes maximum. (In case your oven, does not have a heating device on top, then 5-7 minutes into the cooking process, flip the mackerel over. In case you have additional cranberries/red grape/red currants left, then chop them up and place over the fish and allow to blend with the fish in the oven.
Mackerel in the pan done with thyme sprigs
Mackerel in Cranberry sauce

Bon Appetit! My Indian Fish loving HD...loved this one so much that I reserved some of the remaining sauce for another appetising meal :) Do let me know how you like this one!