"This is a journey of my life since I was all of 12 yrs when I started my hand in cooking to now with displays of my learning and creations of recipes from around the world. My inspiration and role model has always been my Mum who has always created dishes from around the world and excellently well. I do not believe I would ever match to her culinary skills. I remember the times she could cook and bake almost 4-5 dishes in one go without ever letting one go under cooked or burnt! I was born and raised in Dubai, UAE and recently moved to India for family reasons. Kitchenette just means that over the decades, my kitchen has changed from that of my mum's to my uncle and aunt's, to my home in UAE and now in India. Pala't'te, describes both global cuisines ('Palatte'-diverse flavours) and pleasing diverse 'Palates'."
Showing posts with label Cheese. Show all posts

Wednesday, 3 February 2016

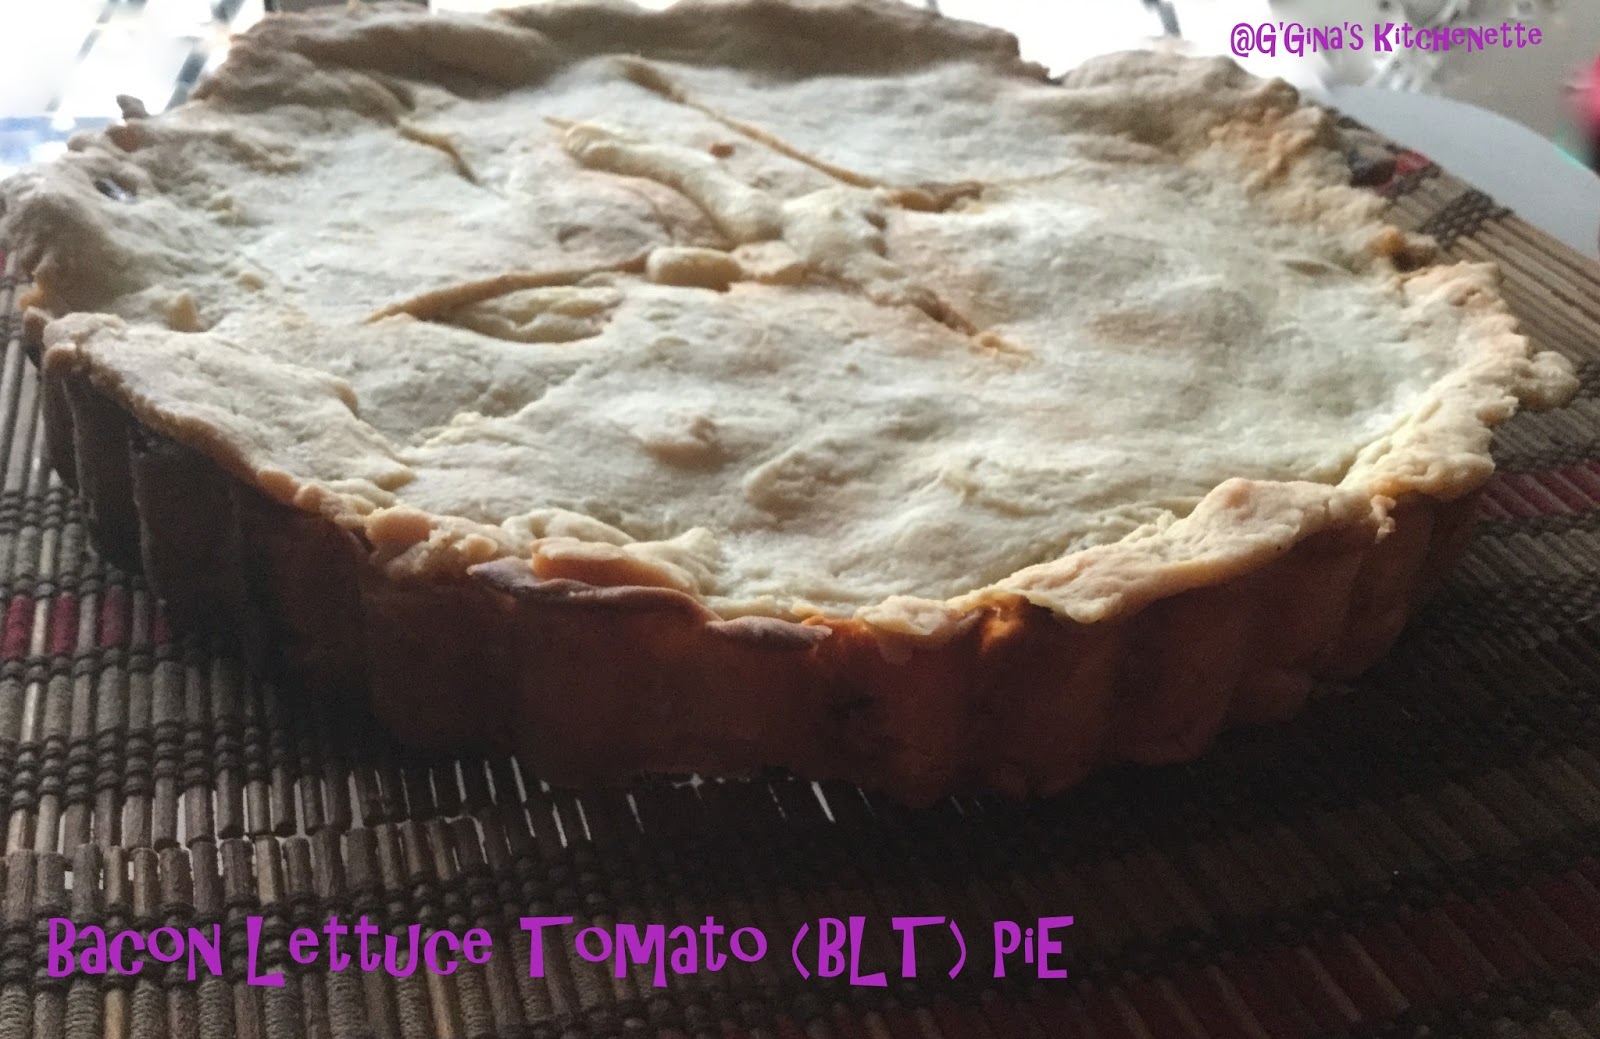
BLT Pie #FoodieExtravaganza

Foodie Extravaganza{Party}'s February 2016 event is 'Pie' or as the lovely Wendy Klik of 'A Day in the Life on the Farm' coined it as 'Bye Bye Miss American Pie'. Wendy that song has been playing in my head for a while since your event posting now :D. Thank you whole heaps Wendy for this theme. What came as a challenge in this dish was the Butter Crust that I chose to make and now I am confident of whipping up a fabulous butter crust anytime.


The first 'Wednesday' of every month, Foodie Extravaganza {Party} hosts a theme based cook-off where food bloggers come together to celebrate the food event of the month from the American National Food Holidays


I know Wendy said that we need not constrict ourselves to American Pie and the theme title came only as a result of the song. But I wanted to challenge myself to make an All-American Pie and BLT just popped up in my head. Of course the 'L' in BLT stands for Lettuce but to introduce lettuce into a pie filling would just make it mushy. I needed something firm but similar to lettuce. Enter a passing moment at the grocers where a lady asked the vendor whether a cut of leaves were lettuce. He informed her that it was Chinese Cabbage. 


Then I remembered why not Leek too. I also wanted the pie filling to reflect a breakfast meal of bacon, eggs and maybe some potatoes on the side. Egg of course came on top of the pie crust. I then introduced some cheese. In fact I decided it would be two kinds of cheese. 


I have to admit I struggled with my first try of the butter pie crust but then I remembered my Christmas Shortbread cookies and well yes you probably guessed right, the second try was a breeze. 


The only thing I would do next time is if I plan on Bacon or Pork or anything else as fatty as protein, then I would not go with a Butter Crust as it can be quite filling. Well that is why the serving number on this dish went up. Otherwise it would be 4-6 adults. 


The Butter Pie Crust would go well with fruit or nuts or both. 


Well let me not go on and on with the background story and get on to the recipe:


You need:

For the Pie crust:

  • 21/2 cups of flour (plus additional for dusting/sprinkling)
  • 16 tbsp of cold butter, chopped in cubes *(refer notes)
  • 1/2 tbsp salt
  • 6-7 tbsp of ice cold water

For the Pie filling:

  • 1 tbsp unsalted butter
  • 600 gms of bacon, diced
  • 2 medium sized potatoes, skinned and chopped into cubes
  • 3 large tomatoes, diced into cubes
  • 1 shallot, finely diced
  • 2-3 cloves of garlic, diced
  • 2 bulbs of leek, diced (include the edible leaves too)
  • 1 cup thick tomato puree
  • 1 egg, beaten or 2 tbsp milk
  • Mozzarella and Cheddar Cheese - 2 tbsp each
  • A good shake of pepper

The Make:

Please take a note of the notes below before attempting to make your Pie.

For the Pie crust:
1. In a large bowl, take the flour, salt and butter cubes*(refer notes) and mash with your finger tips into the flour till combined and no dry flour left aloof in the bowl.
2. Next add the water bit by bit into the flour until well-combined and the dough formed. The water is used as a binder. Wrap in cling film and transfer to the fridge to remain cool till you prepare the table top for the next steps.
3. Prepare the counter top or your silicone baking mat by sprinkling some flour on top. Make sure if you are using your counter top to keep it clean and free off any materials. Preheat the oven at 180°C.
4. Sprinkle some flour on the pie dish as well. You can use any kind of pie dish, I used to bottom shifting, 9.5" pie crust tray that belong to Mummy. Since there is sufficient butter in the pie crust you do not need to butter your pie dish.
5. Take out the pie dough, cut in half and place one half in the center of the prepared mat or on the counter top and with a rotating motion of the fleshy part of your palm, just gentle roll on top.  Return the other half of the pie dough to the fridge.
6. Next press the dough ball down and roll using a lightly floured rolling pin, making sure to turn it over each time you roll flat. Make sure to evenly roll out. Once it has reached about 8" you would need to flip it using the side of your mat.  Since I used a 9.5" pie dish, I needed to roll it to almost 12 inches for the bottom crust to ensure the sides of the pie dish are covered. 
7. If you find that your dough is tearing up slightly while flipping, stop and then mend and then flip over and roll till you reach your desired size. Then flour your rolling pin once more and sprinkle some flour on top the rolled pie dough. Using both hands, gently place one end of the rolled pie dough over the rolling pin and without pressing on the dough lift the dough off the mat and rest it well onto the pie dish, making sure to blanket the sides well and to go over the top edges of the pie dish. Any extra dough hanging off the pie dish can be cut off. You could use the extras to fix any holes of the top crust or can be baked on a tray with some sugar and cinnamon on top as an in-between baking treat ;) .
8.  Blind bake the prepared dough for 10 minutes. Meanwhile prepare the filling of the pie.

For the Pie Filling:
8. Heat a pot and add the butter followed by the potatoes and bacon. Saute for about a minute and add in the remaining ingredients except the puree and saute well for about 5 minutes. Add the puree and cover and cook for another 5-10 minutes. Uncover and allow to cook to room temperature or until warm.

9. Next place the filling inside the prepared pie dish, toss in some pieces of cheddar and roll out the top crust of the pie. Follow the same steps as for the bottom crust and place well over the filled pie dish and seal the edges well. With the tip of your kitchen blade draw a cross on the top of the pie crust. I added a few pieces of mozzarella there.

10. Brush the beaten egg or milk on top of the pie crust, grate some mozzarella on top if desired and place into the oven at 180°C. Make sure to take your oven spill tray and place it on the rack just above the pie rack (only in case you are using an oven with only bottom heat). Bake for 1 hour to 1 hour and 20 minutes. Check to see if you have achieved a golden crust or a dark brown one in case you are using milk.

Slice and serve hot with your favourite dips/sauces. Bon Appetit!


Notes:
1. Time to bake will depend on the type of oven you have. In case you have an oven with only lower heat and no upper, this may take up to 1 hour and 20 minutes.
2. For those of you who do not have an upper heat coil in your oven, then you need the spill tray or oven tray to cover your pie dish to get an even colour on your pie crust.
3. The butter used in the recipe has to be cold, which is why once you chop the same please transfer it to the oven to remain cold.

So that is my Bacon, Lettuce and Tomato Pie or BLT Pie. This was what was for dinner last night.


Take a look at the gorgeous pies our Foodie Extravaganza Party has brought to the table today:


Sunday, 26 January 2014

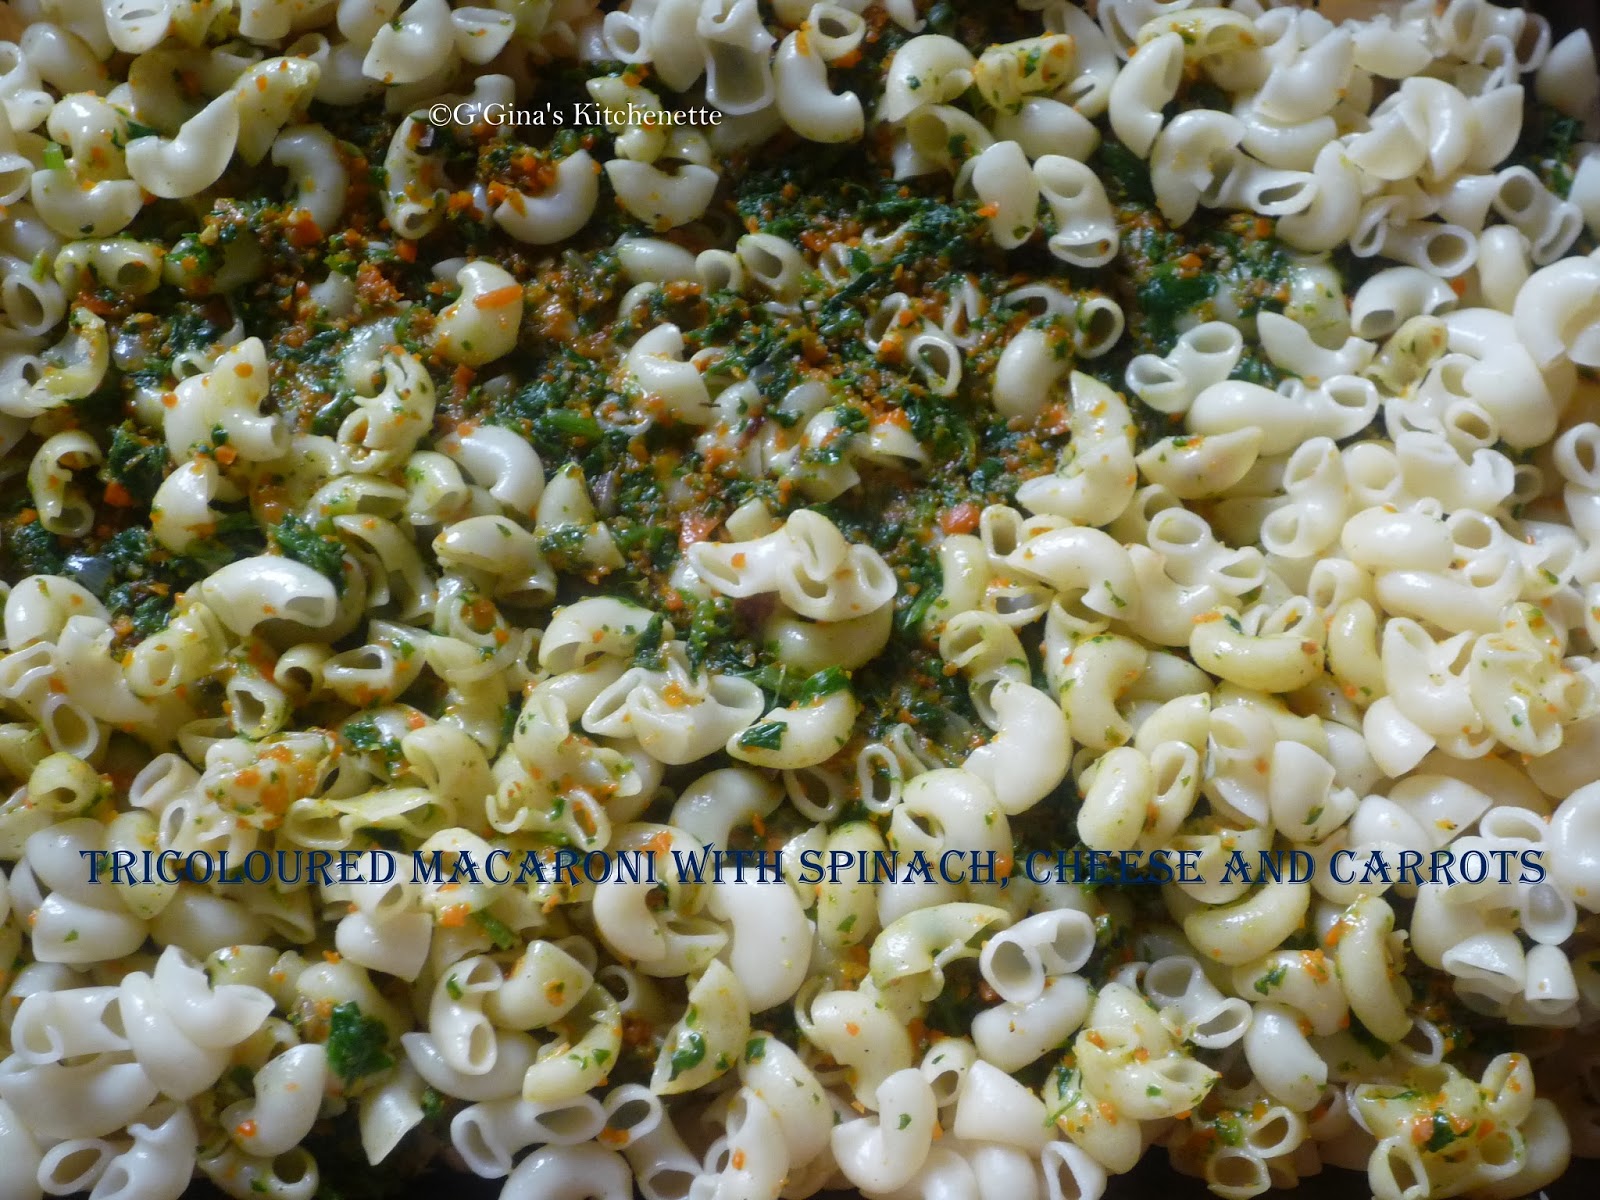
Tri-coloured Macaroni - Cheesy Baked Macaroni with Spinach and Carrots - An Indian Republic Day special

I was contemplating on whether to post this recipe so late in the day and it struck me that some of the readers from across the globe could still be beginning their day. I had a very long weekend with the family as it was my munchkin Isabelle's birthday on the 25th. Actually her birthday officially is on 25th  as per UAE time as she was born in the UAE. But as per Indian time she was born on 26th so you can say she is a Republic Day baby :)


I have been awfully busy, what with the three celebrations my darling had for her 4th birthday! I am glad to see she had a wonderful time with her friends. I too made some new friends as a result.


I know Macaroni is not a very Indian trend but all the main ingredients for this recipe were 'Made in India' and it reflects the colour of our Indian flag (Saffron, White, Green) so I am truly happy that what was a coincidental make actually turned out to be right in time for our Republic Day celebrations! Of course I would have loved if I could I have incorporated the Navy Blue Chakra colour as well but I think I will leave that for next time. Doing it this time amidst the birthday rush would have been a bit too ambitious! This is what is for dinner tonight folks, so I hope you enjoy making this simple Tri-coloured (and healthy) pasta.


You need:


  • 500 gms macaroni/pasta of your choice
  • 2 cups of grated cheese of your choice (you can opt for the low fat version)
  • 4 cups of grated carrots
  • 4 cups of finely diced spinach
  • 4 cloves of grated garlic
  • 1 small shallot, finely diced
  • Pepper to taste
  • Pinch of thyme
  • Pinch of dried Parsley leaves (you can use the fresh version)
  • Water to boil
  • Olive oil
  • Extra virgin olive oil  (EVOO)for drizzling (optional)


The Make:
Serves 7 adults | Preparation Time: 10 minutes | Cooking Time: 20 minutes

1. In a large pot of boiling water, add the macaroni and some salt. Lower the flame and allow to cook over the next 5 minutes. Stir occasionally to evenly cook. Make sure the pot is sufficiently large to allow the macaroni to cook and avoid breaking or sticking together.
2. Meanwhile, heat the oil in a deep-bottomed wok and saute the shallots until lightly brown.
3. Add the garlic, carrots, spinach, thyme and parsley, pepper and a pinch of salt and cover and cook on medium-low heat.
4.  Next in a Pyrex oven resistant baking dish, layer the macaroni, followed by a layer of grated cheese and the cooked veggies and then another layer of cheese and repeat.
5. Place the dish in the oven at 150°C and bake for 5-10 minutes. Leave in the oven until serving time. Drizzle some EVOO over the macaroni before serving.

Serve hot! Happy Republic Day dear citizens of India!

*Note: Non-vegetarians you can add some cooked mince to this dish with the veggies if desired. I didn't as I had vegetarian guests and also I wanted it to look similar to the colours of our Indian flag :)


Sunday, 19 May 2013

Veggie (or Vegan) Quiche

Quiche, a known French dish actually originated from Germany. The word quiche means 'cake' and originated from the German word 'Kuchen'. Quiche normally has a pastry crust which is pre-baked and the filling includes eggs, milk or cream and fillings of you choice. There are several kinds of Quiche such as Quiche Lorraine, a popular variant which is an open pie with a filling of cubed smoked bacon, cheese and custard.  Others include, Quiche au fromage (Quiche with cheese), Quiche Florentine (Spinach), Quiche aux champignons (with mushrooms) , Quiche Provencale (tomatoes), etc.


Well, I have opted for a simpler variety of quiche with no pre-baking the crust. I also used ingredients at hand. So I guess you could call it Quiche au Easy (just kidding). Now to make the quiche, you can use either a pie pan, spring tray, double glass pyrex (for microwave and ovens). I used the latter.


You need:


  • 2 eggs or 1 tbsp corn flour *
  • 1/4 cup self-raising flour or wheat flour (I used wheat flour for my toddler's requirement)
  • 1 cup milk
  • 11/4 tbsp of butter (at room temperature)
  • 1 cup of grated cheese
  • Salt and pepper to taste (you can also add a sprinkle of paprika) - *optional
  • 1 cup filling of choice - grated carrots, finely diced shallots, red bell pepper, small potato, fresh diced parsley, 1 tsp oregano
*You can also make this a non-vegetarian / vegan option by adding pre-cooked and cooled diced eggs, chicken breast, turkey breast, tuna, bacon, etc.


The Make:
Preparation Time: 10 minutes | Cooking Time: 40-45 minutes | Serves 2 adults, 1 toddler

1. Preheat the oven to 180°C. Grease the pan or quiche dish on all edges and the base with oil or butter.

2. Next in a large bowl, whisk the eggs or cornflour, flour butter and milk until well mixed.

3. Fold in the filling, salt and pepper (or paprika, optional) and the grated cheese (reserve 1 tbsp of the cheese for topping).

4. Pour into the prepared quiche dish. I think the size of the quiche dish is a matter of choice. Some like their quiche to be really thick in height and some prefer a thinner variant. Pretty much like pizza base choice.


5. Place the quiche dish into the center of the oven to allow even cooking and bake for 40-45 minutes or until set. Touch the top of the quiche to check if it has set well. I had to do this twice as 30 minutes later I topped it with the remaining grated cheese.


Serve hot with a side of salad or sauce of your choice. You can serve cold but I for one do not enjoy quiche cold, so I made enough only for Dinner...In Rachel Ray's style "This is ('was') what's for dinner tonight ('2 nights ago'), folks!"


Bon Appetit! Trust me when I say your fussy toddler/kid will enjoy this one. Serve kids with a side of tomato   ketchup. 

Thursday, 27 September 2012

Mama Mary's Birthday - Special Love Cheesecake

I have been offline for quite a few days as I mentioned in my recent post on Onam's Special Vermecilli Milk Pudding. Mama Mary's Birthday falls on September 8th. The Virgin Mother Mary as we affectionately call her Mama Mary is a proud celebration in our home everyday. Especially because my daughter Izzy inherited her baptismal name Mary from her Godma and ever since she was a baby we have noticed how she has been drawn to Mama Mary. She calls her fondly as Ammama (which is our native language means Mother of my mother). Rightly said by a little one! Mama Mary is definitely her patron saint! September 8th is celebrated as the Nativity of our Virgin Mother or the Feast of the Immaculate Conception of Mary. If you would like to learn more, please visit this link

Mama Mary's Birthday Love Cheesecake


We had been fasting for 7 days prior to the Nativity Feast and I wanted to do something special for her birthday. So I decided to bake her a cake full of love. I had posted a Cheesecake recipe of George Colambaris, one that I had made on A's birthday last July. Well this is a less complicated one and is more in line with the cheesecakes I have made since I was all of 18 yrs old. I think George made a reference to this type of 'cake base' in the MC Australia when he made his unforgettable Cheesecake.

For those of you in India, please do not be tempted to buy Amul's Cheddar Cheese as it turns out to be too salty and if you have no other option, then do add an additional cup of cream to the cheese mix. Try to get the uncanned variety of cheddar cheese that you could get from Godrej's Nature basket or Spar or some such other outlet that sells loose cheddar cheese. These varieties normally have less salt in the mix. You can also opt for the imported Kraft in case you are opting for the canned variety

You need:
  • 300 gms of cheddar cheese (grated)
  • 250 gms of Ricotta Cheese
  • 400 gms of fresh full cream or whipping cream (if you are using one with less fat%, try not to add the loosened water that settles at the base of the pack. Also try to get gelatine and use as per package instructions if required)
  • 500 gms of powdered sugar or castor sugar
  • 1 packet of your choice of packaged jelly powder (I used raspberry, you can favour your choice of flavour)
  • 1 large packet of Marie Biscuits (break each biscuit into quarters)
  • 400 gms of butter (room temperature, cut into cubes)
  • 1 vanilla pod or 1 tsp vanilla essence
  • 8-10 blanched almonds - chopped finely (optional)


The make:

Preparation Time: 30 minutes| Cooking Time: 20 minutes| Serves 6-8 adults

  • Powder the quartered biscuits. In case you have a food processor or a grinder, you can use this to powder the biscuits. Otherwise, just place some of the biscuit quarters in the middle of a newspaper and fold the newspaper. Run a rolling pin over the biscuits. Check to see if the biscuits are powdered well and no lumps are present. Repeat this until all the biscuits have been powdered and set aside in a large bowl.
  • Add about 100 gms of the sugar to the biscuit mix and mix well (either by hand or with a spoon). Add the butter cubes bit by bit into the biscuit mix and mix well. You will wind up with a rough edges but well-oiled biscuit mix. If you think it is still very dry, add some more butter but do ensure it is not too oily or runny. Tip: Do not melt the butter over heat
  • Choose a cake tray of a size that will ensure that the biscuit mix once pressed and set at the bottom of the cake tray, will provide at least 1/2" or 1" height. A 7.5" to 8" round cake tin should suffice. I used a heart-shaped tin of 8.5" as I did not have a smaller tin of the same shape. Grease the base (in case you are using a spring cake tin) or line first with foil only on the base (not sides) and then with double-sheets of parchment paper/butter paper so as to enable to pick it out of the tray easily once done. I would recommend with cheesecakes to invest in a spring cake tray (I need to get one for myself as well) as the edge gets uneven even if you use parchment paper.
Biscuit base on parchment paper


  • Now place the biscuit mix on the base of the tin evenly and press down. I normally do not bake the base but you can bake it for at least 15 minutes if you want a golden brown crust at medium heat about 215°C (415°F). Once this is  done, leave it to cool to room temperature and turn it to the refrigerator at normal temperature. Ensure that your fridge is not set on high or your biscuit base would be too hard. 
  • Next turn the grated cheddar cheese to a blender and add the ricotta, vanilla and cream. Blend for about 3-4 beats on medium setting. Do not over beat or you will end up with a runny mixture. Tip: please keep a packet of gelatine handy in case you end up with a runny mix. The cheese mix should be slightly less thick than a normal flour based cake mix. Gently fold in the remaining sugar bit by bit into the cheese mix. Taste the mix if it is too salty, add another cup of cream. It should only be a tad salty or it will overpower the cake and make it difficult to consume. After all a dessert should be more sweet or bitter than salty any day.
Layering the cheese on the biscuit base
  • Take out the cake tray from the fridge and layer it with the cheese topping. Top with chopped almonds. Return it to the fridge to set on a higher setting(not highest).
  • After about 20-30 minutes, when the cheese topping is firm, prepare the jelly mix and allow it to arrive at room temperature and add it on top of the cheese mix. Tip: Please be careful to ensure that the jelly mix is not hot or set otherwise you will end up with the cheese of the jelly's colour or a lumpy topping. Since I was making a heart shaped cake, I wanted a layered topping and hence I had placed the jelly in the fridge to set first and then I scooped it out with a flat spoon and layered it on top of the cake to give a more 3-D heart image.
Layered with almonds and jelly mix on the side
  • Return it to the fridge on normal setting until ready to serve. Once ready to serve, slowly lift the parchment paper, taking care to ensure that it does not tear. You will need a cake spatula so as to remove parchment paper from the base and carefully place it on your serving tray/cake board. Tip: To avoid this please invest in a spring tray. 
  • You can top the cake slices with whip cream while serving if you like.


Closeup of the cake


Layered Cheesecake
Special Love Cheesecake

Saturday, 21 July 2012

George Colambaris' Lemon and Ricotta Cheesecake with Fruit Salad

I thought that since this is a month of celebrations, an innumerable of my loved ones' birthdays and anniversaries this month and also because my blog crossed 2000 visitors, this post would be a celebration of all sorts. Thank you for visiting my blog and for cheering me on through your wonderful inspiration and kind words.
My take on George Colambaris' Lemon and Ricotta Cheese cake with  Fruit Salad

Georgie aka George Colambaris is also one of my favourite chefs and no its not only because of his name being similar to mine and us sharing a common nick name.

It was my hubbykins birthday about two weeks ago and I made him this divine cheese cake. 'A' does not have a particular favourite cake per say(can you imagine) but he did want a cheese cake so I decided to go with GC's Cheese cake. Given the limitations of availability of some of the ingredients and kitchen equipment that Mr. Colambaris used in his original recipe, I made best of what produce and equipment I had available in Hyderabad, India and at home. I decided to also put up some of the pictures which are not so pretty to let you know what not to do when you make this cake (get the right sized cake tray and the correct shape. Make sure it is a spring cake tray if you are following this recipe to the 'T').

For those of you in Hyd., I got my Ricotta cheese from Godrej's Nature Basket which incidentally also hosted a pin-up ad of MasterChef Australia's judges on one of their walls. Ricotta had the best price at this store among the many I visited. Also since there were not many options for the fruits, I chose cherry and plum (from what was left over from the sorbet) and some fresh sweet lime. It was a winning compliment for the cheesey cake (no pun intended).  I could have used pomegranate, melons, tender coconut and mango. May be next time!

I used the right quantities of George's cheese layer as I had to make it as perfect as possible for A's birthday celebration. Two things I used that did not work in my favour. One was that I never lined up a cake tray with parchment or butter paper ever, especially in a spring cake tray. So this was my first of doing so and the second was that, of my available spring cake trays, the one I used was probably better for a quiche as it had a rim which was not plain round and with arches. So that was a mistake as you would see from the rim in the picture that it was uneven but when served, it did not pose much of a problem. Also I had to redo it with foil as the cake tray I used was the wrong kind causing the cheese to run the first time. 
Birthday cake


I would have loved for a taller and less wider cake tray. So I will make sure to buy one before attempting this recipe the next time around. I have made many a cheese cake earlier but always similar to George's mention in MC where his friends used a basic Marie biscuit for the base ingredient. Since I also had some utility issues in our apartment, I chose to do the same as I did in the past for my base. Other than that the cheese mix was exactly how George mentions in his recipe

For the Plum Sorbet, I used my mixer since I did not have a ice cream churner. It turned out fine in terms of flavour but not perfect in terms of its texture (not as perfect as George's I would imagine considering the lack of the ice cream churner!).

So for my home version of George's Lemon and Ricotta Cheesecake with Fruit Salad

You need:


Biscuit base

  • 2 large packs of Marie Bisuits (powdered) *I used only one but its best to use 2
  • 50 gms of powdered almond or almond meal
  • 25g of castor sugar or powdered sugar (you can also used refined sugar)

Ricotta Cheesecake Mix
Vanilla bean

  • 200g cream cheese
  • 160g ricotta, drained through a muslin cloth
  • 100g whole eggs (or 2 whole eggs)
  • 25g egg yolks (or 1 egg yolk)
  • 70g caster sugar
  • 90ml pure cream (I got mine from Ratnadeep which was the closest to full pure cream)
  • 1 vanilla bean, seeds scraped (again from Nature's basket)
  • Zest of one lemon (I used the sweet lime as the large lemon was unavailable)

Plum sorbet

  • 170ml water
  • 170g sugar
  • 450g blood plums, roughly chopped and seeds removed (I got this from Nature's Basket as well - Indian variety. Luckily it came in different sizes in one pack so I used the smaller ones for the fruit salad)

Fruit salad

  • 1 tbsp  of Crème fraiche (or light sour cream)
  • Cherries, Sweet lime, Small plums (remove seeds)
The Make:

Serves 6-8 adults, Preparation Time: 8 hrs(min. resting time), 1 hour, Cooking Time: 45 minutes


For the Biscuit base (my make - George prepared one with flour):

1. Preheat oven to 165°C(which is medium heat or Gas Mark 3). Grease and baking paper line the base of a 20cm 'round' spring form cake tin.

2. You can choose to powder the biscuits in a food processor or grinder or use a parchment sheet to place hand-broken biscuits and roll over with a rolling pin until powdered ensuring no lumps. Combine dry ingredients in a bowl. Add butter bit by bit and slowly bring together forming a firm crumb. Tip crumbs into prepared tin and smooth over with the back of a spoon to achieve a thin even layer. Bake for 8-10 minutes or until golden brown.

Base of the cheese cake
For the Ricotta Cheesecake Mix:

3. Reduce oven to 90°C (lowest Gas Mark). Place all ingredients into the bowl of a food processor or blender and process until smooth. Pass though a fine sieve to ensure there are no lumps.
Into the blender
4. Pour mix over biscuit base, tap tin firmly on the bench to release air bubbles and bake for 25-30 minutes. Test touch lightly, it will appear still very soft, leave to set in the fridge for 6-8 hours or overnight before serving. Make sure the fridge is normal temperature and not high cool.

Passing through the sieve
For the Plum sorbet:

5. Place water, sugar and chopped plums into a saucepan over a medium-high heat and cook until plums are tender. Allow to cool slightly. Pour into the bowl of a food processor or blender and puree until smooth.
Cooked Plums

6. Chill over an ice water bath(a must). Pour into a pre-chilled ice-cream machine or blender and churn according to manufacturers instructions or until blended well.

For the Fruit salad:

7. To serve, spread a little crème fraiche or light sour cream down the centre of the plate. This will serve as a base to place the fruits around the cheese cake. Place a slice of the cheesecake in the centre and cover the crème fraiche with the fruit salad.
Happy Birthday Hun!

Although the chef was not happy, she was glad to have had two loved ones enjoy this treat to the max!
Thanks George C. for sharing this lovely, delightful cake recipe.

This is a make to share with the family, friends and loved ones as it is quite rich. Enjoy! Share the joy of this light and creamy Goodness with your loved ones!