"This is a journey of my life since I was all of 12 yrs when I started my hand in cooking to now with displays of my learning and creations of recipes from around the world. My inspiration and role model has always been my Mum who has always created dishes from around the world and excellently well. I do not believe I would ever match to her culinary skills. I remember the times she could cook and bake almost 4-5 dishes in one go without ever letting one go under cooked or burnt! I was born and raised in Dubai, UAE and recently moved to India for family reasons. Kitchenette just means that over the decades, my kitchen has changed from that of my mum's to my uncle and aunt's, to my home in UAE and now in India. Pala't'te, describes both global cuisines ('Palatte'-diverse flavours) and pleasing diverse 'Palates'."
Showing posts with label Breakfast or Snack. Show all posts

Wednesday, 4 May 2016

Southern Buttermilk Biscuits #FoodieExtravaganza

May's theme of Foodie Extravaganza is Buttermilk Biscuits. Our host is Kathleen Coe Clegg of Fearless Creative Mammas has picked a theme true to her roots. Her family is from the South of the United States where biscuit is a staple. The idea behind this month's theme is to get fun and creative with the staple biscuits of the South. 


Thank you Kathleen for sharing with us about your family's roots and I can honestly say I enjoyed learning more about the South. I have always loved Southern cooking and will attempt more recipes from the South of US in my cooking.
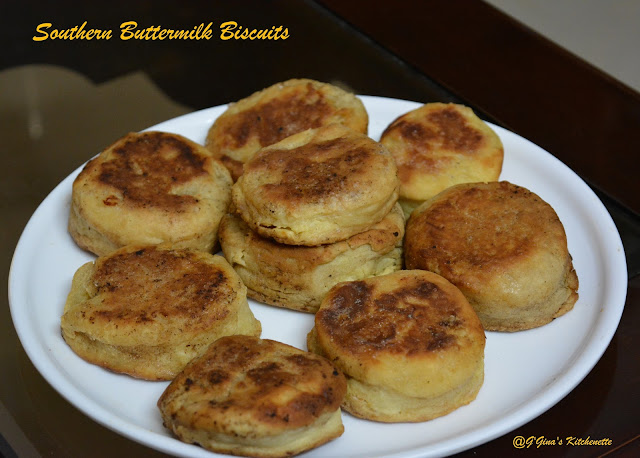


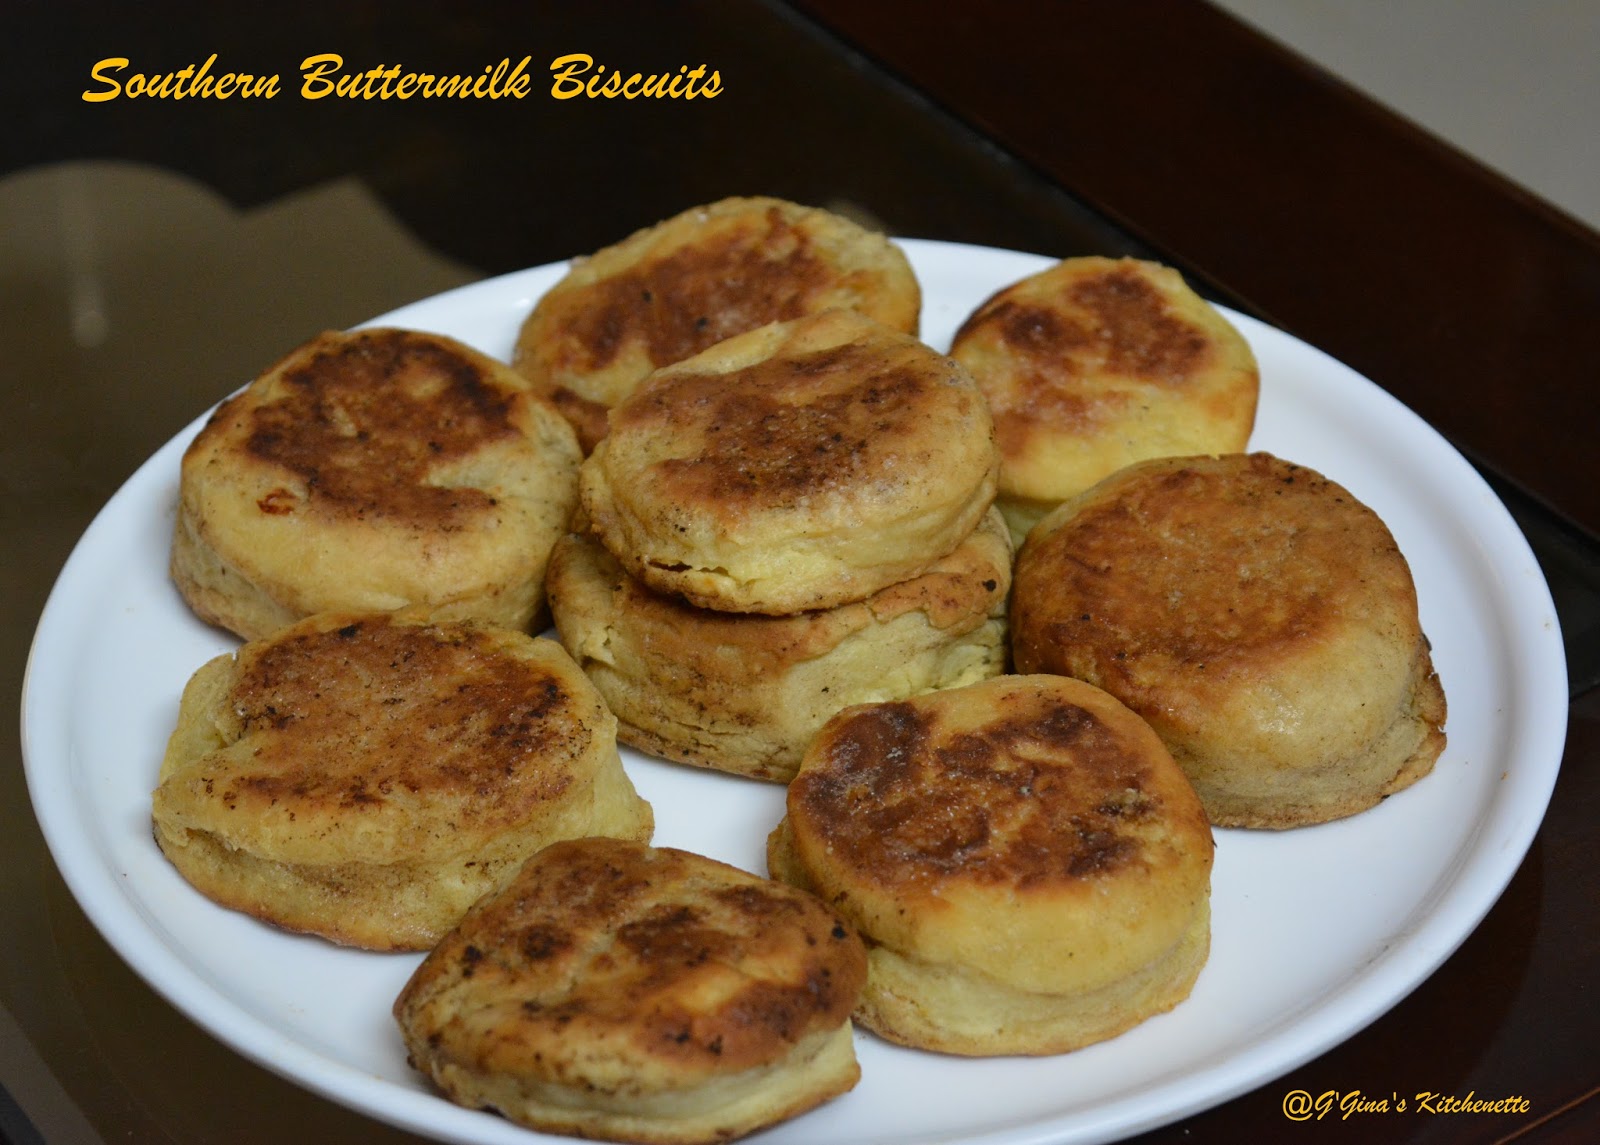
I first misunderstood the biscuits to be that of a normal crispy,flaky biscuit. So when I attempted to make them and found them to be more scone like, I was a little puzzled. I imagined it to be a flaky, crunchy biscuit. Of course, the biscuit ended up having a nice, crusty exterior with a moist, flaky interior. 


You can either try to slap some butter, jam, jelly or honey in this biscuit in which case I would ask you to sprinkle some sugar on top which would be a nice addition or you can have it as a savoury. In my case, when my sister-in-law and family were visiting our home a few weeks ago, I had attempted a savoury muffin, so I used the same kind of filling for the biscuits as well. It made for a nice and satisfying meal.


My first ever biscuits or cookies were attempted at Mum's kitchen in our home at Dubai. I even remember how I had a little tea party with my school friends. My first batch of perfect biscuits were made for my school buddies and I had iced their names on each biscuit.


Mum's first anniversary is in six days. I cannot imagine how I lived a year without Mum. Of course the Good Lord has been Kind and Merciful as always to me. I have always heard Mum's voice or felt her guidance through Him in every time of need. I could have been angry with Him for taking her so soon or for even taking her on Mother's Day last year.  Life will never be the same without Mum. You know what though, He always brings her voice or memory or guidance even when I need her the most. 


There is a little something I am expected to allow in my life but I have not been able to so far. Let's see how life progresses on that. Until then if you believe in God or say prayers, do keep me in your prayers or just send happy thoughts my way.


The best way to eat these biscuits are right out of the oven and in the US it is eaten as a savoury on top of chicken pot pie filling, slathered with some gravy on the side or even with fried chicken. A shorter description of these biscuits are that they are moist, fluffy and light.


You need:


  • 2 cups of plain flour or pasta flour (if you can find pasta flour, it would be the best)
  • 1/4 tsp baking soda
  • 1 tablespoon baking powder
  • 6 tbsp of cold butter (cut into cubes and refrigerated) + 1 tbsp reserve
  • 4-6 tbsp of sugar (optional)
  • 1 cup of chilled buttermilk
  • 1 tsp salt (in case of unsalted butter)


The Make:


Preparation Time: 10 minutes | Resting time: 10 minutes + 10 minutes (optional) | Baking time: 15-20 minutes | Makes 9 biscuits of 7" in diameter each


I did not use a food processor or the kind, just my good ol' hands. So I am unsure if your queries revolve around how to make this recipe using a food processor or a Kitchen Aid or the kind. I am sure the below instructions would serve well for both methods although I cannot be completely sure. So do let me know if you are using any processor to make these biscuits.


1. Preheat your oven to 200°C.

2. In a large mixing bowl, add the flour, baking soda, baking powder and salt and sift well.
3. Next add 6 tbsp of the cold butter to the flour mixture and mix in until it appears like a coarse meal. Place the flour-butter mixture back into the refrigerator. This will help create those lovely flaky layers of the biscuit. Let it stay refrigerated for at least 10 minutes. If you have left it in longer, it does not matter and will not affect the biscuit in anyway negatively.
4. Next add the cold buttermilk bit-by-bit into the flour-butter mixture until just combined. You will have a sticky, clumpy mixture and not a smooth dough. You will be left with at least 2-3 tbsp of buttermilk which you can use to brush on top of the prepared dough circles. Refrigerate the dough for 10 minutes if you find that your butter has melted.
5. Take the dough onto a floured surface and pat gently to about 1/2" thick. Fold the dough and repeat the process. Do this at least 5 times. Then gently pat the dough down to 1" thick.
6. Using a round cutter, cut out at least 8-9 circles and place them on a buttered baking tray about 1" apart to get a crusty top and bottom. Brush the top of the biscuits with the remaining buttermilk.
7. Bake at 180°C for about 10 minutes. Brush the top and bottom of the biscuits with the remaining butter and continue baking for at least 5 minutes when a golden brown colour is achieved. If you are planning to use the biscuits with a sweet filling, you could sprinkle some sugar on top.

Your biscuits are ready to be eaten straight out of the oven. So hope you have your sides or fillings and your family/guests ready to gobble these flavoursome delights right away.


Today's Foodie Extravaganza day is celebrating the Buttermilk Biscuit. Kathleen, from Fearlessly Creative Mammas is the host this month, and to celebrate her southern roots, she picked Buttermilk Biscuits as the theme. 
May 14th is actually Buttermilk Biscuit day, but we get to pick from any of the foods in the specific month, so Buttermilk Biscuits it is. We pick our foods from the website The Nibble
Posting day is always the first Wednesday of each month. If you are a blogger and would like to join our group and blog along with us, come join our Facebook page Foodie Extravaganza

We would love to have you! If you're a spectator looking for delicious tid-bits check out our Foodie Extravaganza Pinterest Board! Looking for our previous parties? Check them out HERE


Wednesday, 20 November 2013

Spanish Omelette [Tortilla de patatas con cebolla (with onion)] - Hubby's Special!!


It was the morning of our fourth wedding anniversary and hubbykins decided to chef the morning breakfast with a surprise make. I saw some sausages defrosting and potatoes coming out of the tray and was wondering what we were going to have...hmmm!

We had some of these wonderful Spanish omelettes at a live counter at the hotel where we stayed for our honeymoon and once after. Of course this one was made after Anup reviewed a couple of recipes and finally decided that this was the one he would make. I definitely enjoyed it to the very last bite.

There are several versions of Spanish omelettes that you would find. Some are made with chorizo toppings and vegans would probably find thinly sliced mushrooms as an option.


What a truly pampered way to start our special day...I cannot believe that it has be four awesome years together. Time sure flies...


Remember while making these omelettes, that the success factor depends on how thinly sliced the vegetables or chorizo are and incorporated into the omelettes. Another success factor relies on the tossing of the omelette.

You need:
  • 4 large eggs
  • 4 chorizo sausages/other sausages, finely diced * see notes for substitutes
  • 1 large potato or 2 medium potatoes, grated or chopped finely
  • 1 large onion, purple or white, finely diced * see notes for preferred
  • Oil as required
  • 1 sprig parsley, finely diced
  • Salt to taste
  • Smoked paprika or pepper to taste


The Make:
Preparation Time: 10-15 minutes | Cooking Time: 15 minutes | Serves 2 adults

1. Heat about 1 tbsp of oil in a non-stick pan and saute the chorizo sausages until lightly brown. Set aside.
2. Next 1 tbsp oil and toss in the onions and grated potatoes on medium low heat. Allow the potatoes to cook through for at least 10 minutes taking care not to burn. Once cooked, strain the potatoes and onions in a large colander allowing the excess oil to drain off.
3. Next whisk the eggs well and toss in the parsley, seasoning/condiments, the potatoes and onions.
4. Heat some of the drained oil in a pan checking if there is enough to grease the corners of the pan and add the whisked ingredients evenly.
5. Turn the heat to medium and allow the egg to cook for a minute. Top with the chorizo slices and cover and cook until the egg base seems set.


6. Tuck the spatula around the pan to ensure that any loose egg would run to the bottom and get cooked. Allow  to cook for a half a minute on low flame.
7. Next loosen the bottom using the spatula and using a plate toss the egg onto the plate and slide the egg onto the pan again to cook the other side for another minute to two minutes.


8. Repeat step 7 a few more times allowing to cook briefly on each side before flipping over. Ensure to press the sides each time using the spatula to keep the shape intact.

Serve with your favourite flatbread or baguette. Bon Appetit!


Notes*:
1. Veg option: Finely diced mushrooms (of your choice)
2. White onion is preferred owing to the flavour variance

Saturday, 28 September 2013

Kumble (Kumbul/Kumbil) Appam (Jackfruit wrap)


This recipe has been waiting to get posted since last year. Kumble leaves or a cousin version of the all-familiar Bay Leaf is used to make this wrap. It looks exactly like the bay leaf except bigger. The bark of the kumble tree does not get used commonly unlike the bay leaf tree whose bark  produces a milder variety of cinnamon. Kumble is pronounced as Kumbul or Kumbil not Kumbley as one would be tempted to especially the Cricket fans out there! :D


There are several versions to this wrap. I am posting the one that was made two holiday breaks ago (last September) at my parent's home in Kerala. Valsamma our maid/cook was behind this creation based on my mum's recipe. The recipe is fairly simple however it was being made for a large number of people which can be quite cumbersome.You can make it for a smaller number of people by equally reducing the quantities. The cooking time would also considerably reduce. It takes 20-30 minutes to make about 8-10 wraps.

The flavour of these leaves would go into the appams during the steaming process which is absolutely divine!


You need 
  • 20-30 nos. Kumbul leaves/ large bay leaves, cleaned and dried (You can even use banana leaves in case you do not get the Kumbul leaves)
  • 1 kg Jackfruit, diced (this is the actual weight of the jackfruit not after deseeding)  
  • 1 kg Rice flour 
  • 1 tbsp cumin (jeera) powder 
  • 1 tbsp cardamom powder 
  • Jaggery to taste and colour (I prefer the darker coloured kumble appam and it taste better too. 500 gms for 1 kg rice flour) / you can substitute with sugar but it just won't be as good  or healthy as jaggery :)
  • Water as required
  • Grated coconut (optional)


 The Make 

 Makes 20-30 wraps | Preparation Time: 15 minutes | Cooking Time: 60 minutes

1. Cook the jackfruit on low heat with jaggery, cardamom and jeera. If you have a slow cooker, this would work well. In our case, it was done at the fire place. This takes at least 30-40 minutes.

The jackfruit should soften and the resultant mix should be nice and pasty. Most of the water content should be gone, with just enough moisture and water content for the next step.


2. Once the mixture is cooled to room temperature, add the rice flour bit by bit and mix well. If the water content is insufficient, add a tad bit of water to help the mixture to be moulded together.

3. Next take about a golf ball sized dough and place the dough on end of the one of the leaves. Fold the other end tightly over the dough and use the remaining part of the same leaf to tuck into the dough as a pocket top. Repeat this for the remaining dough.


This version had lesser jaggery and some coconut as well

4. While doing the above process, heat water in the steamer or idli vessel and place the porous plate over it. Once the wraps are complete, place it in the steamer and cook each batch for at least 20-30 minutes. It would be helpful to have at least two steamers working in parallel for such a large batch.


Serve hot or cold as a snack or even as a breakfast meal. Bon Appetit!


Thursday, 28 February 2013

Puliogare Upma with Veggies (Tamarind Semolina with Veggies)

Puliogare powder is a tamarind based powder which is a creation of Chennai, Tamil Nadu of India. It is normally used with rice but as I mentioned in my previous post, it is becoming increasingly challenging to come up with new vegetarian recipes. Also, since I made this Puliogare powder more than a couple of weeks ago, I thought of putting it to good use.

Also this time, since I did not have much time in the morning and also because I was expecting a week long of eating what I cooked by myself, I made this version of Upma with the veggies I made the previous evening.

Puliogare Upma


You need:

For the Puliogare powder
  • 1 sprig Curry leaves, dry roasted and powdered
  • 1 tbsp Sesame seeds, roasted and powdered
  • 1 tbsp Tamarind paste or concentrate of 1 small lime ball sized tamarind
  • 5-6 tbsp Red chilli powder
  • 1 tbsp Jaggery, grated
  • 1 tbsp Black Pepper powder
  • 1/2 tsp Fenugreek powder
  • 1/2 tsp Turmeric powder
  • 1 tsp chick peas, dry roasted and powdered
  • 1 tsp Blackgram, dry roasted and powdered
  • 1 tsp Musturd seeds, dry roasted and powdered
  • 1/4 cup roasted Peanuts (*Optional but tastes better)
  • 2 tbsp Desiccated coconut, dry roasted and powdered
  • 1 tbsp Coriander powder
  • Vegetable or refined coconut oil
  • 1/2 tsp Asafoetida Powder
  • Cumin Powder
  • 1/2 tsp Sugar
  • 1/2 tsp Salt
For the Upma
  • 1 cup roasted Semolina
  • 4 tbsp of cooked vegetable of your choice (mine had sauteed lady's finger and onions)
  • 1 large onion, chopped (*Optional in case your cooked vegetable does not contain onions)
  • Salt to taste
  • 2 tbsp vegetable oil
  • 2-3 cups of water
  • 1 sprig of cilantro/coriander leaves, chopped finely (*Optional but advised)
The make:
    For the Puliogare:

    Preparation Time: 10-15 minutes | Makes about 150-200 gms

    Once all the ingredients that require roasting are dry roasted and powdered, its as simple as tossing all the ingredients in a large bowl, except the oil. Then add the warmed oil to preserve the powder in an airtight container for a month in a cool, dry place.


    For the Puliogare Upma

    Cooking Time: 10-15 minutes | Preparation Time: 10 minutes | Serves 2 adults

    1. Heat the oil in a wok or a deep bottomed non-stick skillet and add the Puliogare powder and cook on medium low for a minute.
      2. Add the onions (*optional) followed by the veg mix. Mix and leave to heat for a minute.
        3. Add the water and when it comes to a boil, do a seasoning taste and see if more salt is required.
          4. Next add the roasted semolina, a spoon at a time and keep stirring to avoid lumps as it absorbs the water.
            5. Once it absorbs the water, it will start to rise and start to cook. If it dries out too much, add more water. Lower the flame and allow it to cook for 2 minutes whilst continuing to stir as it may stick to the pan.
              6. Garnish with cilantro leaves and serve hot as is or with your favourite chutney or pickle.
              Puliogare Upma served up!

              Bon Appetit!


              Monday, 25 February 2013

              Spicy Lamb Sausage with Cucumber and Tomato Salsa

              This recipe is inspired by Masterchef Australia's Poh Ling Yeow. This amazing treat from Poh makes for an excellent breakfast meal. I used the remaining mix to make a new treat which I will share with you once G'Gina's Kitchenette's Theme Breakfast week completes.


              You need:

              For the sausage:


              • 2 tablespoons toasted fennel seeds
              • 2 tablespoons toasted coriander seeds
              • 500g lamb or beef mince
              • 500g pork mince * for those that do not use pork, you can also make this only with lamb mince or include chicken mince
              • 1 teaspoon salt
              • ¼ teaspoon sugar
              • 2 - 3 cloves garlic cloves, chopped
              • 1 ½ tablespoons smoked paprika
              • ½ cup chopped coriander leaves, reserve the stalks
              • ½ cup chopped fresh basil
              • 1 tablespoon dried red chilli flakes
              • 1 teaspoon coarse ground black pepper
              • 3 - 4 tablespoons red wine vinegar
              • Eggs - 4 to 6

              For the Salad

              • 1 large ripened tomato, diced
              •  1 large cucumber, sliced or diced
              • 1 tablespoons chopped mint
              • 1 tablespoons finely chopped coriander stalks
              • 1 tablespoons chopped parsley
              • 1 tablespoons olive oil
              • 1 tablespoons fresh lemon juice
              • Salt and Pepper to taste
              Tip: Make sure all the leaves/herbs are finely diced as they would break the doughnut mince or would be difficult to mould. Also make sure that once the leaves and herbs are washed and cleaned, that they are well-dried as well to make the perfect rounded doughnut mince.


              The make

              Serves 4 to 6 adults | Preparation time: 5-6 minutes | Cooking Time: 15 minutes
              Source: Poh's Kitchen (http://www.abc.net.au/tv/pohskitchen/stories/s3322745.htm )

              Spicy Lamb Sausage
              1. Toast fennel and coriander seeds until fragrant and smokey (do not burn). This takes about a minute. Grind the toasted ingredients to a fine powder.

              2.This is an important step. Combine all the ingredients and hand mix for about 5 minutes.  In mixing the ingredients, you can even throw mixture at high speeds towards the bowl, but make sure you do not miss! Tip: Make sure that your cleaned and rinsed mince is free of any water content.

              This process of massaging the mince will bind the ingredients together in the absence of a binding agent such as egg. It will also develop the proteins, an important, handy technique for sausage making. The result would be a really sticky mince mixture. At this point you may choose to shape the mince into hand shaped sausages, a kabab sphere shape or a doughnut shape. Poh suggests if you are having some trouble handling the stickiness, wet your hands a little. She is right!


              3. Place the doughnut meat on a medium hot, lightly greased skillet.


              4. Brown one side and then flip it on the other side.


              5. Next, immediately crack an egg into the center of the doughnut. Cook completely and serve with  toasted bread of your choice and fresh tomato and cucumber salad.


              This quantity makes about 10 burger patties, 20 sausages and about 12 doughnuts. In case you have any leftover mince, shape to preferred size and shape and freeze in an airtight container with plastic sheets separators between the mince shapes.

              Salad
              Combine all ingredients and toss lightly. Serve on the side of the Spicy Lamb Sausage.


              Bon Appetit!

              Sunday, 24 February 2013

              Banana French Toast with Cinnamon

              I had requested my readers on G'Gina's Kitchenette's Facebook page to suggest what recipes they would like to view this week. By popular demand through FB messages, inbox message and others they have chosen Breakfast recipes. Thank you my valuable readers. I agree, as possibly the most challenging meal of the day would be the 'King of the Day' which is Breakfast. As you may know for health reasons and to be fit, Breakfast is normally treated as the King meal, Lunch the Prince and Dinner that of a Pauper. Also as you wake up from bed, it becomes so difficult to think of /create a King meal, simply because you are so busy running around getting ready for work or getting the family ready for work or school/college. I dedicate this week of Breakfast recipes to those hard working moms and dads responsible for plating up the most important meal of the day. To get to the next voting cycle, I would suggest you visit my facebook page on https://www.facebook.com/gginaflavorspalatte?ref=hl and hit 'Like' so you do not miss on the next choice of recipes.

              Banana French Toast with Cinnamon is a recipe I came up with during this Lenten season when we follow a strictly vegetarian diet. Yes that means no eggs, no meat or fish until Easter. I was inspired this year to make a sacrifice for a very meaningful purpose for my family (including my extended families) and me. Here's hoping to greater months and years to come. The recipe I followed requires no eggs, however if you would like to include more protein in your diet, I would suggest you could add eggs whites to your recipe. I will make suggestions below in the ingredients list.

              Banana French Toast with Cinnamon

              You need:

              • 10 slices of wholewheat or multigrains bread
              • 1/2 cup milk of your choice
              • 6-8 plantains or 3-4 bananas mashed
              • 4 egg whites (*Optional - if you are using egg whites, then you could use 4-6 plantains or 2-3 bananas)
              • 2-3 tbsp honey or 1-2 tbsp sugar(powdered or granulated)
              • 1" stick of cinnamon powdered
              • 1 tbsp butter or 1-2 tbsp of cooking oil
              • 2-3 plantains or 1-2 bananas for topping (*Optional. You can also top with any other fruit of your choice)
              • Maple Syrup, Honey or Cream for topping (*Optional)


              The make:
              Serves 3 adults | Preparation Time: 10 minutes | Cooking Time: 20 minutes (depends on your pan size or type)

              1. Heat a non-stick pan and in the meantime add the mashed plantains, milk, honey, powdered cinnamon in a large bowl and whisk on high.

              Whisked Ingredients

              2. Add the butter/oil on the pan and allow the butter/oil to just melt or heat and not brown or over heat. Spread to butter/oil cover the pan on all sides.

              3. Dip the bread slices on-by-one into the batter and place on the pan on medium-low heat. Cover the pan if required.
              Tip: Remember not to overcrowd the pan as you need to flip it on the other side as well. Also do not over dip the bread slice in the batter as it may break in the batter or pan.

              4. Allow to cook for 2 minutes on each side or until golden brown. Repeat until all the bread slices are used.

              5. Top with fruit of your choice and maple syrup, honey or cream if required.

              Additional Tip: For fitness freaks or those who simply do not want to use any butter or oil base, you can also bake the bread slices on butter paper for 4-5 minutes on each side in the oven.

              Topped wiith fruit of your choice

              Bon Appetit! Wish all of you who are celebrating Easter, a peaceful, meaningful and blessed Lenten season.


              Tuesday, 4 September 2012

              Injera (Ethiopian Pancakes)

              Whilst chapatis and dosas are common flatbread and pancakes of India, Injera is staple of pancakes in Ethiopia. Its texture is comparable to French crepes or Indian dosas. 'A' 's formative years were spent in Ethiopia when his parents worked there in their younger years. Lucky for me, as I have now begun to explore a cuisine which I never would have earlier on had I not known of it from A and my mom-in-law.

              Injera is made of teff flour and is a yeast-risen flatbread with a slightly spongy texture. Teff is a unique grain which is iron-rich in nature. Teff flour is normally mixed with water and is allowed to ferment for days which is then used as a sourdough starter. The sourdough is stored for long periods and is subsequently used in batches of Injera batter to follow. The mildly sour flavour thus follows. Traditionally the batter for Injera is spread over a large clay plate. The batter has to be sufficiently liquid as that of a crepe to spread into a large circle. The bottom of the Injera would be smooth whilst the top would be porous in texture. The porous nature allows the Injera to scoop up stews, sauces and the like. I made the Injera with a Yefesoleya Wot (Ethiopian French beans Stew).
              Injera with Yefesoleya Wot

              I looked all over Hyderabad and did not find the Teff flour. 'A' checked with some of our Ethiopian church go-ers and they confirm that Teff was unavailable in Hyderabad and they are very  much adjusted to our chapatis and dosas now. They have promised to try and get me a batch of Teff flour in case someone known arrives from Ethiopia:). Reading online I read that some of the common variants to Teff flour is ground millet or ground Bajra. So I went with that.

              You need:

              • 700 gms of millet flour or bajra flour
              • 1 packet of yeast (2 tsp)
              • 6 cups of boiled/cooled water

              The make:

              Cooking Time: 20 minutes | Preparation Time: 30 minutes | Makes 8-10 large injera

              • In a large deep bottomed pot/skillet, take 3-6 cups of the water and add the millet flour. Mix well by hand. Tip: Add 2-3 cups of water at first and the flour and slowly add more water as required till a sufficiently liquid batter is formed. Do not make it too watery.

              The batter
              • Next add the yeast and mix well. Cover and allow the batter to rise up which takes a minimum of 10-20 minutes.
              • Preheat a large pancake pan to 425°F. I used an iron one I had from Mum's kitchen. 
              Ladle in Injera batter
              • Take a deep curved ladle or a cup with at least 3/4 cup of the batter and pour it into the center of the pan and spread the batter with the ladle working your way in clockwise fashion. If using a cup you can pour from the outer circle and work your way in clockwise fashion to the center.
              Injera batter spread on a heated pancake pan

              • Allow it to cook for 3-4 minutes and then transfer to a clean cloth. Continue the same way until the batter is completely used. Alternatively, you can also reserve a portion of the batter and refrigerate to use as a starter for your next injera batter mix. You can serve this with a stew of your choice. I served it with  Yefesoleya Wot (Ethiopian French beans Stew).
              Injera served with Yefesoleya Wot
              • Serve warm. Cover and store in a cool, dry place for later meals. Refrigerated, the injera can also last 2-3 days.
              Bon Appetit!


              Monday, 18 June 2012

              Baked French Toast with Pumpkin and Fenugreek leaves

              In an attempt to maintain Breakfast as the most healthiest meal of the day, this dish was whipped up for breakfast this morning. Fenugreek as I have mentioned in many of my posts has several health benefits, some of which I have mentioned in the Health Tips blog section. You can use any fruit you like. Pumpkin is an excellent source of protein and it is important to load on more protein vs. carbs for breakfast. I used wholewheat brown bread. You can also substitute with multigrain bread. Alternatively, you can also top with walnuts, raisins or almonds. 

              There is no rocket science to making French toast so I was thinking twice on whether I should post such a simple recipe. This was the first time I attempted to bake French Toast Vs.fry it on a pan with butter as base. I must admit it was not easy initially as I tried to place the dipped bread on tin foil with butter base but it stuck on and was not possible to flip over. I had to manually take it off the foil and/or flip over with the foil on. I then remembered of a similar situation I had with making bread in the oven. I placed the next batch straight on the baking tray that came with the oven and lightly dabbed some EVOO before placing it on the tray.

              French Toast with Pumpkin and Fenugreek leaves


              You need:

              • 4 egg whites or 2 full eggs
              • 6 slices of wholewheat brown bread or multigrain brown bread
              • 1/2 cup milk
              • 3-4 tbsp of wild honey *we got some on A's visit to Munnar
              • Drizzle(s) of EVOO (Extravegine Olive oil)
              • Powdered Cinnamon - 1" stick
              • 1 sprig of Fenugreek leaves - diced finely
              • 1 cup of ripened or half-ripened Pumpkin diced small
              • 1/2 cup grated cheese (optional)


              The make:

              Cooking Time:15 minutes|Preparation Time: 10 minutes|Serves 2


              1. Whisk the eggs whites until nice and fluffy in a bowl. Try and use a hand whisk with thin metal wires.


              Whisked ingredients


               2. Add honey,milk, fenugreek leaves and powdered cinnamon. Beat well.
               3. Next add the diced pumpkin and whisk well.
               4. You can refrigerate this blend overnight or make a fresh just before baking.
               5.  Pour the contents into a wider bowl/deep bottomed  wide plate.


              Contents poured into a wider bowl for dipping


              6. Prepare the baking tray by brushing some EVOO on the surface.
              7. Dip the bread one at a time and place it carefully on the baking tray. Take care not to over soak the bread and cause breaking.
              8.  Do this for each of the bread slices. Do not crowd the baking tray. Make it in batches if required.
              9. Heat the oven on high for 5 minutes and then lower the flame to medium.
              10. Place the tray on the lower level. It takes about 4-5 minutes for the first batch on each side and about 2-3 minutes for the 2nd batch in each side.
              11. Serve as it is or with an extra dash of powdered cinnamon or sugar-free powdered sugar or toasted walnuts or almonds or extra fruits like chopped strawberries or blue berries. You can also add grated cheese on top. Kids would love it with grated cheese. (For the melted effect, you could add the cheese 1/2 a minute before taking it out of the oven)


              Ready to Eat!


              This was what was for breakfast folks! Enjoy your healthy and savoury breakfast! Bon Appetit...